EP 028 CNC, GRBL and Arduino with DIYMachining
A Conversation about GRBL, CNC and Arduino:
Michael:
Welcome, everybody. I am excited to have Tim from diymachining.com. Tim, thanks so much for joining me today.
Tim:
Yes. Happy to be here.
Michael:
Tim is into CNC stuff. And I’m sure everybody listening to the show right now has at least heard of CNC generally. I am super interested in the topic just because I tend to get excited about all types of cool things, where you can make stuff and build stuff. Plus if you’ve been on YouTube for any amount of time, you’ve seen one of those absolutely crazy CNC machines that make the most amazing stuff. You watch these videos and they just blow you away. I also had the joy of visiting a friend who had this really awesome lab, like a fab lab kind of thing.
And he used a CNC machine to make some little toys for my kids, which was really cool. It was a little gift I was able to bring them home on the airplane. I was like, “Oh, this is so cool.” So, I really like CNC stuff. And so, I reached out to Tim, he graciously said he’d be on the show to just, “I would just want to talk about CNC from the perspective of pretend I’m your buddy and we’re hanging out and I’m like, ‘Hey man, I heard you’re into CNC stuff.'” But I’m actually really interested. I’m hardcore interested.
And I want you to walk me through the whole… I don’t know. Just walk me step-by-step like I’m a little baby bird and you got to feed me each little step and then I’ll probably have a lot of ignorant questions because I’m just not that versed in some of the jargon. And I know everybody listening to this show, everybody’s really into Arduino or at least interested in Arduino and stuff.
And Arduino might not be the center of our conversation? I don’t think it will but I’m just interested to see where it comes in because between those one of those tools that can be used in so many different applications, I feel like CNC is one of them. All right. Som I’ve just talked a ton here. So, Tim, I mean, I don’t know. You can start wherever you think might be cool.
Tim:
Okay. Great. Well, I think let’s start with how I got into CNC machining and where I picked up the bag for manufacturing and making in general. So, I’m classically trained I guess you could say as an engineer. And so, when I was in college, there was always an elective that I wanted to take and it wasn’t elective to learn how to run CNC machines. And just through happenstance and the course loads, it was an elective and the timing just didn’t line up. So, it was something that I was never able to do in my coursework.
And so, after I graduated from college and started working professionally in the engineering field, I decided that, “You know what? I have to learn how to do this because I would draw parts during the day and then I would have them quoted by machine shops and they would come back and they’d say, ‘Oh, you want to change this or it can be manufacturable.'” So, things like that. And so, at one point I just decided, “Okay. The best way to learn this is to build a CNC machine to really understand what this takes.” And so-
Michael:
Yeah. That’s definitely one route. Hey, I’ll just build my own seats.
Tim:
And this was back in 2014, 2015. And Arduinos were becoming ubiquitous and there was a company and on the east coast of the U.S. here that developed and built a shield for the Arduino that was specifically made for CNC machines. So, basically, it’s a shield that drops onto the Arduino Uno, just like many of the other shields that are available out there. And it has three axes or separate drivers that you can connect some separate motors to.
And so, I thought, “Well, I’ve never seen anybody take this Arduino Uno with this stepper shield and create a CNC mill out of a Harbor Freight mechanical mill.” And so, that’s what I did. I basically, I bought a little X2 manual milling machine from Harbor Freight and I installed stepper motors. And there’s actually a kit that you can buy that does all the mechanical integration. But what I was left with is okay, how do I do the electrical side?
And so, I thought, “Well, this is a perfect opportunity to try this Arduino Uno with the CNC shield.” And so, that’s what I did. And it’s worked great. I’ve had it since 2015 and I’ve run I don’t know how many different parts on this machine. But I’ve never had any issue with the Arduino side of things. It’s been really just a lot of fun to use and learn how to create parts or CNC manufacturing and then actually build the parts, so.
Michael:
Oh, wow. That is really cool. All right. So, and just anybody listing, Harbor Freight is the cheapest place to buy tools in the world or it seems like at least in the U.S. It’s like you can buy straight off the ship from China kind of tools. You know what I mean?
Tim:
Right.
Michael:
Yeah. That’s cool. So, all right. And now, this again, I’m really ignorant here. So, when you say a mechanical CNC, I’m not sure I even know what you mean exactly.
Tim:
Right. So, the mills that you can buy from Harbor Freight, they’re just a handprint. And so, they have little wheels on the end with a handle. And to run the milling machine, you would just actually physically turn the crank to move the X and the line of Z axis of the machine. And so-
Michael:
Oh, no kidding. All right.
Tim:
Exactly. And so, I ripped off those handles and where those handles would normally attach, I would install separate motors.
Michael:
Don’t need this things. Got some [inaudible 00:06:01].
Tim:
Yeah. I don’t need those things. I want to make a robot to build something. That was my dream.
Michael:
That is cool.
Tim:
I wouldn’t be able to do this because I am not very well-versed in the software side of things as being trained in all things mechanical, I had a firm grasp on how I would be able to do that. And so, I think having some familiarity with the Arduino and the Arduino IDE, specifically the UNO, I thought, “Okay.” That gave me the confidence to say, “I can take this software that’s been developed by this open-source community. And it’s a software called Grbl or Grbl, G-R-B-L that’s set different ways.
I don’t even know the exact pronunciation because I’ve heard it said so many different ways. And essentially, it’s just a piece of software that you load to the Arduino and you load it once through the Arduino IDE and you’re done. And so, that’s really the extent. So, folks are wondering, “Okay. Is this going to take a lot of programming experience to set this up?” It’s if you can load the blink sketch, you can load the Grbl sketch to run this CNC machines.
Michael:
All right. Hey, I can handle that.
Tim:
Yeah. I know. Exactly. That’s what I thought.
Michael:
That’s nice. Som it’s like an Arduino library, you load it up and that’s it. And you said it works with an Uno. All of that fits onto an Uno?
Tim:
It does. And it uses up almost all of the flash memory on the Ono. And so, there’s no room for anything else. And what’s interesting a way this is set up. So, there’s a bit of a process or workflow to get the design and the information out of the digital world into the CNC machines that seam CNC machine connection build apart. And so, at the heart of that is the Arduino Uno and this CNC shield or G Shield that I use. And so, that’s all the software that’s loaded on the Arduino. It’s probably more like firmware because you don’t really interact with it.
But that takes all of the G-code commands. And that’s the G-code commands are nothing more than a bunch of text commands. So, it says in G01 is a command to go to a certain position then you’d have an X aligned Z value. And it’s basically a coordinate system that tells the machine to go to that position in space and reading space. So, you have a file, you create a file of this G-code and you send that from a laptop or some other PC that’s connected over the USB to the Arduino Uno and feed that G-code into the Arduino Uno. And it does all of the machine control and interpretation and drives a step or drivers that then tell the separate motors how much to move and read the part.
Michael:
Oh, wow. That’s amazing. Okay. So, you’ve got a laptop running, I assume your laptop. And this is where I was like, again, there’s just a lot of missing parts for me in the whole process here. But so, the laptop I imagine is running some type of software that is producing the G codes for you, right? It’s not like you’re coming up with G codes or something or do you have to come up with G codes or how does that work?
Tim:
So, that’s a great question. Then, let me back up a little bit and start with, so, they’re on the laptop. And I’m just running an old netbook. So, it doesn’t have to be a very powerful computer. It sits in my garage. So, I don’t want something that’s pristine that I can’t get dusty or dirty.
Michael:
Right. All right.
Tim:
So, it’s an old netbook and it runs, I use a software called Universal Gcode Sender. And it basically reads a text file that’s saved on your PC or laptop and then pushes those Gcode lines one line at a time over to the Arduino, a little bit over the USB port. And so, that’s all of the work that happens in the garage right next to the mill. The CNC machine is from that laptop PC in the Arduino.
To get that Gcode, there’s a whole other can of worms that can be pretty intimidating or the learning curve to get up to speed on how to do all of the piece that happens when you have a design or an idea that you want to create. The first step is to take that and develop that idea and create a solid model, which is going to happen in some kind of CAD package. I typically use Fusion 360, which is an Autodesk product. I don’t make any money from them. So, I’ve enjoyed it because there’s a free version. What’s neat about Fusion 360 is it also has the cam side.
So, the app you have, the 3D model created, you move over into this Tam workspace, which is computerated manufacturing, where you generate all the tool paths that are required to then create the Gcode one line at a time so that the machine then knows how to cut apart. So, there’s a lot of steps involved in actually going from an idea that is unique to a finished part. And so, it can be intimidating from the whole entire workflow perspective. But it’s definitely I think it’s a worthwhile endeavor for somebody that’s really interested in making their own parts.
Michael:
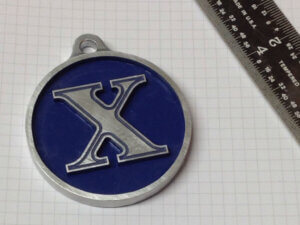
Right. Well, I mean, so, I was checking out diymachining.com. And that coin you made, that X coin was so awesome. And that’s that you made there with the machine you’re talking about right now.
Tim:
I did. Yeah. Everything on that website I made with the little CNC machine that I have in my garage.
Michael:
Yeah. That blows me away because I was just impressed with the precision there. I mean, I guess some people might be thinking, “Oh, you’re making a DIY CNC machine. How precise is it going to be?” Blah, blah, blah. Maybe that’s what their expectations are. But go check out this coin because it’s like, well, that’s pretty sweet. Now, you did some… And now, people just need to go check this out on the website. It’s under some of the projects. But so, it’s like a coin.
Imagine you had a big coin, like a big silver dollar thick Warner and then imagine an X in the middle of it that’s like set above and but you did this cool beveling on the X so that when you painted it and then you scrubbed off the stuff, it was like there was pain in there and it looks awesome everybody. I know it’s like a podcast and everything but check it out. So, I mean, that’s to me really impressive that you were able to like pull that off with that machine.
And let me just recap this workflow so far just so I’m on board here. So, basically you got some idea in your head, you’re using some CAD software, computer aided design software like Fusion 360 or I don’t know if you’ve heard of Tinker CAD. Tinker CAD, that one’s a free one too. And so, you’re using that, you’re designing something but then you need to take it from that to a computer-aided-
Tim:
Manufacturing.
Michael:
Manufacturing CAM. Okay. All right. So, and then is the CAM like a software that just runs behind the scenes for you or do you have to tell it certain things in that CAM part? I’m curious about that.
Tim:
Yeah. That’s again, it’s a deep rabbit hole to go down. And so, depending on how complicated your part is, the CAM side of the design can be fairly complicated. And if it’s a simple part, like the X, the coin, it was basically just a bunch of 2D type of operations. So, I wasn’t doing any surfacing. I wasn’t trying to make a sphere out of the top of a coin or a flat plate. So, yeah. You have to go through and you have to understand, this is where the challenge is.
You almost have to understand how are you going to build the part so that you can tell the computer, “Okay. I want the tool which is going to be say a quarter inch end mill that I’m going to install my machine. I want it to profile the outside of that coin.” So, you click on a certain edge or the surface that is the perimeter of that coin. And you say, “Oh, I want to do a 2D contour for example.” And it’ll say, “Okay. What tool do you want?”
Well, you have to know that you are going to use a quarter inch end mill because what it’ll do is it’ll recognize the perimeter of that coin but then it will offset the diameter or the radius of that tool from the edge because the Gcode is actually set at the center point of a tool. So, when the program and software generates the Gcode, that’s how it interprets all of those different variables to create the Gcode that we’ll run on the machine.
Michael:
Okay. So, that makes sense. So, it’s like you have to build your parts in that CAM tool. The cam tool needs to know your… I’m sorry. I’m not parsed. But your implements or your… Whatever the-
Tim:
[inaudible 00:14:47].
Michael:
Yeah. Okay. And an end mill, just again, my ignorance is shining here but an end mill, it’s like something that looks like a drill bit but it would go around something, right? It would apply a horizontal pressure to something, I guess. Is that-
Tim:
Right. It is. Yeah. An end mill, it looks like a drill bit but it is designed to cut radially instead of axially.
Michael:
Oh, okay. Got you. All right. So, I’m thinking through this process and I’m like, “Man, that does take a little work, doesn’t it?” To and I imagine this just comes with practice and that’s what you’ve been doing and…
Tim:
Exactly. Yeah. I’m all self-taught on the CAM side of things. And I did have a leg up because of my background in chemical engineering. We did take courses in CAD software in college. And so, I recognize that I have an advantage there. And so, for people that don’t have that experience, that’s yet another piece of this tool chain that they need to learn.
Michael:
Right. Yeah. And I imagine, for somebody listening who does want to get into it, I imagine, I mean, I’m sure people can get through it. You know what I mean? I’m sure there’s lots of-
Tim:
Right.
Michael:
Resources out there to work through it but it’s not like it’s going to be 1, 2, 3, easy go. It’s going to take some real work. That’s worth anything worth doing. I feel like. Okay. So, you start with the CAD, you got an idea. You go to the CAD, you go to the CAM, assuming that you can pull that off, that software is then going to generate a file, which is essentially, it sounds a lot like it, I mean, is it literally like a text file type thing, or?
Tim:
It is literally a text file that has a bunch of they’re called G codes. And it’s just a bunch of different codes that say, “Okay. Some of them are telling the machine to turn on the spindle or the main header of the machine to a given RPM.” Some of them are directional commands that tell the different axes of the machine, where to move, how far to move and how fast to move.
Michael:
Okay. And so, that instruction set is what’s going to direct this machine to do its work, you take that file, take it over to your laptop and then your laptop has another program on it. And you said it was like a G Sender or something like that.
Tim:
Exactly. Yeah. It’s called Universal Gcode Sender. And it does exactly what the name implies. It just reads that text file one line at a time and just sends that single line of Gcode over to the Arduino.
Michael:
Awesome. Okay. So, then the Arduino is just sitting there. And you said it’s connected like USB cable to the computer, right?
Tim:
Exactly.
Michael:
Okay. And so, it’s just reading in one line at a time, it’s executing that Gcode and then, “Hey, I’m done with that. I’m getting the next one or however it pulls those codes in and then just executes one at a time.”
Tim:
That’s exactly right.
Michael:
Wow. Okay. So, that is really pretty fantastic. So, you have to know at some point then like let’s say you needed more than one tool like that coin, for example, you said you needed four different… I’m sorry. I don’t know the name of those things.
Tim:
End mills.
Michael:
What are they called?
Tim:
End mills.
Michael:
End mills. Okay. You needed four different end mills for that. Does it give you a prompt like, “Hey time…” Or just go to some position so you know, or?
Tim:
Yes. The way that I run my CAM software and the way I generate my Gcode is I create one Gcode file for every tool size. So, every different tool it gets its own Gcode file. And that’s just the way I like to do it. You get fancier software, it will go and it’ll pause and say, “Okay. It’s time for a tool change. You can change out the tool.” I like to just keep it simple. And that way I don’t mess anything up in my workflow. I actually name the files with the tool side usually so I can if I have to go back a month later to build to the part, I don’t have to try to remember what tool is supposed to go with which operation.
Michael:
Yeah. It was a coin 74221 and my name and convention meant that, what?
Tim:
Which [inaudible 00:18:52] was that and did I make any changes [inaudible 00:18:54].
Michael:
Actually, this is a P.
Tim:
Yeah. [inaudible 00:18:58].
Michael:
Okay. So, that makes sense. So, you are loading that Gcode for that one tool, it runs its course and then it’s like, “Oh, hey, next tool.” Now, I mean, I’m imagining then there’s an order to that, right? Does it now generally to CNC grow like I’m assuming here you go from like big, big steps down to smaller steps down to smaller detail type stuff generally or I guess it would all be around but?
Tim:
Yes. Yes. Generally, that’s how it works, right? You start with a big end mill that you can take a heavy cut and do roughing operations and then you’ll come back in with a smaller end mill to do the fine detail work.
Michael:
So, I’m just like, there is such a huge body of knowledge here. I’m just thinking about just CNC in general. I mean, there’s people who are very much trained in this and know all the ins and outs and I’ve seen some awesome mills and people really putting in work and stuff and understanding this craft. And it’s like huge. I’m trying to understand, I mean, how hard is it for example to do something just pick the right end mill for a piece? I wouldn’t. You asked me, I’d be like, “I don’t know. It’s aluminum or it’s this thick or you have to figure that stuff out,” right?
Tim:
You do. And thankfully, there’s YouTube.
Michael:
All right.
Tim:
And so many great people that have put out this body of work, where they went through this process and they did all of their learning and they put it up there for everybody to see. So, people like John Grimsmo or John Saunders, formerly NYC CNC on YouTube. He’s now Saunders Machine Works. And he’s got a great body of work that shows how to do all the different pieces of this tool, workflow all the way from the CAD side, all the way through the Gcode file to the machine and running it. They’re using different software sometimes along the line but the same workflow applies when you’re using this Arduino-based CNC controller.
Michael:
That is cool. So, are you pretty happy with your… Do you have more than one CNC machine or do you got this one and or I’m just curious.
Tim:
So, I have just the CNC mill. It’s a pretty small mill. So, the work envelope is about six inches by four inches by, I don’t know, nine inches tall, something like that. So, that’s really my only CNC that’s a subtractive CNC machine. I do have a 3D printer and actually I got the 3D printer after I had finished my CNC mill. So, I did it in the reverse order. I think most people go 3D printer then CNC milling. I’m glad I did. And I really enjoy the 3D printer. It’s significantly easier from the learning curve perspective.
Michael:
Yeah. Absolutely. I jumped on that 3D printer bandwagon I think a year and a half ago. And it definitely had some… There were still some set up. Do you know what I mean? It wasn’t quite as plug and play as I anticipated. But I felt like once I got the setup right and I was like, “Hey, I can do this.” This isn’t too hateful, so. And I’m glad that people do make designs and stuff because I’m definitely not a CAD person whatsoever.
But somebody on our team is really good with CAD stuff. They’re in the same boat where they’d done CAD in college and they could make designs. And we have Fusion 360, we use that. We have a couple of licenses of it. And I have a hard time rotating apart. You know what I mean? I’m like, “I can’t even…” It’s laughable but it’s just spending the time to learn that stuff, but.
Tim:
Exactly. I liken it to trying to learn another language because that’s really what it is. And so, it’s developing just this entirely almost unique set of way of thinking and communicating and interfacing with the world.
Michael:
Yeah. Absolutely. So, on the website, I saw the coin very impressed. What other stuff have you done that you think would be interesting to somebody who’s listening?
Tim:
So, I think some of the things that I’ve done that I just haven’t posted on the website but that might show up on my Instagram, I’ve been making a lot of growth charts lately. So, my family… And I have a couple of kids and it’s nice to be able to track their growth over the years. And so, I made these giant rulers that are pretty popular. They’re about six and a half feet tall. And they usually have the tick marks. So, I didn’t make the ruler with my CNC machine but I’ve made all the tags.
So, each of the little tags is it’s got their name and their age and then use that same technique where I will run an engraving bit over the top of the part, which cuts a shallow V groove into the park. And then I’ll paint that whole part then and I’ll sand the entire top surface. And that just leaves the paint then in that D group. And so, it really pops the name and the gauge really pop. And so, it’s been a fun annual tradition to tack one of those onto the growth chart and every birthday.
Michael:
That is so cool. Yeah. I mean, we’ve got a board too down in the basement, up against like the laundry band thing and it’s six foot tall and I just use a sharpie marker. And I feel like we do it more than a year. I don’t know. Every three months or something. And kids grow so quick. It’s crazy. I love it. But so, you make a new one for each year then and then is that how you do it? A new name one and then so you’ve got multiple name one’s going in or is it the same name when you just move it up or just?
Tim:
No. It’s multiple. It’s one for every year. So, I actually cheated. I don’t know if I cheated but I made all 18 at one one time. So, I assume, “Okay. I’m just going to make 18 and we’ll go from age one to age 18, assume that they’re going to stop growing at 18, which they may or may not. So, if I have to make more, I will but I’ve got through 18 finished.”
Michael:
Oh, that’s awesome. We’re out of tags. Stop growing.
Tim:
Stop growing.
Michael:
That is so much fun. Yeah. I love those things. You know what I also love is visiting people’s houses if I ever get to see where they have theirs. Because it’s a great thing. That is so cool. What a neat… Now, I honestly can’t say I’ve seen. So, is the ruler made out of wood then?
Tim:
Yeah.
Michael:
Okay. And then these [crosstalk 00:25:08]-
Tim:
The is tag is out of aluminum just with a little bit of an engraving to have the name and the age. And then yeah. Just paint it. Then I’ve got a couple of different colors, the different kiddos so that we can keep them straight.
Michael:
Oh, that’s fun. That is so cool. What do… I mean, that’s a perfect example of like, “Hey, what am I on my own CNC machine?” So, I can make just some stuff that is so cool and so unique to your family. You know what I mean? What a wonderful endeavor. That’s cool.
Tim:
Yeah. And things that you can’t really easily source. It’s not something that’s I’ve even seen it on places. Let’s see. I’ve never seen a tag like that. It’s like, “Okay.” Probably because it takes a lot of work to do it. So, it doesn’t really make sense to just mass produce them.
Michael:
Yeah. Labor of love for sure. That’s cool. That’s neat. I love that idea. So, I’m sure people’s minds are turning. Maybe they’re into Arduino. They’ve probably got like 14 Arduino Unos in their drawer that they’re not using right now? Like, hey, it’d be cool to build a CNC machine. What costs are we talking about? Let’s say if somebody does have access to a Harbor Freight or some kind of lower end, I’m sure you could probably get some really cheap mechanical ones off of eBay or something like that.
But let’s say somebody wanted to just go in at a low cost, which is how I got into 3D printing. I just got a really cheap one because I wasn’t sure like, “Hey, is this going to be something I really…” Because you can… Man, especially with these CNC machines, it is crazy the money you’re putting in. Even for like a mid range one, it’s not… The high end one is like… Yeah.
Tim:
Hundreds of thousands.
Michael:
Yeah. I know. It’s now. It’s now. I mean, they’re pretty sweet, but. So, what are we talking here to just get into this? I’m talking to the whole shebang bang, like everything you just talked about.
Tim:
Right. So, I have on my website, I listed all the expenses that I incurred to build this machine. And so, I think I met right around $1600 all in. And that includes the mini mail from Harbor Freight. That includes the kids of mechanical pieces to adapt the stepper motors. That includes the stepper motors. The least expensive part of this whole thing was the Arduino and the shield that goes on top of the Arduino.
But ironically, I think it’s the most critical piece of this whole thing because without all the open source software that was created by the Arduino community, it wouldn’t be possible because I would never be able to write the software to interpret the Gcode mood machines were given positions. So, I’m really grateful for all the people that contributed to the Grbl or Grbl software.
Michael:
That is cool man. That’s amazing. So, that’s not too bad. $1,600 to get into a really sweet… To have that functionality to build that stuff. And then, obviously, the time you’re going to put in to learn those things. But like you said, YouTube is such a good resource. You could probably figure it out. For sure.
Tim:
And there are options that are lower costs that are turnkey. And so, they’re just not going to be as capable. And they’re smaller between 300 and $500. You can get a machine that you can learn on. And you can learn the entire tool chain and have a lot less invested to your point of learning the 3D printing. Is this something I really want to do?
Michael:
Right. Absolutely. And just to run back again, you said that work envelope of your current machine, what is the size of it? Did you mention?
Tim:
Right. So, it’s about six inches in the X, about three and a half four inches in the Y, about nine in the Z. So, you can think of two of that size.
Michael:
And is that a pretty typical size then? Or is that let’s say somebody who’s looking for CNCs, what’s a normal… Is that a big envelope, a small envelope or is it all relative?
Tim:
That’s definitely on the smaller envelope because I went and purchased basically the smallest mill that Harbor Freight sold. Because I didn’t have a lot of room. That was another thing. If I had my druthers, I would have a huge shop and have a large CNC mill or CNC router. I have all the toys. But that wouldn’t fit in my garage. So, I had to compromise there as well. I’m happy I did because the first and main goal this entire endeavor was to learn how to build a part on a CNC machine.
Michael:
Right. That’s cool. How rewarding that is. So, now do you get parts back from the machine shop? And you’re like, what is this? [inaudible 00:29:30]. Come on. [inaudible 00:29:31].
Tim:
Well, I’m always impressed with the work I get back from machine shops because now I understand exactly what it takes to get that part to look the way it does. It has helped me though on the design side for sure is now I really understand, “Okay. If I make a deep pocket with no radius, a very tiny radius in the corner, I know that that’s going to be really hard to make because of the type of tool that the machine shops have to use.” So, hopefully I’ve been a little bit friendlier to machine shops in the area, having gone through this experience.
Michael:
That’s nice. They’re not cursing you anymore. They’re like, “Oh. Damn.”
Tim:
Yeah. Hopefully. Yeah.
Michael:
That’s awesome, Tim. This is great, man. I’ve really enjoyed this conversation. I appreciate this. Hey, if somebody wants to find you online, I know we’ve mentioned diymachining.com. That’s diymachining.com. Great website. I’ve been just pouring over it for a couple of days. It’s really neat. Like you said, you’ve got links to a bunch of different stuff on there. You’ve got a couple projects on there and just nice overall. It’s a great concise thing. So, that’s cool. Where else could somebody find you online if they wanted to see what you’re up to?
Tim:
Sure. That’s really the main place that I post things. I’m also on Instagram. Aber Works. So, Aber and Works. So, A-B-E-R W-O-R-K-S.
Michael:
Awesome. Sweet man. Well, hey, let’s end it on that. Thank you so much for your time. I really appreciate it Tim.
Tim:
Likewise. Thanks for having me. Appreciate it.


