The Ultimate Guide to Using a Solderless Breadboard with Arduino
If you’re getting started with Arduino and electronics, a solderless breadboard is one of the most essential tools you’ll use. It allows you to quickly prototype circuits without making permanent connections. Think of it as a “first date” with a circuit—you get to know it before making any serious commitments like soldering!
In this tutorial, we’ll walk through how a solderless breadboard works, how to properly use it with an Arduino, and some pro tips to make your circuit-building experience smoother.
In this lesson, you will learn:
- Most importantly -> How to use a solderless breadboard with Arduino
- If that’s all you need to know, just watch for a couple more minutes and you’ll be set
- For those wonderful nerds there, I’ll also talk about some solderless breadboard details that you might find interesting (and handy) if you plan to use solderless breadboards a lot
- I’ll make some recommendations about my favorite bread boards with an associated tools list
- I’ll also talk about some handy uses for a breadboard that actually include soldering…
Let’s go.
Some links in this post are affiliate links - this helps us buy golden toilet seats for our mega yachts.
Understanding the Solderless Breadboard
A solderless breadboard consists of two main sections:
- Inner Section – Composed of columns and rows where components and jumper wires are placed.
- Outer Section – Contains power and ground rails to distribute voltage across your circuit.

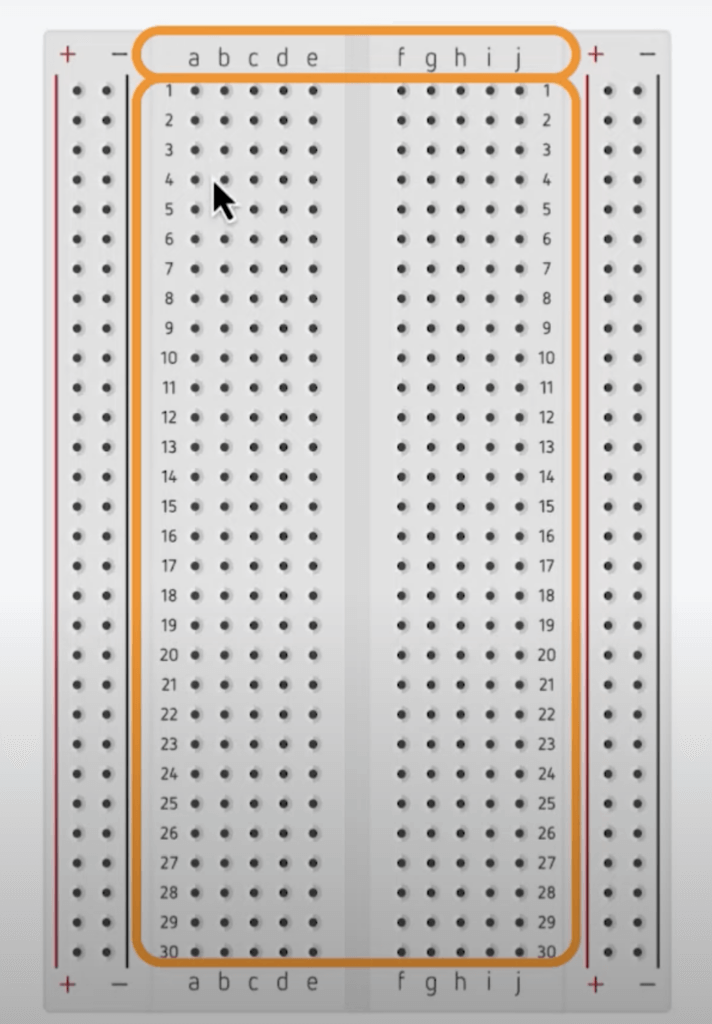
Inner Section: Where Components Connect
The inner section consists of two sets of five columns, separated by a channel in the middle. These columns are often labeled ‘a’ through ‘j’, while the rows are numbered.
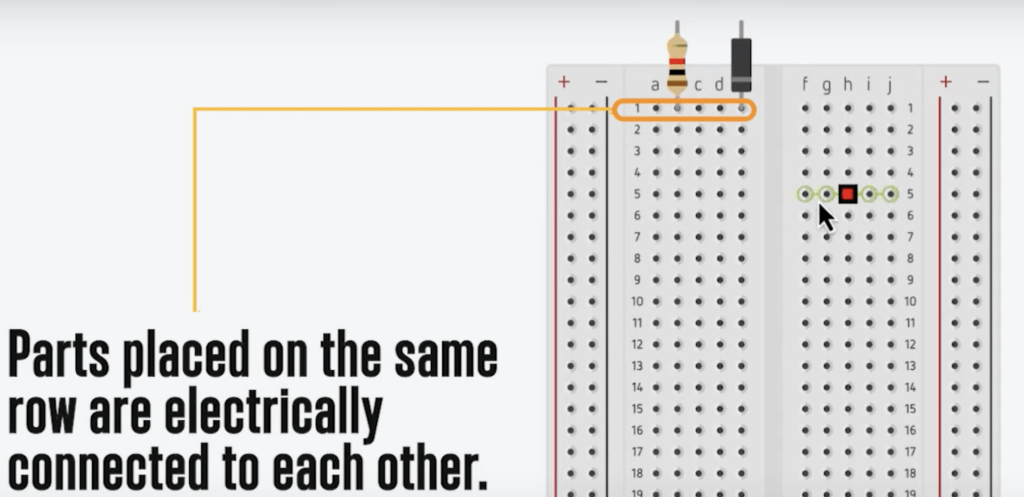
Key Concept: Electrical Connectivity
- The short rows in each section are electrically connected. Any components inserted into the same row will be connected, just like soldering them together.
- The two sides of the board, separated by the center channel, are not electrically connected unless you bridge them with a wire.
- You can test connectivity using a multimeter’s continuity mode, which will beep when two points are electrically linked.
Outer Section: Power and Ground Rails
The outermost rows are typically marked with + (red) for power and – (black/blue) for ground. These rails are connected vertically along the length of the board.
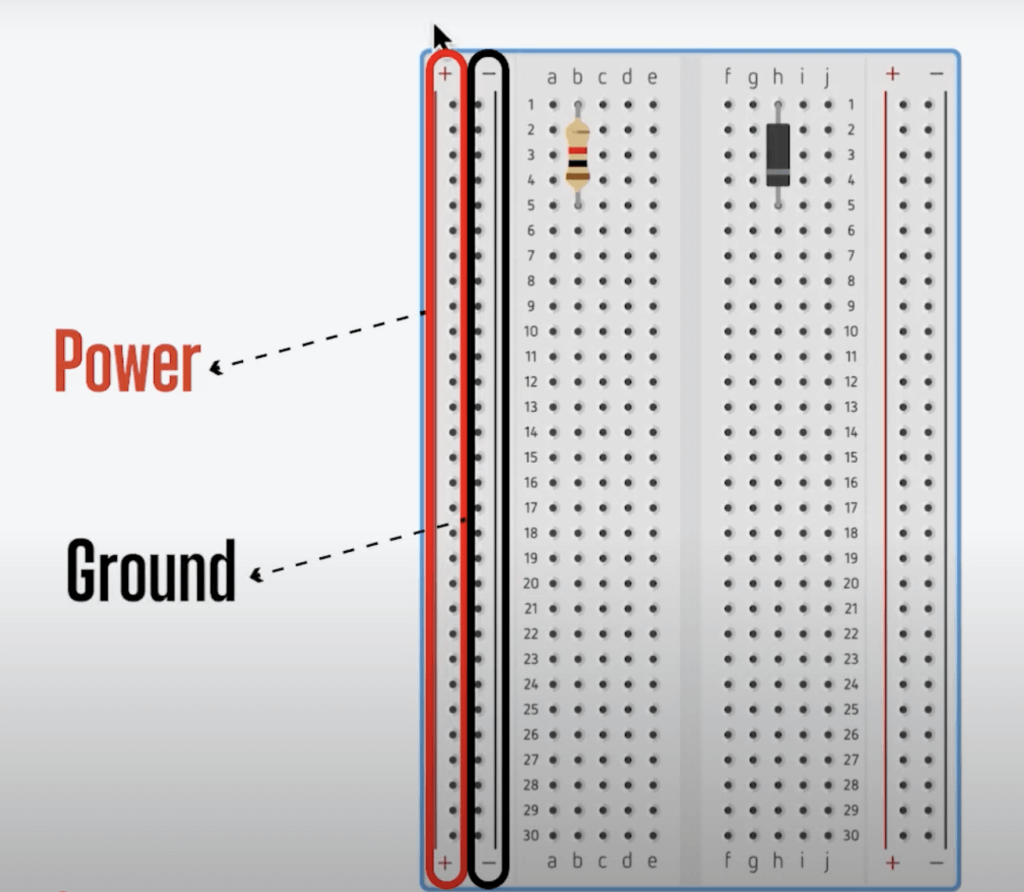
However, some breadboards have a gap in the middle of the power rails, which means the top and bottom halves are not automatically connected. Look for a break in the color coding to spot this feature.
Using a Solderless Breadboard with an Arduino
To use a solderless breadboard with an Arduino, follow these steps:
Step 1: Powering the Breadboard
- Connect the 5V or 3.3V pin on the Arduino to the power rail (+).
- Connect the GND pin on the Arduino to the ground rail (–).
- If necessary, bridge the two power rails together for easy access.

Step 2: Placing Components
- Resistors, LEDs, and sensors can be inserted directly into the inner section of the breadboard.
- ICs (Integrated Circuits) should be placed so that their pins straddle the center channel.
- They have tools for placing and extracting DIP ICs.
- Use jumper wires to connect components and extend circuits.
- Needle nose pliers work great for inserting components
Step 3: Making Circuit Connections
- Use solid-core 22 AWG wire for clean, secure connections.
- Avoid stranded wire, as it can fray and cause shorts.
- Precut jumper wires or male-to-male, male-to-female, and female-to-female jumpers can make prototyping easier.
Types of Breadboards
Breadboards come in different sizes:
- Standard Size – Best for most Arduino projects.
- Half-Size Breadboard – Compact for smaller projects.
- Mini Breadboard – No power rails, great for tight spaces.
Some breadboards even feature binding posts for connecting to a bench power supply using banana clips.
A Pro Tip: Using a Breadboard for Soldering
Need to solder pin headers onto a development board? Insert the pin headers into a solderless breadboard first to hold them in place while soldering. Just be careful not to overheat the plastic!

Conclusion
By now, you know more about solderless breadboards than 99.6% of the population! With these tips, you’re ready to start prototyping your own Arduino projects with ease. Grab a breadboard, an Arduino, and start experimenting!
Looking for more Arduino tutorials? Check out our other guides and start building today!


