Just how random is the ESP32 random number generator?
- On Random Numbers
- History of Random Numbers for Computers
- Pseudo-Random Number Generator Demo
- ESP32 True Random Number Generator
- Proving the True Random Number Generator
- ESP32 Random Number Generator and Wifi
- ESP32 Repeatable Random Number Generator
- Example Demo, using a TRNG to solve very complicated math problems
- Still need help?
On Random Numbers
If you’re reading this tutorial, you’ve likely found a reason to use random numbers for your project. You may in the past have used a “random” number generator on a computer or other microcontroller, and soon realized how not-random they actually are. You may also be familiar with techniques that use the timer, ADC, or RSSI to seed a random number generator.
Fortunately, pseudo-random numbers are a thing of the past. The ESP32 uses true random numbers for things like encryption, games of chance, and problem solving. Unlike the pseudo-random number generators of the past, the ESP32 has a built-in True Random Number Generator (TRNG). The ESP32 captures noise from tiny hardware variations within the chip and turns it into a random number that can be used.
If you want to learn more about random number generators and the old techniques, read on. If you just want to skip to the final TRNG code examples, scroll down to the section titled, “ESP32 True Random Number Generator.”
History of Random Numbers for Computers
Timers as Seeds
A few decades ago I was writing a text-based dungeon crawling game in BASIC, and wanted to “roll the dice” for fighting monsters. I quickly realized that the dice rolls were predictable every game. Looking further into it, I realized “random numbers” simply came from a pre-programmed list. Every time the game was reset, I’d get the same exact results. Thinking of a solution, I realized that human thinking and reaction times when selecting menu options are unpredictable and therefore random. I then inserted the computer timer as a seed value for the random number generator. My random number game problem was solved.
While today computer clocks are updated by a server based on an atomic clock, microcontroller clocks use a crystal which over time can drift due to temperature fluctuations and other imperfections. This adds a bit more randomness.
To implement the timer method for the ESP32, simply insert the current time as the random number seed
randomSeed(millis());
Sensor ADC as Seeds
Years later I started building robots running around the house. I wanted to make the robot a little less predictable in its decision making, to make it more life-like. So, I needed random numbers.
Unfortunately, as the robot wasn’t dependent on the timing imperfections of human decision making, the timer method would no longer work. Instead, the robot had many relatively noisy analog-based sensors, so I would sum up all of its ADC sensor pins, then insert that as the seed value. It wasn’t perfect as some sensors wouldn’t change values often, but other unconnected pins were still affected by static electricity and therefore changed values just enough to seem random.
As ESP32 code:
randomSeed(analogRead(adcPin1)+analogRead(adcPin2)...);
Given ADC values alone were imperfect, I also added in the timer value. It was impossible to predict beforehand exactly when the robot would encounter obstacles, for example. Sensor values changed the actions the robot would take, thereby changing the time needed to complete certain actions.
As ESP32 code:
randomSeed(analogRead(adcPin1)+analogRead(adcPin2)...+millis());
RSSI as Seeds
Timers and ADC are great as seeds when the world around your device randomly changes. But what if your project is in a box, just sitting on a desk and mostly detached from anything unpredictable and random? That’s when we need to add more ways to gather “random” information.
The next method is RSSI, which is the measured signal strength of a wireless signal. Things like objects moving around, humidity, and other nearby signals can affect the RSSI, making it a bit random.
The code is a bit more complicated so read on. We will combine all methods into one unified pseudo-random number generator.
Pseudo-Random Number Generator Demo
For the purpose of understanding how old pseudo-random number generators worked, the following program combines the timer method, the ADC method, and the RSSI method together. This code only uses one ADC pin, but ideally you should use as many as you have available – with each plugged into a noisy sensor. The more pins, the higher the probability static electricity will “randomly” affect one of them.
The following code is mostly self-explanatory. It looks for the strongest nearby WIFI network to determine RSSI, reads the timer, and gets the ADC values. It then sums these values up to use as the random number generator seed.
pseudo_random_num_gen.ino
#include <WiFi.h>

const int adcPin = 34;  // Choose an ADC pin (34, 35, 36, etc.)

void setup() {

    Serial.begin(115200);

    WiFi.mode(WIFI_STA);

    WiFi.disconnect();  // Ensure no connection is active

    delay(100);

}

void loop() {

    // Scan for nearby WiFi networks

    uint16_t numNetworks = WiFi.scanNetworks();

    int16_t rssi = -100; // Default RSSI value if no networks are found

    //get the RSSI of the strongest signal

    if (numNetworks > 0)

      rssi = WiFi.RSSI(0); // Get RSSI of the strongest network    }

    uint16_t adcValue = analogRead(adcPin);

    // Sum the absolute RSSI, ADC value, and millis LSD, then extract the LSD of the sum

    uint32_t sum = abs(rssi) + adcValue + millis();  // Use abs() to avoid negative numbers

    // Use the LSD as a seed for the random number

    randomSeed(sum);

    // Generate a random number

    uint16_t randomNumber = random(0, 100); // Example: random number between 0 and 99

    // Print values

    Serial.print("RSSI: "); Serial.print(rssi);

    Serial.print(" | ADC: "); Serial.print(adcValue);

    Serial.print(" | Seed: "); Serial.print(sum);

    Serial.print(" | Random Number: "); Serial.println(randomNumber);

}
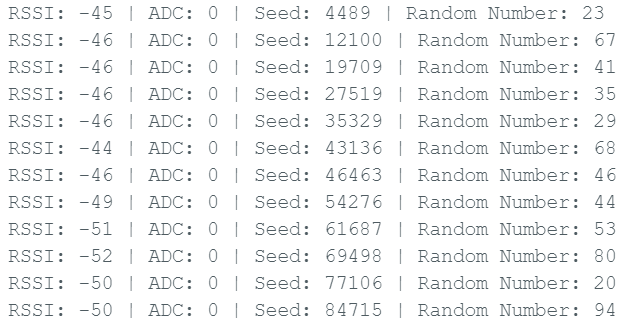
The WiFi.scanNetworks() command takes about 8 seconds to run per loop. I let it run until I had 439 data points, a good statistically valid sample size. After running the code, you should get an output similar to the list below.
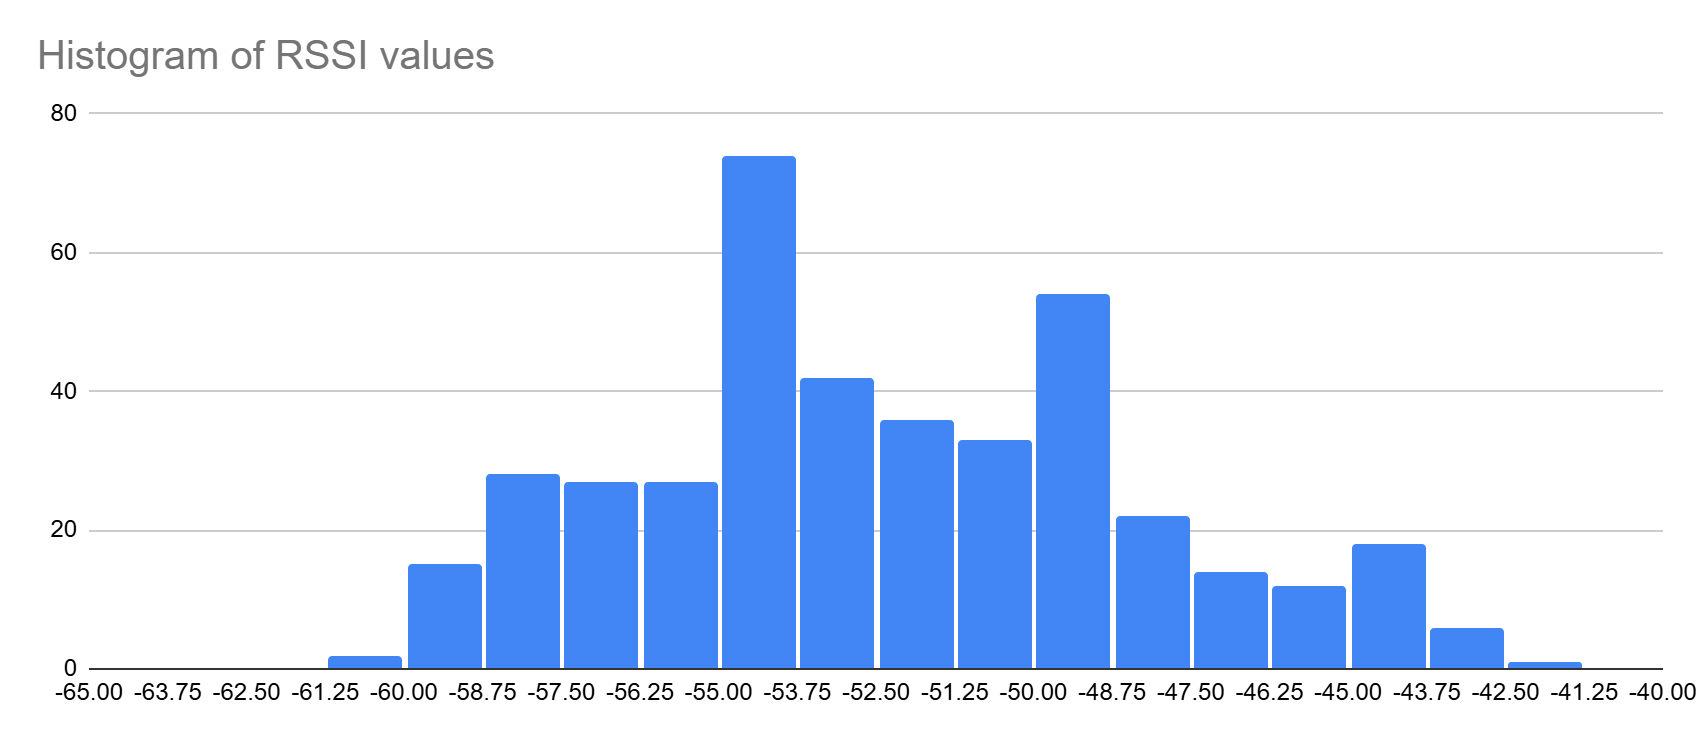
I first plotted the RSSI values using a spreadsheet. It formed a bell curve, so not entirely random, but it introduced enough randomness into the seed value to make it more unpredictable.
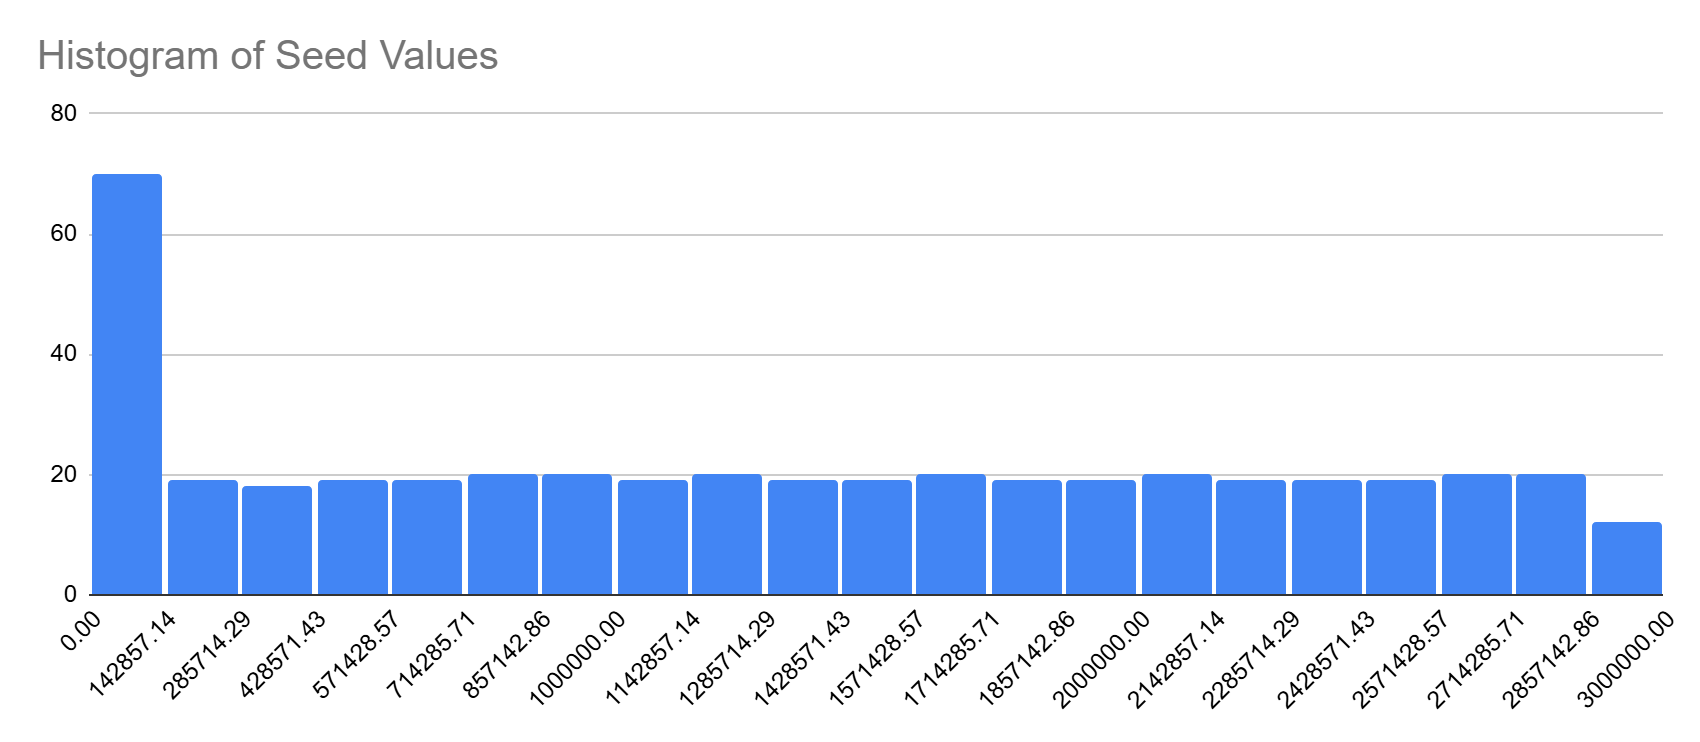
The RSSI was added to the timer, which itself was unpredictable because each WiFi.scanNetworks() scan took a slightly different amount of time. Below I chart the time taken for each loop, for 3 separate runs of the same code.

I also added an ADC value, but it remained unconnected and there wasn’t enough electrical noise in my test system to go above 0. But, that’s ok, because we really only wanted to test RSSI and the timer, and an electrically noisy sensor would be a project in itself.
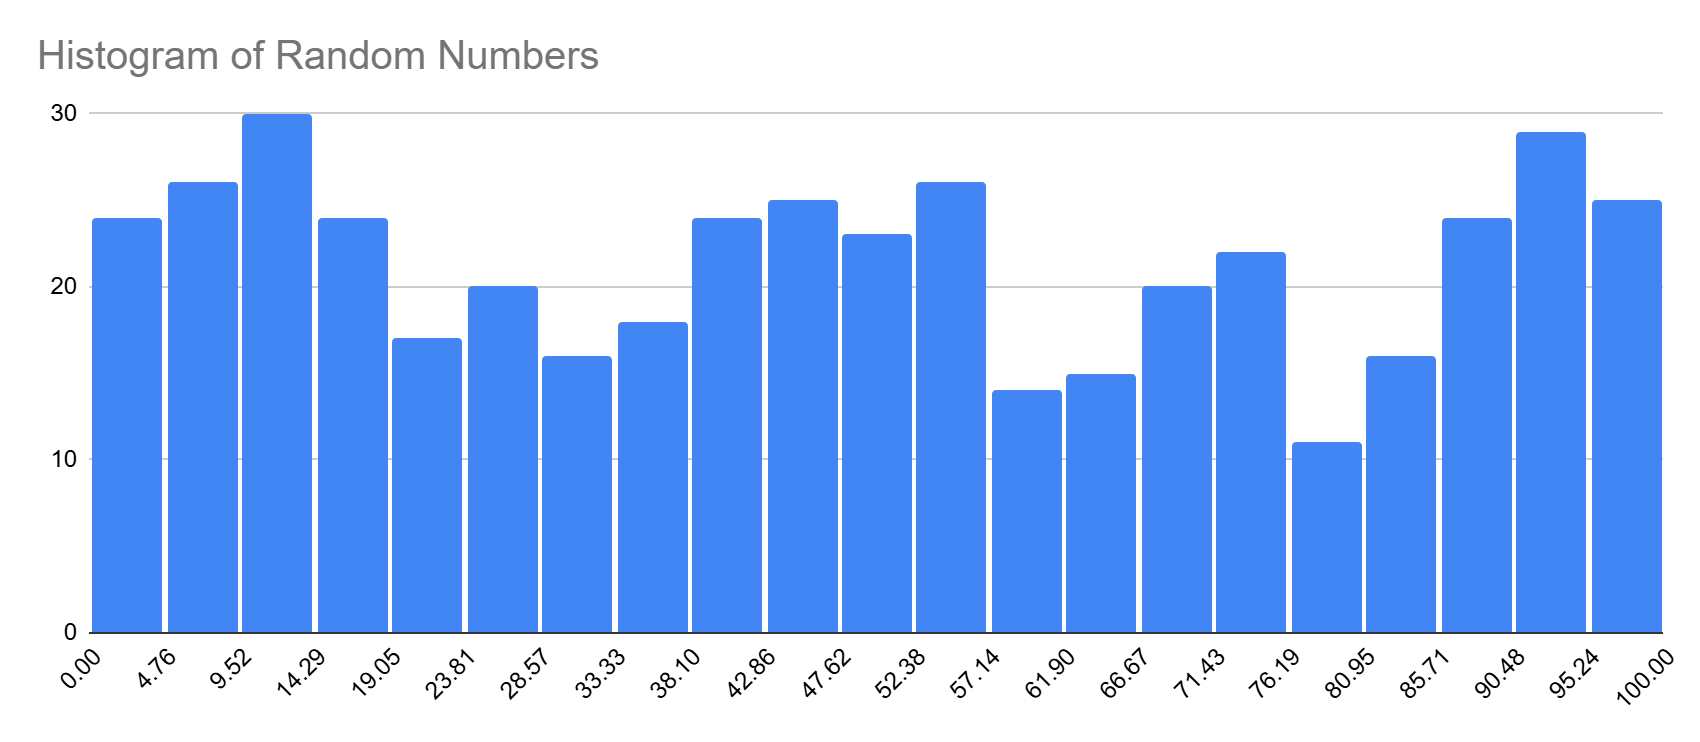
The program used these seed values to determine a random value, shown in a histogram below. The program took forever to run so I didn’t run it for long, but I suspect if I ran it for an hour that each bar would be relatively equal height.
This pseudo-random number generator has some issues:
1. If a hacker had physical access to the device, he could force the ADC to zero and isolate it from any external WiFi signal, effectively making the seed value exactly the same on every run.
2. The system takes too long to search for the strongest RSSI signal, which could cause problems if you need many numbers fast.
3. While the random number histogram shows it to be random enough, it’s still reading from a pre-programmed list. The probability of being predictable is statistically higher than a true random number generator.
With some non-negligible effort I’m sure I can partly resolve these problems, but that’s outside the scope of this tutorial.
Now that we’ve ruled out the old-fashioned pseudo-random number generator techniques, let’s learn about and try out the superior built-in hardware random number generator of the ESP32.
ESP32 True Random Number Generator
First, let’s start with the “true” hardware random number generator (HRNG or TRNG) built into the ESP32. The ESP32’s TRNG is based on an entropy source from internal noise within the chip. It is designed to generate “true” random numbers, making it more secure than any software-based pseudo random number generator (as demonstrated earlier). The randomness is provably suitable for cryptographic applications and other security use cases that require high-quality randomness.
To test the TRNG, run this very basic code which gives a “random” number from 0 to 100.
TRNG.ino
void setup()

  {

  Serial.begin(115200);

  }

void loop()

  {

  //official ESP32 function, 0-100

  //Serial.println((esp_random() % 100));

  //Arduino function, 0-100

  Serial.println(random(0,100));

  delay(1);

  }
It can generate many thousands of random numbers in just one second, proving that it’s very fast.

So, what happens if I power reset and re-run the same code over and over? Would it still be random, then? I got a different set of numbers every time I ran the code.
| Run 1 | Run 2 | Run 3 | Run 4 |
| 39 | 64 | 28 | 58 |
| 25 | 58 | 88 | 69 |
| 92 | 17 | 89 | 45 |
| 17 | 13 | 28 | 73 |
| 95 | 78 | 73 | 17 |
| 43 | 22 | 32 | 52 |
| 6 | 76 | 7 | 57 |
| 22 | 10 | 12 | 23 |
| 96 | 13 | 74 | 54 |
| 16 | 64 | 76 | 33 |
| 21 | 17 | 46 | 70 |
| 52 | 89 | 36 | 65 |
| 97 | 53 | 31 | 23 |
| 64 | 11 | 83 | 52 |
| 96 | 79 | 23 | 37 |
| 13 | 76 | 27 | 6 |
| 76 | 35 | 95 | 100 |
| 32 | 14 | 35 | 96 |
Proving the True Random Number Generator
Just how random is the ESP32 true random number generator? Does it have quirks? Does it secretly read from a list?
To test the TRNG for flaws, I wrote the below code to create a histogram for me. In short, it runs the random number generator for a second and records the number of all values returned between 0 and 100.
TRNG_histogram1.ino
//#define DURATION 60000*5  // Run for 5 minutes

#define DURATION 1000  // Run for 1 second

#define MIN_VAL 0

#define MAX_VAL 100

uint16_t histogram[MAX_VAL + 1] = {0};  // Array to store counts

void setup() {

  Serial.begin(115200);

  uint32_t startTime = millis();

  Serial.print("nstarting... wait one minute!n");

  while (millis() - startTime < DURATION) {

    uint16_t num = random(MIN_VAL, MAX_VAL + 1);  // Generate a number from 1 to 100

    histogram[num]++;  // Count occurrences

    delay(1);  // Control execution speed

  }

  // Print the histogram

  Serial.println("nHistogram of Random Numbers:");

  for (uint16_t i = MIN_VAL; i <= MAX_VAL; i++) {

    Serial.print(i);

    Serial.print(": ");

    Serial.println(histogram[i]);

  }

}

void loop() {

  // Empty loop as setup runs once

}
I ran the code three times, pasted the data into a spreadsheet, and then created a stacked chart. No obvious patterns between each of the three 1-second runs. The histogram looks unpredictable.
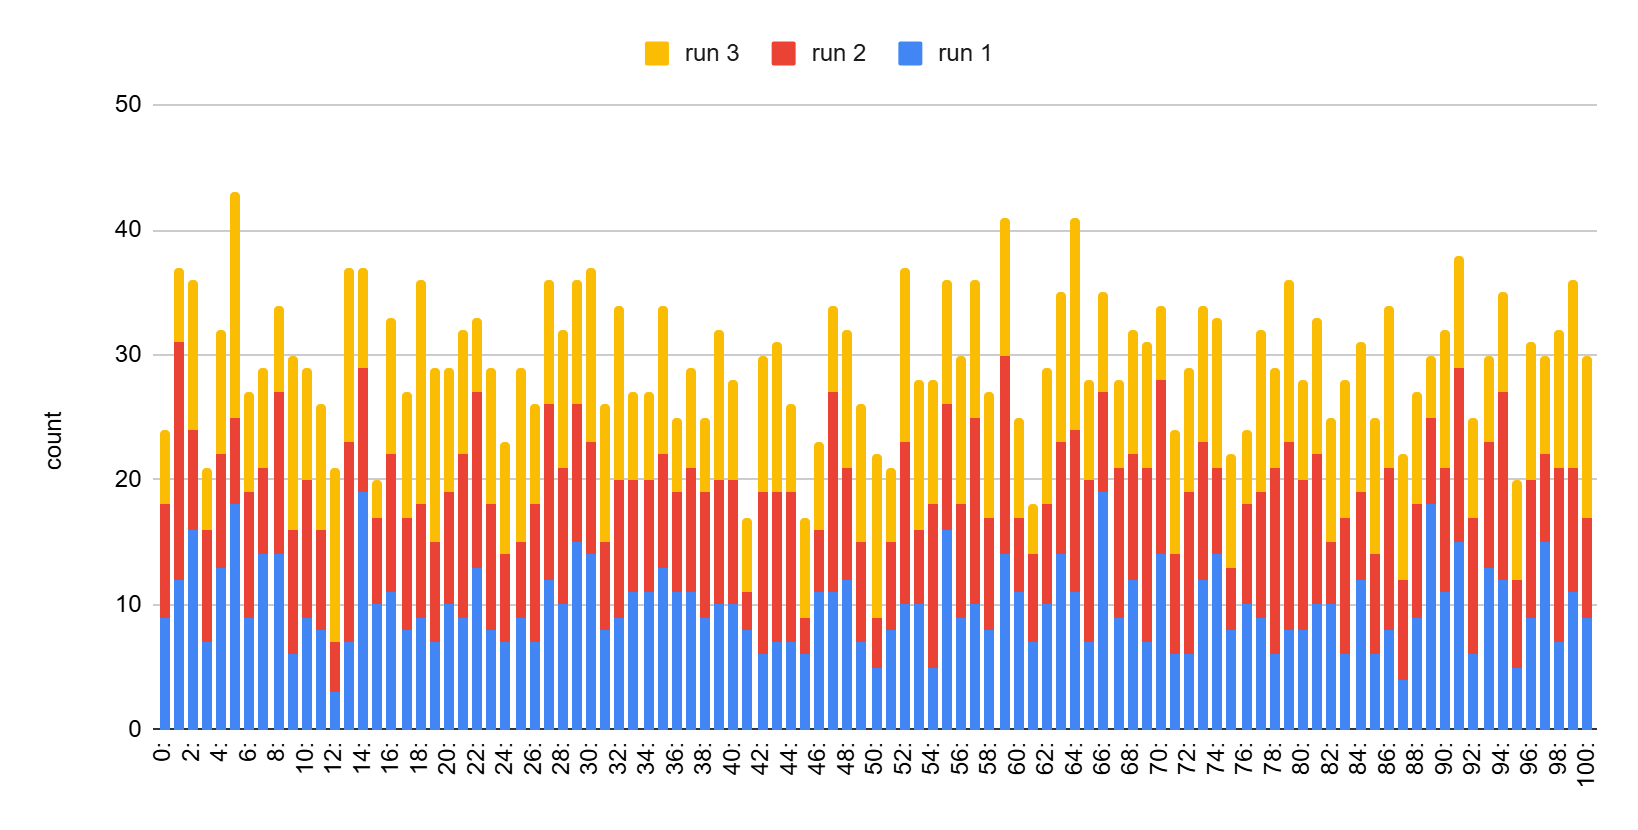
The first few thousand numbers look random. But, what about after millions of numbers, would it still appear to be random? I then ran the below code to try 300,000 numbers to see if the randomness would appear less random.
In the previous example code, I changed the top #define comment to this below to test for longer:
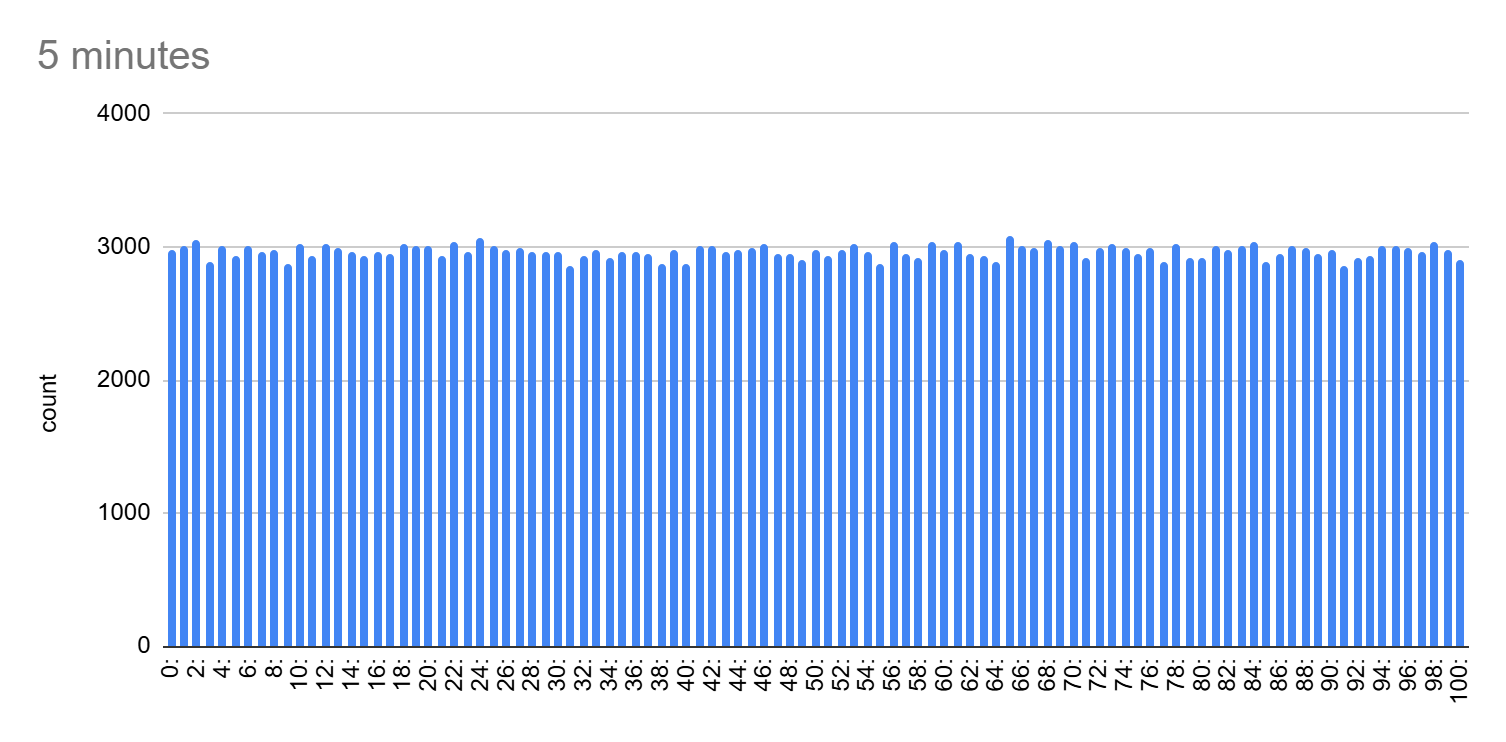
#define DURATION 60000*5  // Run for 5 minutes

//#define DURATION 1000  // Run for 1 second
The below chart is the result after running for 5 minutes, 1 value every ~1 ms. This proves that as the amount of random numbers approaches infinity, the variability approaches 0.
ESP32 Random Number Generator and Wifi
When doing research for this tutorial I ran across claims that the TRNG of the ESP32 will not work without WiFi enabled. To test this claim, I wrote the below code that disables WiFi before generating random numbers.
no_wifi_RNG_test.ino
#include <WiFi.h>
void setup() {
// Disable WiFi and Bluetooth to save power
WiFi.mode(WIFI_OFF);
btStop();
Serial.begin(115200);
//disabling wifi causes Serial initialization delay
//delay needed for Serial to work properly
delay(1000);
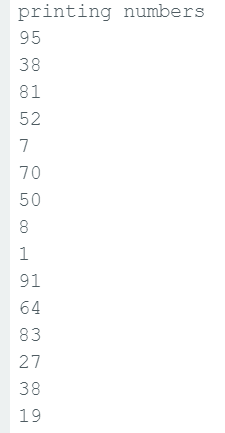
Serial.print("nprinting numbersn");
}
void loop() {
Serial.println(random(0, 101)); // Prints a random number between 0 and 100
delay(100);
}
Contrary to the claims, the TRNG does indeed work even with WiFi disabled. I believe this may be due to the ESP32 using sources be
Contrary to the claims, the TRNG does indeed work even with WiFi disabled. I believe this may be due to the ESP32 using sources beyond just WiFi for entropy, such as internal electrical noises, clock jitter, thermal variations, and gremlins.
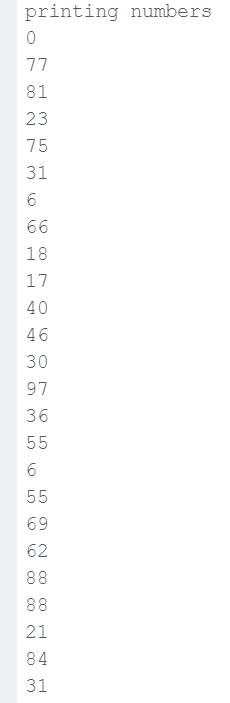
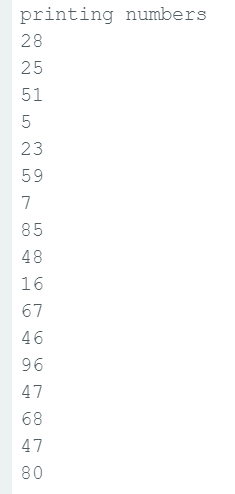
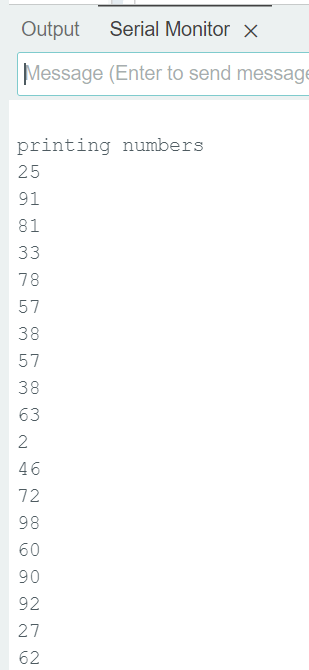
Below are the random number results when WiFi is disabled after three power resets. It is different every single time. Myth busted!
Note: looking around in forums, I found claims that there was a bug in earlier firmware or libraries (?) causing this effect, and that it has since been resolved many years ago.
ESP32 Repeatable Random Number Generator
As mentioned earlier in this tutorial, in the old days RNG’s used a pre-written list and a seed value. For any seed value, you’d get a specific repeatable list of the same numbers after every program reset. I can’t think of any reason anyone would want this today, except for maybe repeatable test code.
To use this feature, you need to call randomSeed() before calling random(). If randomSeed() is not called, random() will use the ESP32’s hardware TRNG (esp_random()). If randomSeed(n) is called, it switches to a pseudo-random sequence based on the seed, n.
The ESP32’s randomSeed() function takes a 32-bit unsigned integer (uint32_t) as a seed value. This means the smallest seed value is 0, and the largest seed value is 4294967295 (0xFFFFFFFF, or 2^32 – 1).
To test the repeatable random number generator, try this below code:
repeatable_RNG_test.ino
void setup() {

    // Set a fixed seed so the sequence is the same on every restart

    randomSeed(12345);  // Change the number to get a different sequence

    Serial.begin(115200);

    //delay needed for Serial to work properly

    delay(100);

    Serial.print("nprinting numbersn");

}

void loop() {

    Serial.println(random(0, 101)); // Prints a random number between 0 and 100

    delay(100);

}
I consistently got the same below set of random numbers on my ESP32 no matter how many power resets I gave it.
Example Demo, using a TRNG to solve very complicated math problems
This next example is to demonstrate the power of randomness. We will use the random number generator to solve a very complex mathematical equation using random number numerical analysis. Numerical analysis is a whole field unto itself. While using random numbers is the least efficient method in numerical analysis, it is however the easiest and has few caveats. I won’t go into details on numerical analysis as it’s outside the scope of this tutorial – just know that it can be used to solve the craziest mathematical problems.
How does it work?
Random number numerical analysis uses billions and billions of random guesses until it solves, by luck, a complex mathematical equation. It is extremely computationally intensive.
Just as an example, I made up a really complicated math equation. You can use any equation you want in the below code.
The equation: log(x) + pow(5,y) + z*4 = 500
Solve for x, y, and z. Good luck doing this manually!
The below program will keep guessing, continually printing out a better solution every time one is found.
random_num_generator_test.ino
const int32_t solution_real=500;//desired answer
int32_t solution_best=30000;
void setup()
{
Serial.begin(115200);
delay(1000);
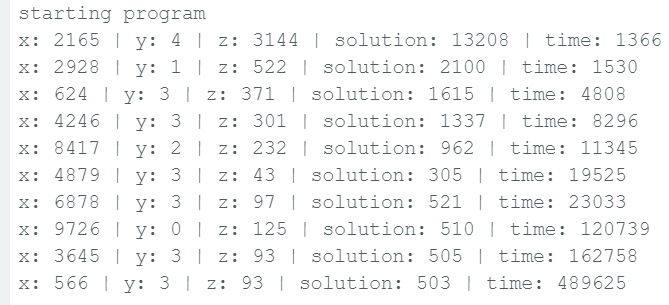
Serial.print("nstarting programn");
}
int64_t equation(int32_t x, int32_t y, int32_t z)
{
int64_t solution = log(x) + pow(5,y) + z*4;
return solution;
}
void loop()
{
// Generate random numbers
int32_t randomNumber_x = random(0, 10000);
int32_t randomNumber_y = random(0, 10000);
int32_t randomNumber_z = random(0, 10000);
int64_t sol=equation(randomNumber_x,randomNumber_y,randomNumber_z);
//if new solution is closer than the last, save the new one
if(abs(sol-solution_real) < solution_best)
{
solution_best = abs(sol-solution_real);
// Print values
Serial.print("x: "); Serial.print(randomNumber_x);
Serial.print(" | y: "); Serial.print(randomNumber_y);
Serial.print(" | z: "); Serial.print(randomNumber_z);
Serial.print(" | solution: "); Serial.print(sol);
Serial.print(" | time: "); Serial.println(millis());
}
}
The results of the program are shown below. Each solution closer to 500 took progressively longer to find. After about 8 minutes of intense processing it found a solution that gave 503. I ran it for an additional half hour but no better solutions were found. It would have likely needed to run for several more hours before it found x, y, and z values that gave exactly 500.
Note: For the smarter people out there, yes, in this particular case using for-loops with x, y, and z would have been faster and more efficient. But, if there were say 20 variables, the number of possible solutions explodes exponentially! If you have limited processing time, for example a robot solving real-time problems, or renting time on a server, the for-loop method wouldn’t work at all.
A somewhat better way to do this random method would be to implement heuristics to narrow in on the solution faster. But again, outside the scope of this tutorial.
Still need help?
If you have a specific issue with random numbers for your ESP32 project, and the above tutorial isn’t sufficient, write in to us and maybe we’ll expand this tutorial with your suggestion. =)


This is an excellent article, and I will experiment with it in my Arduino lab. Thank you for this highly detailed information.
Thanks!