Arduino Course for Absolute Beginners – Tutorial 03
Arduino Code & Syntax Overview
As you learned in Module 01, IDE stands for Integrated Development Environment. Pretty fancy sounding, and should make you feel smart any time you use it. The IDE is a text editor-like program that allows you to write Arduino code.
When you open the Arduino program, you are opening the IDE. It is intentionally streamlined to keep things as simple and straightforward as possible. When you save a file in Arduino, the file is called a sketch – a sketch is where you save the computer code you have written.
The coding language that Arduino uses is very much like C++ (“see plus plus”), which is a common language in the world of computing. The code you learn to write for Arduino will be very similar to the code you write in any other computer language – all the basic concepts remain the same – it is just a matter of learning a new dialect should you pursue other programming languages.
The code you write is “human readable”, that is, it will make sense to you (sometimes), and will be organized for a human to follow. Part of the job of the IDE is to take the human readable code and translate it into machine-readable code to be executed by the Arduino. This process is called compiling.
The process of compiling is seamless to the user. All you have to do is press a button. If you have errors in your computer code, the compiler will display an error message at the bottom of the IDE and highlight the line of code that seems to be the issue. The error message is meant to help you identify what you might have done wrong – sometimes the message is very explicit, like saying, “Hey – you forget a semicolon”, sometimes the error message is vague.
Why be concerned with a semicolon you ask? A semicolon is part of the Arduino language syntax, the rules that govern how the code is written. It is like grammar in writing. Say for example we didn’t use periods when we wrote – everyone would have a heck of a time trying to figure out when sentences started and ended. Or if we didn’t employ the comma, how would we convey a dramatic pause to the reader?
And let me tell you, if you ever had an English teacher with an overactive red pen, the compiler is ten times worse. In fact – your programs WILL NOT compile without perfect syntax. This might drive you crazy at first because it is very natural to forget syntax. As you gain experience programming you will learn to be assiduous about coding grammar.
Let’s get our hands dirty and introduce some syntax.
The Semicolon ;
A semicolon needs to follow every statement written in the Arduino programming language. For example…
int LEDpin = 9;
In this statement, I am assigning a value to an integer variable (we will cover this later), notice the semicolon at the end. This tells the compiler that you have finished a chunk of code and are moving on to the next piece. A semicolon is to Arduino code, as a period is to a sentence. It signifies a complete statement.
The Double Forward slash for Single Line Comments //
//When you type a double backslash all the text that follows on the same line will be grayed out
Comments are what you use to annotate code. Good code is commented well. Comments are meant to inform you and anyone else who might stumble across your code, what the heck you were thinking when you wrote it. A good comment would be something like this…
//This is the pin on the Arduino that the LED is plugged into
int LEDpin = 9
Now, in 3 months when I review this program, I know where to stick my LED.
Comments will be ignored by the compiler – so you can write whatever you like in them. If you have a lot you need to explain, you can use a multi-line comment, shown below…
/* The multi-line comment opens with a single backslash followed by an asterisk. Everything that follows is grayed out and will be ignored by the compiler, until you close the comment using first an asterisk and then a backslash like so */
Comments are like the footnotes of code, except far more prevalent and not at the bottom of the page.
Curly Braces { }
Curly braces are used to enclose further instructions carried out by a function (we discuss functions next). There is always an opening curly bracket and a closing curly bracket. If you forget to close a curly bracket, the compiler will not like it and throw an error code.
void loop() {   //this curly brace opens
//way cool program here
}    //this curly brace closes
Remember – no curly brace may go unclosed!
Functions ( )
Let’s switch gears a bit and talk about functions.
Functions are pieces of code that are used so often that they are encapsulated in certain keywords so that you can use them more easily. For example, a function could be the following set of instructions…
Wash Dog
1. Get a bucket
2. Fill it with water
3. Add soap
4. Find dog
5. Lather dog
6. Wash dog
7. Rinse dog
8. Dry dog
9. Put away bucket
This set of simple instructions could be encapsulated in a function that we call WashDog. Every time we want to carry out all those instructions we just type WashDog and voila – all the instructions are carried out.
In Arduino, there are certain functions that are used so often they have been built into the IDE. When you type them, the name of the function will appear orange. The function pinMode(), for example, is a common function used to designate the mode of an Arduino pin.
What’s the deal with the parentheses following the function pinMode? Many functions require arguments to work. An argument is information the function uses when it runs.
For our WashDog function, the arguments might be dog name and soap type, or temperature and size of the bucket.
pinMode(13, OUTPUT);
//Sets the mode of an Arduino pin
The argument 13 refers to pin 13, and OUTPUT is the mode in which you want the pin to operate. When you enter these arguments the terminology is called passing. You pass the necessary information to the functions. Not all functions require arguments, but opening and closing parentheses will stay regardless though empty.
millis( );
//Retrieves the length of time in milliseconds that the Arduino has been running
Notice that the word OUTPUT is blue. There are certain keywords in Arduino that are used frequently and the color blue helps identify them. The IDE turns them blue automatically.
Now we won’t get into it here, but you can easily make your own functions in Arduino, and you can even get the IDE to color them for you.
We will, however, talk about the two functions used in nearly EVERY Arduino program.
void setup ( )
The function, setup(), as the name implies, is used to set up the Arduino board. The Arduino executes all the code that is contained between the curly braces of setup() only once. Typical things that happen in setup() are setting the modes of pins, starting
void setup( ) { //the code between the curly braces is only run once for setup()
You might be wondering what void means before the function setup(). Void means that the function does not return information.
Some functions do return values – our DogWash function might return the number of buckets it required to clean the dog. The function analogRead() returns an integer value between 0-1023. If this seems a bit odd now, don’t worry as we will cover every common Arduino function in depth as we continue the course.
Let us review a couple things you should know about setup()…
1. setup() only runs once.
2. setup() needs to be the first function in your Arduino sketch.
3. setup() must have opening and closing curly braces.
void loop( )
You have to love the Arduino developers because the function names are so telling. As the name implies, all the code between the curly braces in loop() is repeated over and over again – in a loop. The loop() function is where the body of your program will reside.
As with setup(), the function loop() does not return any values, therefore the word void precedes it.
void loop( ) { //whatever code you put here is executed over and over
Does it seem odd to you that the code runs in one big loop? This apparent lack of variation is an illusion. Most of your code will have specific conditions laying in wait which will trigger new actions.
If you have a temperature sensor connected to your Arduino for example, then when the temperature gets to a predefined threshold you might have a fan kick on. The looping code is constantly checking the temperature waiting to trigger the fan. So even though the code loops over and over, not every piece of the code will be executed every iteration of the loop.
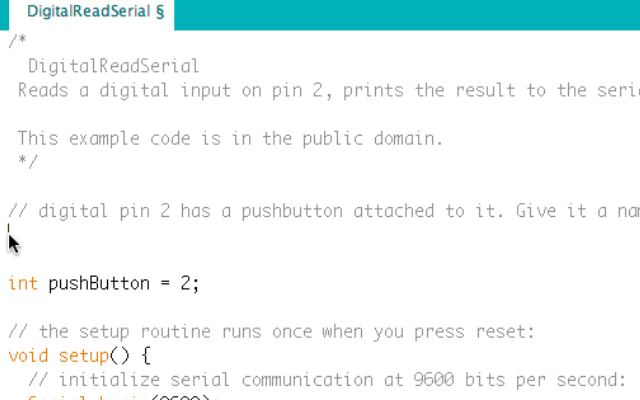
Try On Your Own
This course is based around the example sketches provided with the Arduino IDE. Open up your Arduino IDE and go to File > Example > 01.Basics and open up three different sketches. Identify the following syntax and functions that you find in the sketches:
- ; semi-colons
- // single line comments
- /* */ multi-line comments
- { } open and closing curly braces
- ( ) parenthesis
- void setup() – identify the opening and closing curly braces
- void loop() – identify the opening and closing curly braces
- some blue keywords like OUTPUT or INPUT
Further Reading
Go to the Arduino Reference page and check out all the syntax under Further Syntax that we talked about. You will find some further useful info on each of these elements.


