Use the Arduino Mouse Library for automating simple tasks
In this lesson, we are going to talk about using the Arduino Mouse library! This is a really helpful way to automate mouse functions by using the Arduino USB libraries and programming them to your Arduino board! Check out the video and lesson below!
Automating tasks using Arduino
Do you ever find yourself doing repetitive tasks on your computer and you think to yourself, “I know this could be automated”? Well, what’s cool is a lot of stuff can be automated using an Arduino and the USB libraries that come pre-installed in the Arduino IDE!
 This lesson is part two in a series doing a deep dive into those USB libraries.
In the previous lesson, we talked about controlling your keyboard with Arduino. In this lesson, you’re gonna learn how to use the Arduino to emulate your mouse.
HARDWARE
First off, it’s important to know that the USB mouse library that comes pre-installed on the Arduino IDE doesn’t work with all types of Arduino boards. It only works with a specific subset of Arduino boards. And those are the ones that are designed with the 32u4 or the SAMD micro based boards.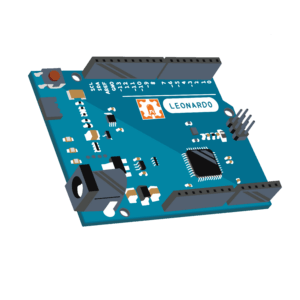 So that’s gonna be a Leonardo, Esplora, Zero, a Due, the Micro and the MKR Family boards. If you’re trying to use this on an Arduino Uno or a Mega, it’s not gonna work. That’s where these USB libraries will function.
Now we’re talking about these USB libraries, and if you go to the Arduino reference, which is my favorite page on the Arduino website, and you go to Libraries, down at the bottom, you can see there are two USB libraries, the Keyboard library and the Mouse library.
 USB MOuse libraries
 USB MOuse libraries
We’re going to walk through each one of these functions.

So right here, these are all of the functions inside the Mouse library. Like I mentioned, the Mouse and Keyboard library, these are the USB libraries, they come pre-installed on the Arduino IDE. And these are all the functions in the Mouse library. But if we want to use these functions in our sketch, we still need to include the library. And that would look like this.
 This line of code will tell the program, Hey, we’re gonna be using functions from this Mouse library.
If you try to run this program, but you don’t include the Mouse library, it’s not going to know what any of these functions are. So that’s an important step.
Now, if you didn’t want to type it out, what you could do is go up to Sketch, include library, which is what we’re doing, and then if you come down to Arduino libraries, you’ll see the mouse is already there. These are Arduino libraries.

These are all the ones that come pre-installed for you. When you click Mouse, it inserts that Mouse line. We’re achieving the same exact thing, but just in a different way.
Set up
So now what I’m gonna do is write a little bit of code to kind of get this set up, and then we’re gonna walk through each of these functions step by step.
 So I’ve got some code written right here, and you might be wondering, what is all this other code that’s going on? Well, here’s the basic idea. This is what’s happening here. I have a button set up on my Arduino. I’m using a Kit-on-a-Shield for Arduino.

It’s a circuit board we sell. It’s got two buttons on it. One of them happens to be a pin five. So what I’m doing is I’m saying, Hey, there’s this button at pin five. I’m setting it as an input. And when I read from this button, I want to see whether or not the button’s being pressed. If the button is being pressed, then I want to run the code that I’m calling from the Mouse library. If I’m not pressing the button, I don’t want to run any of this code.
So the way this button is set up, it’s normally low. So there’s a low voltage at that pin. We’re setting it as an input. When you press the button, the voltage goes high. So digital read is gonna read pin five. If it sees high voltage, high voltage that’s, that would be a one or a true value. And so this if-statement is only gonna run if the condition inside here is true.
So if I am pressing the button, then we run this code.
 If I’m not pressing the button, we don’t. And the reason that we have this protection in here, the reason I set up this whole code construct is that we don’t want the mouse to be doing things unless we explicitly tell it to do things. What can happen, is that when you plug your Arduino in, if you’ve got the program doing some crazy stuff with the mouse, then it’s going to immediately start doing that crazy stuff with the mouse.
Unless you can stop that behavior with a button press or start that behavior with a button press, then it can get a little bit tricky to kind of reprogram the code if you need to. So hopefully that makes a little sense. As we go through this lesson, we might see how that comes into effect, you know, just by me screwing up the code here. But anyway, let’s go ahead and start diving into these functions.
Mouse.begin & Mouse.end
All right, so the first two functions we’re gonna talk about are Mouse.begin and Mouse.end.

Here’s the thing, you would think that if you sandwich between the begin and the end function, you’d think that if you put some of this other mouse code inside here, that this other mouse code, these other functions would only work when begin has been called, and then they would stop working when Mouse.end was called.
Unfortunately, these two functions are not implemented in the actual library. So if you go to the Arduino GitHub, and you go to the Mouse library, and you come to the library file, the CPP file for the Mouse library, and that’s the one we’re using, you can notice that these two functions right here, begin and end, have not been implemented.
 There are just shells here. There’s no actual code that runs when these functions are called. Unfortunately, they don’t work yet. So that’s the first two. Don’t worry about using them. Now, if you go to the Arduino reference in the documentation for the Mouse library, it’s just a little bit confusing because they still have these Mouse.begin and Mouse.end functions. And if you go to Mouse.begin, it will tell you that this is when it begins emulating the mouse to the computer. It says the begin function must be called before controlling the computer. Okay. So that’s those two functions.
Mouse.click
The next function we’re gonna talk about is Mouse.click.

When this function is called, wherever your mouse happens to be on the screen, it is going to input a click function. So a click is when it’s pressed and released. Double-check that you’re using a compatible board (we’re using the Leonardo), and select your board. So I’ve got, it’s an AVR board. I’ve got Leonardo selected in the boards.
 I go to port, make sure I’ve got my Leonardo selected. So then I’m gonna click Verify, and then I’ll upload this to the board. After testing it out, we can see that a delay is required in order for it not to fire multiple times while we’re pressing the botton down. So here’s a half second delay.

Problem-solving mouse take over issues
We had a commenter on the YouTube channel, Scott Frazier, and he presented a really easy way to kind of get yourself out of the situation. So what you can do is you just unplug your Arduino, you adjust your sketch so that it’s not gonna have that runaway situation. And then what you do when you plug your Arduino board in, all you do is you hold down the reset button while you plug it in. And while you’re holding the reset button, the Arduino sketch is not going to run. And then simultaneously, while letting go of the reset button, you also click upload. And what’s gonna happen is it’s gonna upload that new sketch to your board, and you should be back in a good situation to keep on moving forward.
 So big shout out to Scott for bringing this to my attention. Super helpful.
Mouse.move

So we’ve talked about Mouse.click. Now let’s talk about Mouse.move. So Mouse.move takes three arguments. It wants to know how much to move on the X direction, the Y direction. And if your mouse has a wheel, you can move or scroll that wheel, so like the scroll direction.
So I decided to change up the naming here from the axis to direction. I feel like that’s better naming. Anyway, these values for move, the arguments that we need to pass into move, they need to be characters, and a character can hold eight bits and it’s a signed value. And in this case, we can pass from negative 128 to positive 127. And depending on that value, it’s going to affect where or how much that is your mouse moves. Now it’s important to understand about the positive and the negative. So the X axis is pretty, the X-axis is pretty straightforward.
And it’s all dependent on where your mouse currently is. So if I say, I want the X direction to be 100, it’s gonna look at where my mouse currently is. So let’s say my mouse is right here on this little dot next to input. It’s gonna move it to the right 100. Now, I’m not sure if the unit of measurement here is pixels or what that unit of measurement is, but whatever that unit of measurement is, it’s gonna move it 100 of those units to the right. If this was a negative 100, based on where my mouse was, it would move it 100 units to the left. Now, for the Y direction, positive, a positive value will move Y down, which you may not expect. You might think Y would kind of go up if you had like, you know, a Cartesian graph or something like that. But in this case, a positive Y moves you down.
 Now notice I’ve got a little delay in here this way. If I put my cursor on the top of the screen and press the botton on my Kit on a Sheild before I know it, my mouse, it’s like way down over here. So that’s the whole, you know, the delay thing, and it can be a little, it can be a little tricky. Okay, so that is a, that’s Mouse.move. And so Mouse.move should be called 10 separate times. So that should move this 1000, right? So X should move way over, and Y, if we’re calling it 10 times, it should move up 100 units.
Mouse.press & Mouse.release
Okay, so that is Mouse.move. Let’s go ahead and check out Mouse.press and Mouse.release.
 All right, so here’s Mouse.press and Mouse.release. Now, Mouse.press, as you might expect, presses down on your mouse. So it simulates a button press on your mouse. And Mouse.release releases that press. If you don’t call the release function, then Mouse.press is going to be continually pressing down. Now, you can actually specify what mouse button you want pressed.
If we go over to the Arduino website and check out the documentation, we can see that the parameters for the button that you want to press is mouse left, mouse right and mouse middle.

So a left press is the default, a right press, you can also add it or a middle press. So like a left press is just, you know, me clicking the screen. A right press in the Arduino IDE looks like this. You know, it could look like whatever anywhere else, some contextual, it brings up a contextual window for me. So I’m just gonna use the default here. Now, if you line it up so that it’s Mouse.press and then immediately Mouse.release, this is essentially like click.
Mouse.isPressed

All right, finally, we’re gonna talk about Mouse.isPressed. All right, so now we’re gonna check out this Mouse.isPressed function. So what the Mouse.isPressed button does is it returns a true if the Mouse.press button was called, and it returns a false if the Mouse.press button has not been called. Like currently, right? So let’s say I call Mouse.press and we just pass in the default value. And I want to check if Mouse.press is currently being pressed by our mouse or USB library. Then I can use the Mouse.isPressed function to tell me, Hey, yeah, it’s been pressed. It will return a one if it is being pressed, and a zero if it’s not being pressed. So right now, digital read. So when we press the button, we’re gonna also press the mouse and then we should see the serial print and we should see a one in the serial monitor.
Arduino Mouse Control conclusion
See the video to watch an example of how using a combination of these mouse libraries allowed me to execute a super helpful automated task for something I’ve been developing in Python recently.
 Well, thank you so much for working through this lesson with us, I hope you’ve found it helpful!


hello I have a problem for this project I used an arduino mkr1000 and the mouse does not click yet the software does not show me any error
i use arduino-1.8.18
Arduino SAMD Board v1.8.12
Mouse v1.0.1
Have you changed the code at all? Or are you using the same code?
Can you leave the code as text so I can copy it?
I would like to have the code as text too.