VEML7700 Light Sensor for the ESP32 [Guide + Code]
- VEML7700 Spectral Response
- Wiring up your VEML7700
- Programming the ESP32 to use the VEML7700
- Configuring your VEML7700
- Viewing VEML7700 Data
- An Example Using Light Data
The VEML7700 ambient light sensor (ALS) is a ”high accuracy ambient light sensor with I2C interface” that’s “close to real human eye response”. It outputs brightness, and can be interfaced with microcontrollers like the ESP32.
This tutorial will guide you through the process of wiring up the VEML7700 sensor to an ESP32 and programming it to read brightness values.
If you do not already have a VEML7700, you can cheaply obtain one on a breakout board from many different online sources.
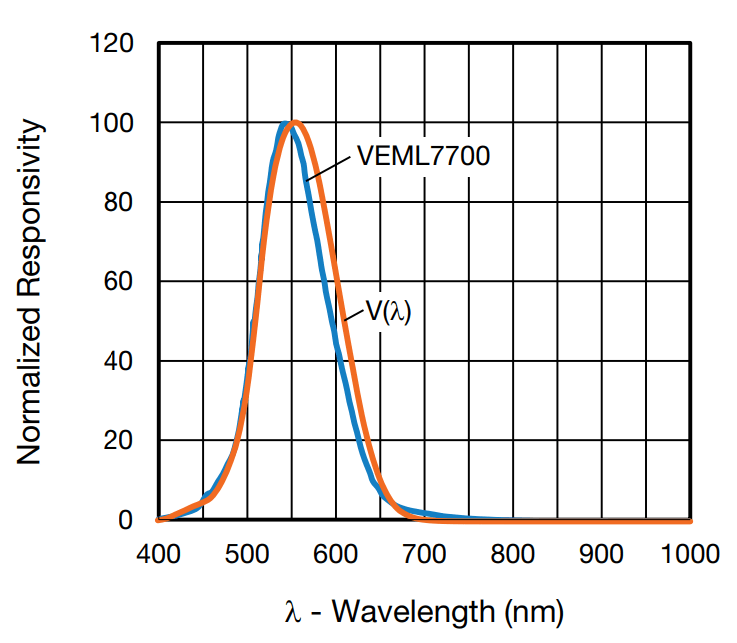
VEML7700 Spectral Response
Electronic sensors can typically see a very broad spectrum of light, including wavelengths that the human eye cannot see. While this can have many benefits, the disadvantage is that sensors can sometimes react in unexpected ways. For example, you may want a device (such as a TV) to adjust brightness based on lighting conditions. However, it could annoyingly fluctuate in brightness with invisible infrared light, even though visible light in the room remains constant.
To resolve this issue, the VEML7700 was designed to “see” just as your human eye can see. Meaning, it is sensitive to visible light frequencies while “blind” to all others. From the datasheet:
Wiring up your VEML7700
The VEML7700 communicates with the ESP32 through I2C, a microcontroller communication standard that uses 4 wires (two communication lines, power, and ground). The supply voltage Vdd should not exceed 3.6V, and the I2C lines should be pulled up to Vdd through two 2.2K resistors as shown in the diagram below:
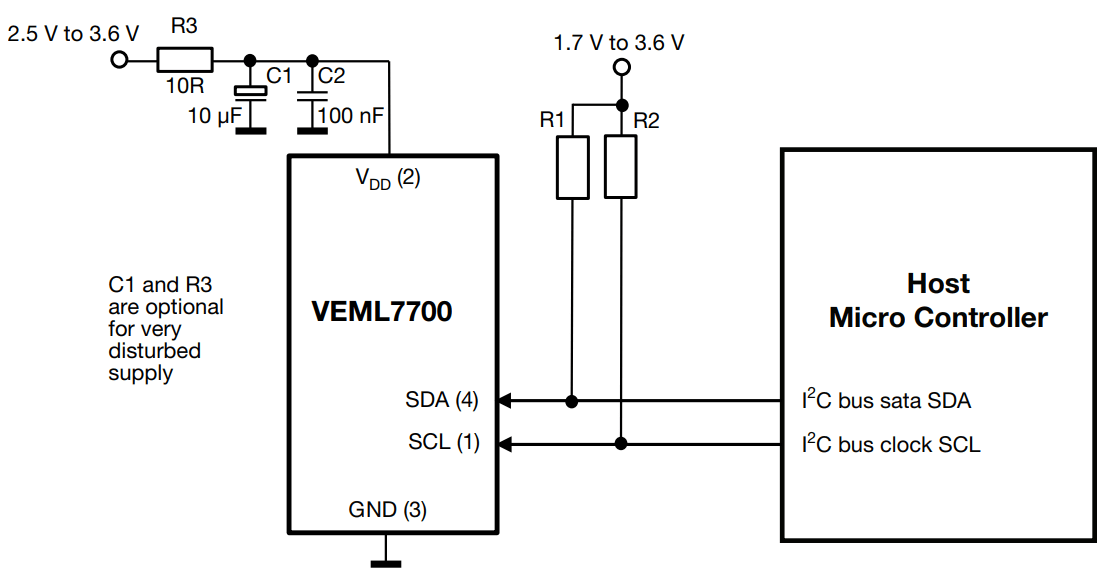
Here is a link to the VEML7700 data sheet for additional information.
Programming the ESP32 to use the VEML7700
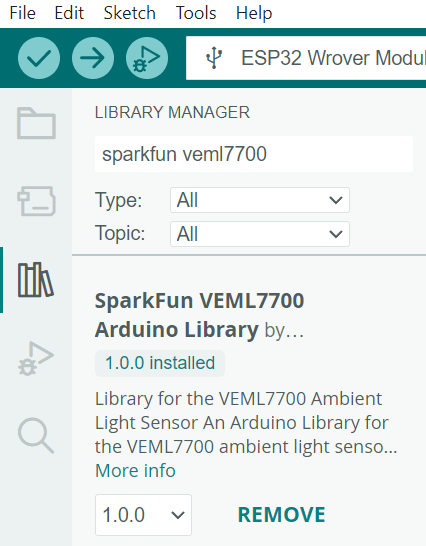
To get started with the VEML7700, you will first need to install a library to use it. Within the Arduino GUI, go to the Library Manager and search for “sparkfun veml7700,” and download the one as shown in the following image.
After downloading, within the the Arduino IDE go to:
File => Examples => SparkFun VEML7700 Arduino Library => Example1_getLux
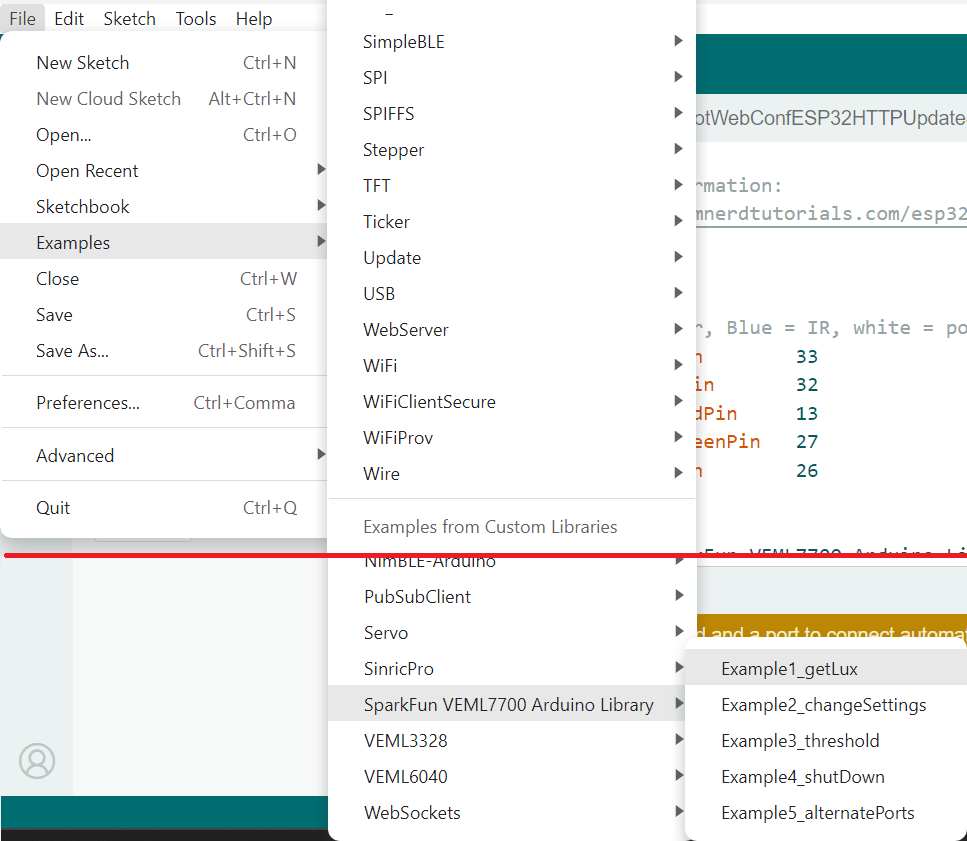
Note: you can optionally download the SparkFun VEML7700 library on github.
Optionally, after downloading the VEML7700 library, open a new sketch and copy/paste in the below test code. After running your code to confirm it works, the following section we’ll go over how to configure and visualize the output data.
#include <SparkFun_VEML7700_Arduino_Library.h>

VEML7700 mySensor; // Create a VEML7700 object

void setup()

  {

  Serial.begin(115200);

  //mySensor.enableDebugging(); // Uncomment this line to enable helpful debug messages on Serial

  // Begin the VEML7700 using the Wire I2C port

  // will return true on success, or false on failure to communicate

  if (mySensor.begin() == false)

    {

    Serial.println("Unable to communicate with the VEML7700. Please check the wiring. Freezing...");

    while (1);

    }

  Serial.print("nLux:");

  }

void loop()

  {

  // Read the lux from the sensor and print it

  Serial.println(mySensor.getLux(), 4);

  delay(250);

  }
Configuring your VEML7700
This light sensor allows for several configurations which are accessible through its command register. This library can access and edit these command register configuration bits through the following functions. Optionally, if desired, place any of these configuration lines into your setup() function:
//The default integration time is 100ms.

//Possible values are:

//VEML7700_INTEGRATION_25ms

//VEML7700_INTEGRATION_50ms

//VEML7700_INTEGRATION_100ms

//VEML7700_INTEGRATION_200ms

//VEML7700_INTEGRATION_400ms

//VEML7700_INTEGRATION_800ms

//Let's change the integration time to 50ms:

mySensor.setIntegrationTime(VEML7700_INTEGRATION_50ms);

//Confirm the integration time was set correctly

Serial.print(F("The sensor integration time is: "));

Serial.println(mySensor.getIntegrationTimeStr());

//The default gain (sensitivity mode) is x1

//Possible values are:

//VEML7700_SENSITIVITY_x1

//VEML7700_SENSITIVITY_x2

//VEML7700_SENSITIVITY_x1_8

//VEML7700_SENSITIVITY_x1_4

//Let's change the sensitivity to x2:

mySensor.setSensitivityMode(VEML7700_SENSITIVITY_x2);

//Confirm that the sensitivity mode was set correctly

Serial.print(F("The sensor gain (sensitivity mode) is: "));

Serial.println(mySensor.getSensitivityModeStr());

//We can also change the persistence ptotect number. Default is 1.

//Possible values are:

//VEML7700_PERSISTENCE_1

//VEML7700_PERSISTENCE_2

//VEML7700_PERSISTENCE_4

//VEML7700_PERSISTENCE_8

//Let's change the persistence protect to 4:

mySensor.setPersistenceProtect(VEML7700_PERSISTENCE_4);

//Confirm that the persistence protect was set correctly

Serial.print(F("The sensor persistence protect setting is: "));

Serial.println(mySensor.getPersistenceProtectStr());

Serial.println(F("Lux:tAmbient:tWhite Level:"));
Viewing VEML7700 Data
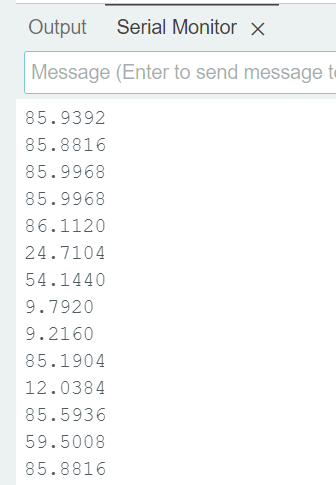
While running the example code, open the Serial Monitor to see the readings from each color channel:
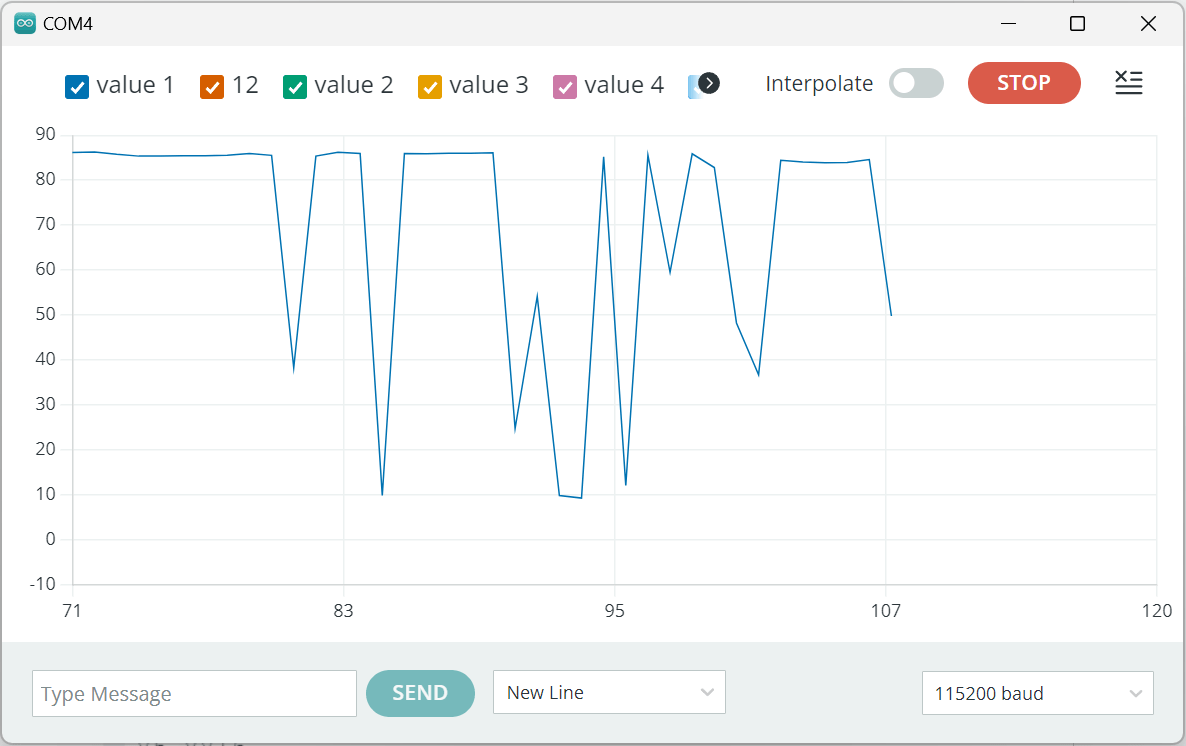
Use the serial plotter for a better viewing experience. The serial plotter can be accessed within the Arduino IDE via:
Tools => Serial Plotter

The below chart is what I got in a low-light room while waving my hand over the light sensor:
An Example Using Light Data
Now that you can read in the light sensor data, let’s have an example of using that data. This below example looks at the light in the room and determines whether it’s bright or dark. Copy/paste this example and run it.
void setup()
{
Serial.begin(115200);
// Begin the VEML7700 using the Wire I2C port
// will return true on success, or false on failure to communicate
if (mySensor.begin() == false)
{
Serial.println("Unable to communicate with the VEML7700.");
while (1);
}
void loop()
{
// Read the lux from the sensor and print it
Serial.println(mySensor.getLux(), 4);
if (mySensor.getLux() > 40)
Serial.println("it's bright");
else
Serial.println("it's dark");
delay(250);
}
The expected output, while turning my room lights off and on:


