A Practical Guide to ESP32 Deep Sleep Modes
ESP32 deep sleep modes can be the best method (and the easiest to implement!) for increasing the battery life of your IoT projects.
The gains you can make by putting your ESP32 to bed are massive (just look at the power consumption chart below).
We’re not talking about extending battery life by a 1.5 times or 3 times, we’re talking exponential power savings! (By literally using a couple lines of code…)
Think about your battery life as a budget. You can only spend so much before you go broke (and if you go broke, how you gonna feed the babies?)
You’ll want to be as frugal as possible with what you spend!
The ESP32’s deep sleep mode is a coupon you can apply to all your purchases that is going to save you massive cash battery life.
In this lesson you will learn:
- The basics of the ESP32s Deep Sleep
- Why you should be using Deep Sleep (if we haven’t already convinced you!)
- Code flow for thinking about your deep sleep programs
- A line-by-line code walk through of putting your ESP32 into Deep Sleep
- Deep Sleep challenges
- Tips for extending battery life even longer
ESP32 Deep Sleep
Power efficiency is a key factor to think about when making an Internet of Things (IoT) project.
The ESP32 microcontroller, which is recognized for its adaptability and power, has a unique function called deep sleep mode.
It’s this functionality (and its ease of implementation) that (among other things) make ESP32s a fantastic option for battery-powered applications.
In deep sleep mode, the ESP32 considerably lowers its power consumption while maintaining a number of crucial features.
It achieves this by shutting off the majority of components, in contrast to conventional sleep modes that merely halt the CPU.
More Benefits to Deep Sleep than meets the eye
We could simply say that the deep sleep mode helps the ESP32 consume less energy, but we couldn’t help ourselves from building a chart to show the ways deep sleep makes an application go from good to better to best:
| Benefits of ESP32 Deep Sleep modes | |
|---|---|
| Energy conservation | The extraordinary energy efficiency of deep sleep mode is its defining benefit. The ESP32 can increase the operating longevity of battery-powered devices by consuming just microamps of electricity, lowering the frequency of charging or battery replacements. |
| Longer battery life | The ESP32 is the best option for devices like wearables, remote sensors, and other low-power applications since deep sleep mode greatly lengthens the intervals between battery charges. |
| Maintained functioning | Deep sleep doesn’t mean that all activities stop completely. Even in low-power situations, crucial features like the RTC (Real-Time Clock) and some timers continue to work, making it easier to complete planned activities. |
| Reduced energy (heat) dissipation | Heat production is minimized in deep sleep mode when power consumption plummets. This feature is very helpful for applications that need to run for a long time without building up too much heat. |
| Eco-Friendly | Deep sleep mode encourages eco-friendly design strategies by optimizing power consumption, reducing energy waste, and adhering to sustainable development standards. You might even end up on Santa’s nice list. 😉 |
ESP32 Deep Sleep Power Consumption Chart
The ESP32 power consumption in deep sleep mode varies, ranging from 0.15 mA to 150 µA when the Ultra-Low-Power coprocessor is active.
Check out this table made from data in the ESP32 data sheet:
| Mode | Description | Power Consumption |
|---|---|---|
| Active (RF) | The chip radio is powered up. The chip can receive, transmit, or listen. All systems GO! | 95-240 mA |
| Modem-Sleep | The CPU is operational and the clock is configurable. Wi-Fi/Bluetooth disabled. Radio silence. | 20-68 mA |
| Deep Sleep | The Ultra Low Power coprocessor is functional. RTC can still work. Enter Sandman. | 10 µA - 150 µA (note the unit change!) |
What’s On and Off in Deep Sleep modes?
As you can tell from the chart above, the way the ESP32 is saving so much power in Deep Sleep mode is by shutting things down.
The core CPU is turned off in this low-power state so that the ULP Coprocessor can handle sensor readings (if configured) and wake up the CPU as needed.
This mode is also known as the ULP sensor-monitored pattern.
It is especially useful for applications that require the CPU to wake up in response to timers, external events, or a combination of such events, all while consuming the least amount of power.
The primary memory is deactivated in deep sleep mode, erasing all of its data and making it unreachable. This has big implications for how you’ll write your Arduino program (which we’ll address below).
Even though the chip is in this low-power state during deep sleep, the Real Time Clock (RTC) memory is still functioning and keeping its data.
Therefore, before going into deep sleep, the chip stores crucial Wi-Fi and Bluetooth connection data in RTC memory to make sure it can be accessed and used when it wakes up.
The following table shows individual unit states in an ESP32 when it is in deep sleep mode:
| Unit | Status (ON/OFF) |
| ULP Co-processor | Variable |
| RTC and Peripherals | ON |
| WIFI | OFF |
| Bluetooth | OFF |
| Peripherals | OFF |
| ESP32 Core and Memory | OFF |
We may have sold you on Deep Sleep modes, but what about waking up? That’s important too!
How Do I Wake Up My ESP32 after it’s in deep sleep?
There are a number of ways to wake up an ESP32 from Deep Sleep – in fact it’s something you need to specify BEFORE you put your board to bed.
| ESP32 Deep Sleep Wake Up Method | Description |
| Timer | We use a built in RTC timer to wake up the ESP32 at a given interval. |
| Touch wake up | We use one of the capacitive touch pins on the ESP32. |
| External Wake Up | Use some external input to wake up the ESP32. |
In this lesson, we’ll show you how to use the internal RTC timer to wake up the ESP32 at set intervals. If you’re interested in learning about touch and external wake ups, we’ll have lessons on those shortly!
Let’s talk code flow for your sleepy ESP32
Below we have put together the near absolute minimum Arduino code you’ll need to put your ESP32 into deep sleep mode (What can I say, I’m a fan of getting to the essentials).
But there is this one weird thing you’ll notice pretty quickly…there is no code in the Arduino loop function!
Wait…What?! No code in loop? How am I supposed to write a program?

Here’s the deal. When we put the ESP32 into Deep Sleep, once it wakes up the board is reset.
That means the code doesn’t start from some point in the loop where you “put it to sleep”. Instead, it starts at the top of the setup() function and runs like you just pressed the reset button. It’s not exactly the same as pressing the reset button, but from a functional point of view it’s close enough.
So in this example sketch, all the code you’ll add will be in the setup before you put this baby to rest.
That means all the tasks you need your board to do will happen in setup(). So you can start up WiFi or Bluetooth, read sensors, send a message, whatever – but as soon as you’re done with that – it’s off to bed!
Any data that you didn’t store in EEPROM or Flash memory before you went to bed, is going bye-bye!
This might sound odd, but remember, we are trying to maximize sleep time to maximize our battery life.
Now that you have an idea for what’s in store, let’s look at this minimum code…
Minimum Arduino Code for ESP32 Deep Sleep
Here is the full code you’ll need to get your ESP32 into Deep Sleep mode. Take a look at this, and then we’ll walk through it step-by-step…
int TIME_TO_SLEEP = 5;                        // Time ESP32 will go to sleep (in seconds)

unsigned long long uS_TO_S_FACTOR = 1000000;  // Conversion factor for microseconds to seconds

RTC_DATA_ATTR int bootCount = 0;              // Number of reboots

void setup() {

  /****  Do your stuff here! ****/

  Serial.begin(115200);                                 // Start serial communication at 115200 baud rate

  ++bootCount;                                          // Add 1 to the current value of bootCount

  Serial.println("Boot number: " + String(bootCount));  // print the value of bootCount on the serial monitor

  Serial.println("Going to sleep now");                 // Print when the ESP is about to go into deep sleep mode

  /* Now we wrap up for Deep Sleep - I hope you did everything you needed to... */

  esp_sleep_enable_timer_wakeup(TIME_TO_SLEEP * uS_TO_S_FACTOR);  // Set up timer as the wake up source and set sleep duration to 5 seconds

  Serial.flush();                                                 // Waits for the transmission of outgoing serial data to complete.

  esp_deep_sleep_start();                                         // Start the deep sleep mode

}

void loop() {

  // This is not going to be called

}
Declare required variables (before setup)
The first variable we declare is TIME_TO_SLEEP which is the time, in seconds, we want the ESP32 to go into deep sleep mode for.
int TIME_TO_SLEEP = 5;  // Time ESP32 will go to sleep (in seconds)

unsigned long long uS_TO_S_FACTOR = 1000000;  // Conversion factor for microseconds to seconds
As the ESP32 times its deep sleep mode in microseconds, the second variable we declare is uS_TO_S_FACTOR which is a factor to convert the time in seconds to microseconds.
The last variable we declare is bootCount, which is a counter for how many times the ESP32 has booted.
RTC_DATA_ATTR int bootCount = 0; // Number of reboots
Note that while declaring the bootCount variable, we added the prefix RTC_DATA_ATTR. This saves the value of bootCount in the RTC memory, which is not wiped during deep sleep mode.
Do what You Need to Do
The next bit of code is what we want our ESP32 to do while it is awake. In our case, it’s simply starting Serial Communication, incrementing the boot count, and then sending a couple messages to the Serial monitor window:
void setup() {

  /****  Do your stuff here! ****/

  Serial.begin(115200);                                 // Start serial communication at 115200 baud rate

  ++bootCount;                                          // Add 1 to the current value of bootCount

  Serial.println("Boot number: " + String(bootCount));  // print the value of bootCount on the serial monitor

  Serial.println("Going to sleep now");                 // Print when the ESP is about to go into deep sleep mode

  /* Now we wrap up for Deep Sleep - I hope you did everything you needed to... */
Set wake-up source and sleep duration
As mentioned earlier, there are several different ways to wake up your ESP32 from deep sleep, but in this lesson we cover using the RTC timer.
The key function to do this is the esp_sleep_enable_timer_wakeup() function which takes the time to sleep in microseconds. You heard me right folks – microseconds.
That’s why we are using the microsecond to second conversion variable to make it more intuitive to calculate.
// Set up timer as the wake up source and set sleep duration to 5 seconds
esp_sleep_enable_timer_wakeup(TIME_TO_SLEEP * uS_TO_S_FACTOR);
Depending on the demands of your application, the sleep time might be anything from a few milliseconds to several hours.
The documentation on the esp_sleep_enable_timer_wakeup is not very clear about the maximum deep sleep time, but from what I gather from searching the interwebs, it’s at least 12 hours!
Prepare for sleep
Once you’ve set the wake up source, now you need to do your housekeeping and make sure everything is wrapped up for sleep.
If there are any peripheral devices connected, before going into deep sleep, take the appropriate safety measures, including turning off any unused peripherals, closing any open connections, and putting sensitive information in non-volatile memory to prevent loss during the low-power stage.
In this example, we do not have any devices connected to the ESP32 board, and we have already instructed the ESP32 to save the bootCount variable in the non-volatile RTC memory. However, we need to clear out the serial port.
Serial.flush(); // Wait for the transmission of outgoing serial data to complete.
Enable ultra-low power mode
Call me a geek, but something about “ultra-low power mode” sounds like a line from a great sci-fi movie.
In one line, we can put our ESP32 to sleep:
esp_deep_sleep_start(); // Start the deep sleep mode
This gets the microcontroller switched to Deep Sleep power-saving mode and completes our work.
It’s worth noting that esp_deep_sleep_start() can fail, and if it does will return an error.
According to the documentation, this function generally never returns (because the device goes to sleep when it works!), but if it does fail, it can be from the sleep interval being too short.
The documentation is unclear as far as the minimum interval you can deep sleep an ESP32 – your guess is as good as mine 😀.
Step-by-Step of loading a deep sleep sketch for an esp32
It’s one thing to read about Deep Sleep code, it’s another to try it yourself!
Let’s go step by step through the entire process…
Prerequisites
- Make sure you have the latest version of the Arduino IDE installed. Any version of the Arduino IDE will work fine.
- The ESP32 board package needs to be installed in the Arduino IDE. You can follow this lesson to add ESP32 boards to your Arduino IDE 2.x, or this lesson if you have Arduino IDE 1.x.
Step-by-Step Instructions
- Launch the Arduino IDE
- Connect the ESP32 board to your computer with a USB cable.
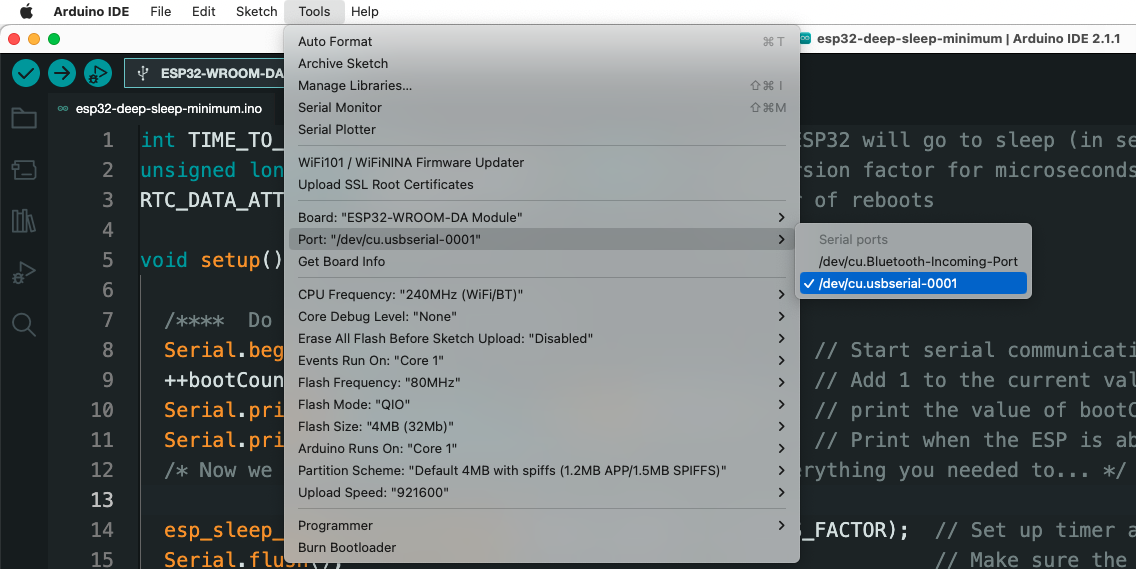
- From the Tools menu, select the board according to which board you are using. For me, it was the ESP32 Dev Module.

Arduino IDE 2.x - Select the Serial Port to which the ESP32 is connected.
- If you see multiple ports (usually shown as COM if you’re on a PC, or dev.cu on a mac) and you’re unsure which one corresponds to your ESP32 board, that’s fine. Simply disconnect the ESP32 board from the computer and open the Tools menu again. Whichever option was available before and is not available now in the menu is the serial port your ESP32 board was connected to. Connect it again and choose that serial port.
Arduino IDE 2.x
- If you see multiple ports (usually shown as COM if you’re on a PC, or dev.cu on a mac) and you’re unsure which one corresponds to your ESP32 board, that’s fine. Simply disconnect the ESP32 board from the computer and open the Tools menu again. Whichever option was available before and is not available now in the menu is the serial port your ESP32 board was connected to. Connect it again and choose that serial port.
- Paste the code provided above in the Arduino IDE… OR better yet, type it out yourself! This will get you more familiar with the functions and process of putting an ESP32 into deep sleep.
- After selecting the appropriate board and port, upload the code either by clicking the upload button in the top left corner of the window (or by pressing Ctrl+U on a PC or Cmd + U on a mac).
- When the code is uploaded, open the Serial Monitor window either by clicking on the Serial Monitor button in the top right corner of the window or by pressing Ctrl+Shift+M PC or Cmd+Shift+M on a mac. The Serial Monitor will show something similar to this:

Arduino IDE 2.x
You should see the boot number, which is the number of times the ESP32 has started. The first boot is the default boot, which occurs when the ESP32 is powered. Every boot after that is triggered by the wake up timer.
Voila! You’ve earned yourself (and your ESP32) a good night’s sleep!
Try on Your Own Challenges
OK, now that you have the minimum code written to sleep an ESP32 it’s time to try and push your limits some. Give these challenges a try and see how it goes.
- Write a program that puts an ESP32 into Deep Sleep, and wakes up every 30 seconds to blink an LED once.
- Write a program that turns on an LED using digitalWrite() and then puts the ESP32 into deep sleep. What happens to the LED? Does it stay lit, or turn off? What’s your hypothesis?
- Write a program that puts an ESP32 into deep sleep, but after the esp_deep_sleep_start() function call, write some code that blinks an LED. Will that code ever get executed? What’s your best guess?
Things to Consider about Deep Sleep
Although deep sleep mode has many advantages, there are a number of difficulties and things to take into account.
| Wakeup latency | There may be a delay between the wakeup event and the microcontroller being fully operational, depending on the wakeup sources and the intricacy of the wakeup algorithm. Real-time responsiveness may be impacted by this lag. |
| Data integrity | It’s crucial to save important information in order to prevent data loss while you’re sleeping deeply. In low-power circumstances, using non-volatile memory like Flash memory or EEPROM protects crucial information. |
| Clock accuracy | Long stretches of deep sleep can cause clock drift, which reduces the accuracy of the microcontroller’s internal clock. Applications that depend on accurate timing or synchronization may be impacted by this drift. |
| Debugging | Debugging deep sleep apps might be more difficult than normal. Effective low-power state problem diagnosis may require using lower level functions not available in the Arduino IDE, but the native ESP-IDF. |
Improving the Deep Sleep Mode
Although deep sleep mode automatically saves power, there are a number of ways to improve its use. Applying some of these techniques can help you extend your battery life even longer.
Make A plan: Reduce the number of times your application wakes up by making a plan. Plan your wake-ups carefully and at the right times to avoid reducing the power-saving effects of deep sleep.
Batch Transmissions: If your application requires data transmission, you might want to gather and organize data before going to sleep. For example, if you have several data points that need sent to the cloud, you’d want to read and send them all in the same wake cycle. This method lessens the number of wake-ups, letting the ESP32 remain in ultra-low power mode for longer.
Be Picky: Pick components with reduced standby power requirements. Choose peripherals or external sensors that are built with power efficiency in mind when integrating them.
Shutdown Peripherals: Before going into deep sleep, be sure that any unused peripherals are correctly turned off (for example, close a serial connection to a sensor connected over an additional serial port). Energy loss through inactive components is reduced as a result.
Finish What You Started: To save the most power, use effective programming techniques to avoid bugs in your code – like closing unused connections (for example, a connection to a WiFi client), appropriately deallocate memory, and stop code from initiating unintentional wake-ups.
If you’d like us to go in depth on any of the points above, just let us know in the comments and we’ll see if we can make some specific examples to demonstrate
Real-Life Applications for Deep Sleep
You’ve probably got your own uses for the ESP32’s Deep Sleep mode, but just in case you’re wondering, we put together a chart!
As you can see, the ESP32 Deep Sleep mode adds a layer of adaptability that makes it suitable for usage in a wide variety of real-world applications:
| ESP32 Deep Sleep Real-World Applications | |
| Environmental Monitoring | Devices that monitor the environment, like weather stations and air quality sensors, can take advantage of deep sleep mode to occasionally wake up, collect data, and communicate it while consuming less energy over time. |
| Home automation | In the world of smart homes, deep sleep mode can benefit motion sensors, door/window monitors, and light controls, ensuring that essential operations are maintained while reducing energy usage. |
| Wearable devices | Health and fitness monitors that are wearable require constant monitoring while maintaining battery life. These wearables can save energy by effectively gathering and sending data when in deep sleep mode. |
| Asset tracking | To improve battery life and lessen the need for regular recharging, devices that track assets or vehicles occasionally transmit their whereabouts when in deep sleep mode. |
| Industrial IoT | Sensors and controllers in industrial environments frequently need sporadic data gathering and transmission. These gadgets can maintain functionality while using less power thanks to deep sleep mode. |
Where to go from here
If you want to jump start your Arduino program, then I think you’ll find our training program extremely useful. It goes in depth on how to program Arduino, how to use external code libraries, and much more.


