Enable your ESP32 to play MP3s
- Why Sound Playback?
- Wiring the DFRobot Mini Player
- Installing The DFRobot MP3 Library
- Put some MP3s on your Player
- Create your own voice files
- First Example Sound Playback Program, Demo #1
- List of Playback Commands
- Example Demo #2 for your ESP32
- Still need help?
This tutorial will teach you how to get your ESP32 to play music, talk back to you, sound an alarm, and even make inappropriate body noises!
Why Sound Playback?
I can think of an infinite number of projects that involve sound playback. Everything from an alarm system, a music player, data sound feedback, halloween props and gags, a talking doorbell, or in my case, a talking robot.
The basic idea is that your ESP32 has an event, such as a sensor detecting something, and then a specific sound is played back. My long term goal is to talk to my robot using voice recognition (link to voice recognition tutorial here), and then it can talk back via pre-recorded sound files.
So, let’s get started!
Getting Started with Hardware
There unfortunately weren’t many beginner friendly sound playback products out there. Ideally I wanted something controllable via I2C and with a built-in speaker port connector, but I couldn’t find anything of this sort. But I did find one that uses UART (include link to a UART tutorial here).
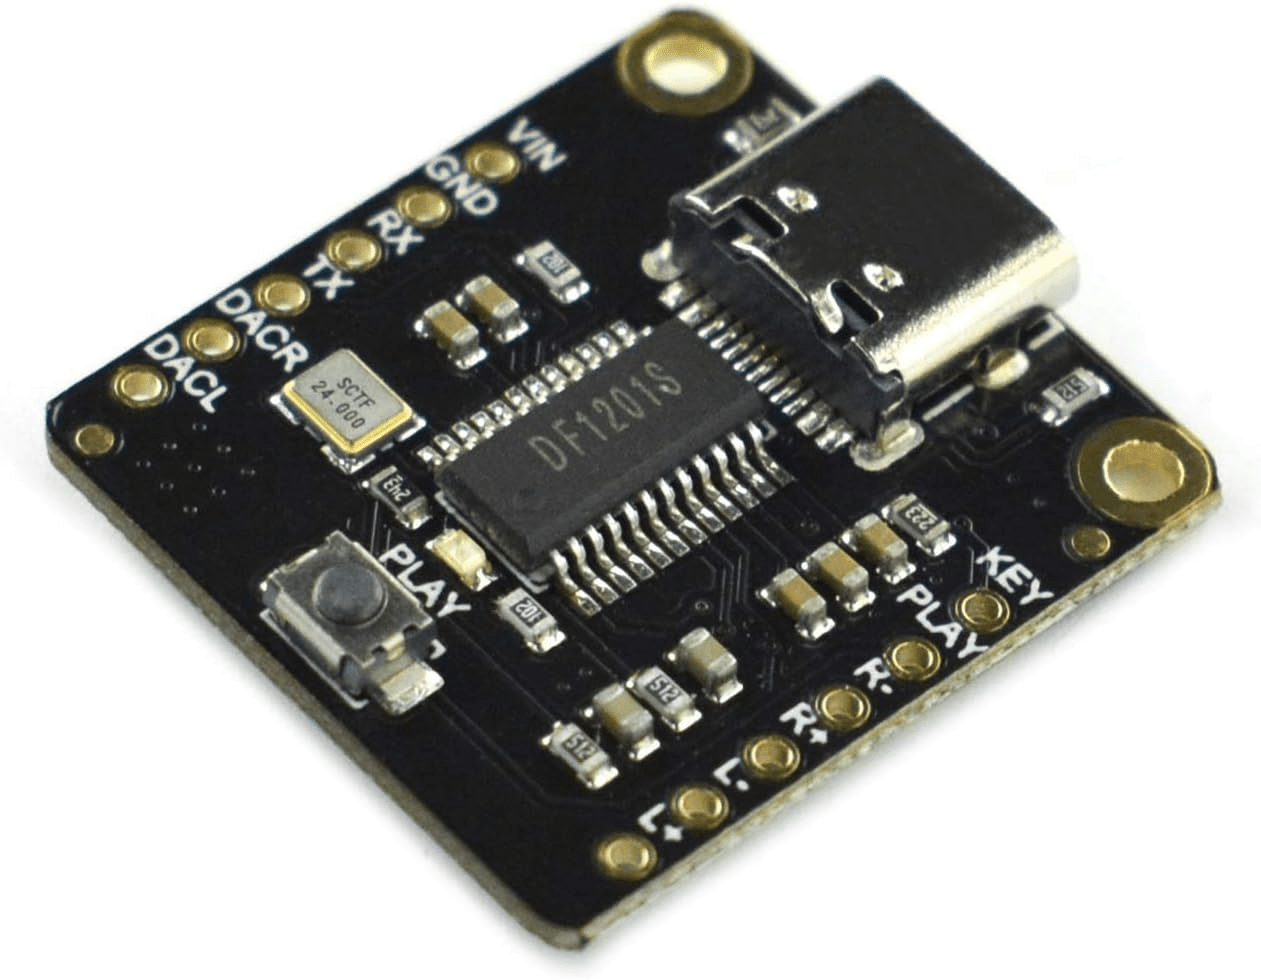
For this project, I chose to use the
DFRobot MP3 Player for Arduino (Amazon)
DFRobot MP3 Player for Arduino (website)
I encourage you to look at their tutorial for the Arduino, but it won’t be necessary for our following ESP32 projects.
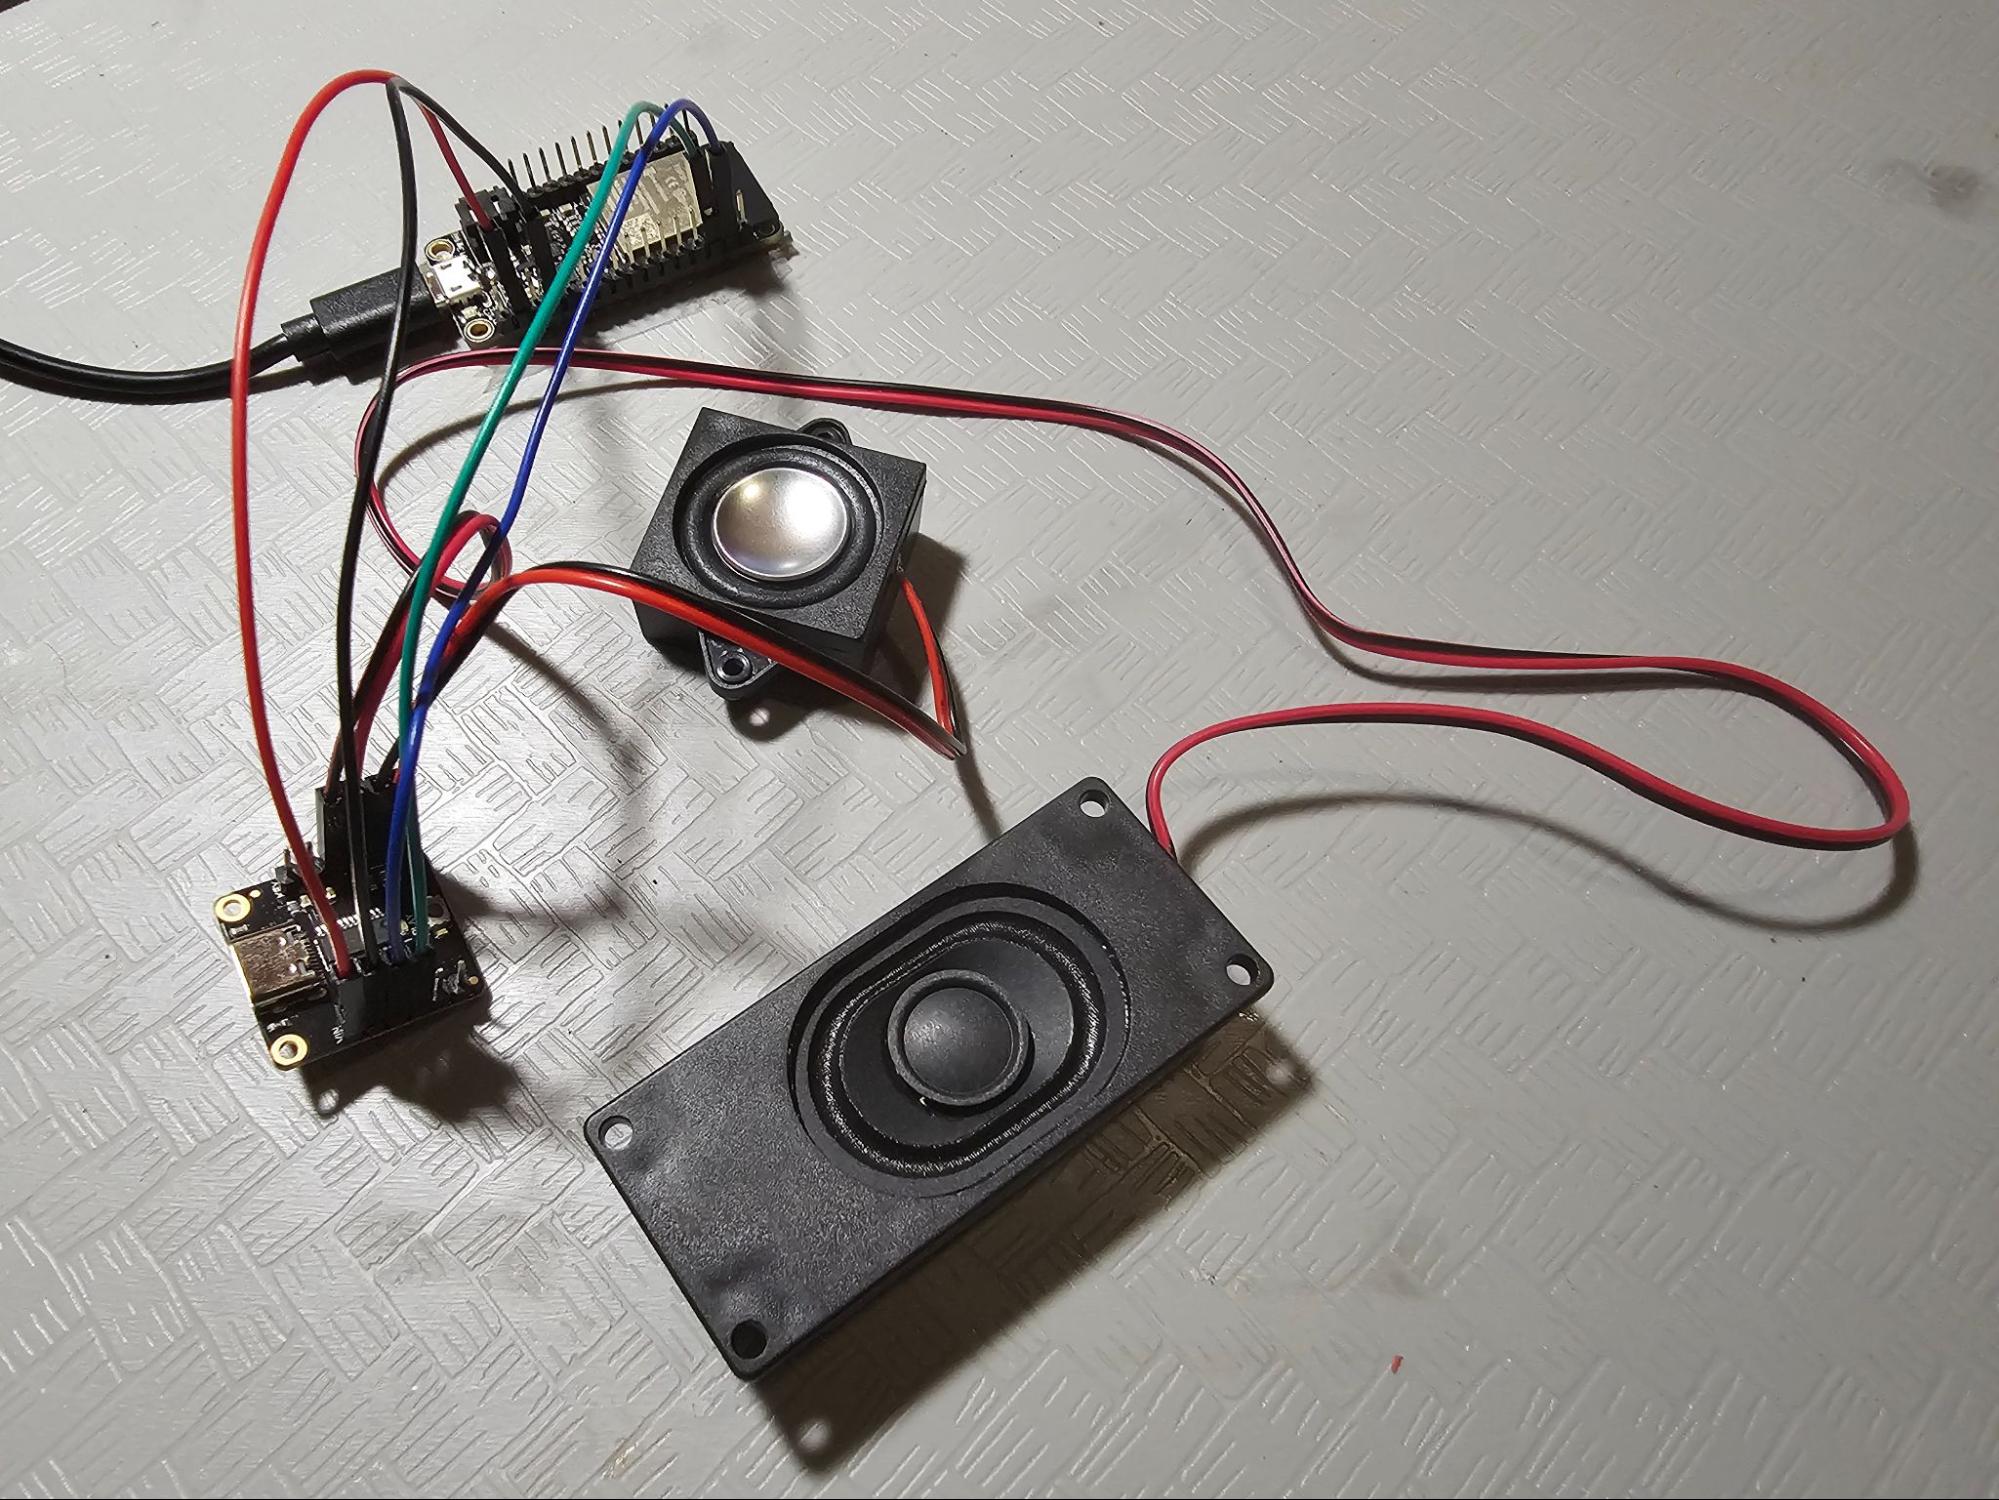
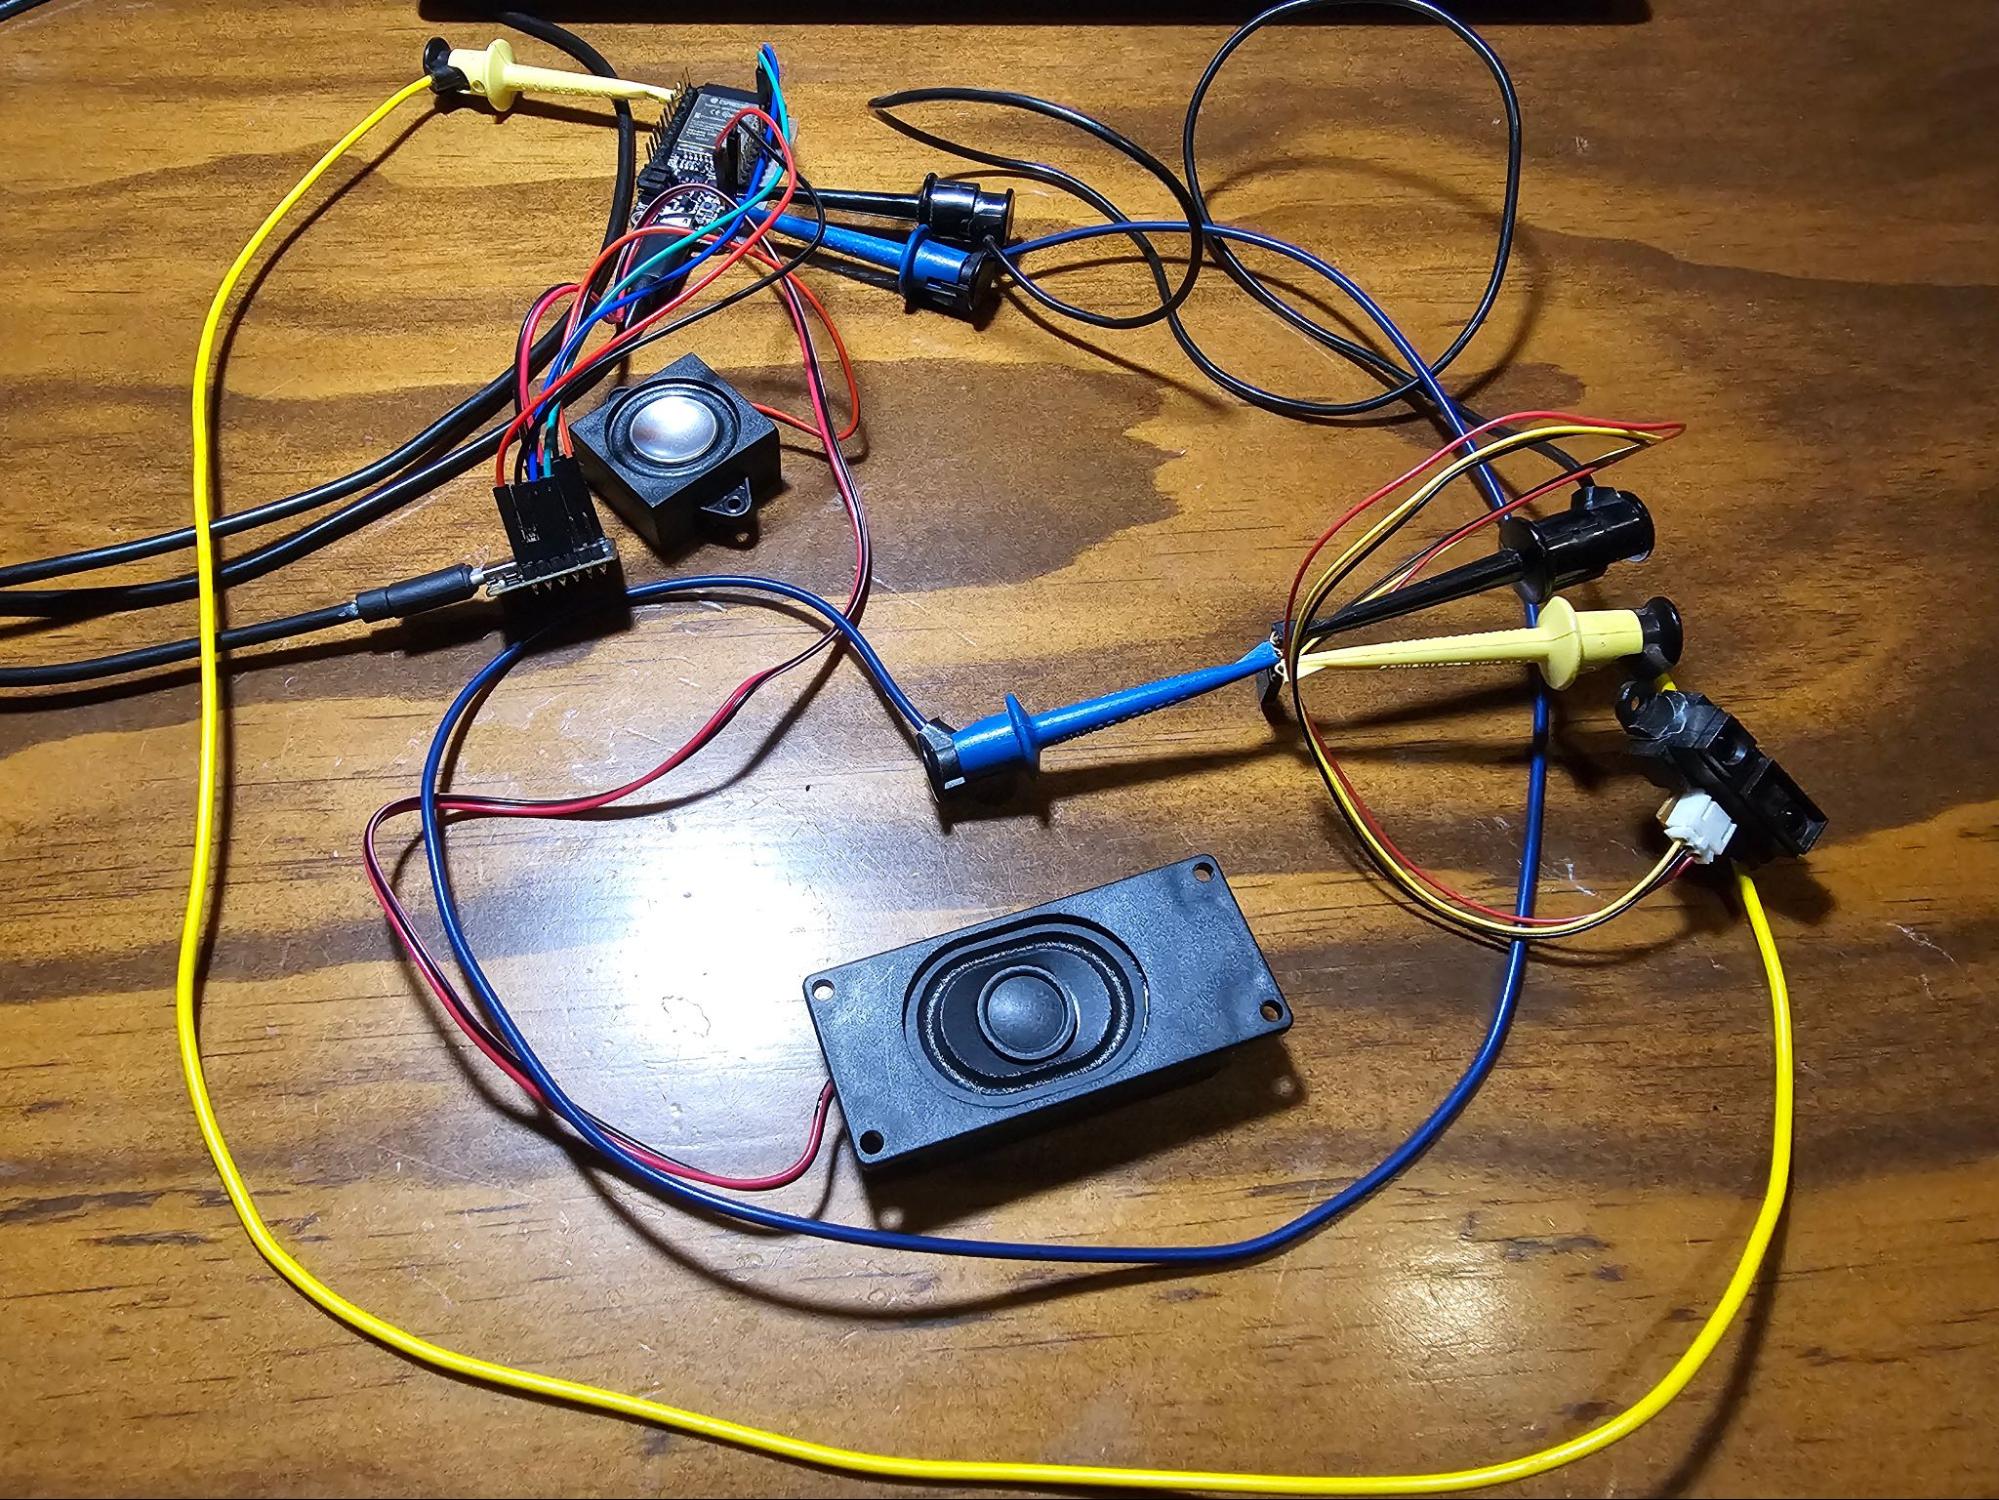
You’ll also need some speakers, such as this set of speakers from Amazon. The DFRobot tutorial suggests 4Ω 3W speakers. I tried both 8Ω (below left image speaker) and 4Ω (below right image speaker), and both subjectively performed the same. Use a bit of double-sided sticky tape or velcro tape to attach them to your project. Or screws.

I created a quickie sound demo so you can hear how it sounds. Check out this below demo:
Yes, I used my voice to create those tracks….
Wiring the DFRobot Mini Player
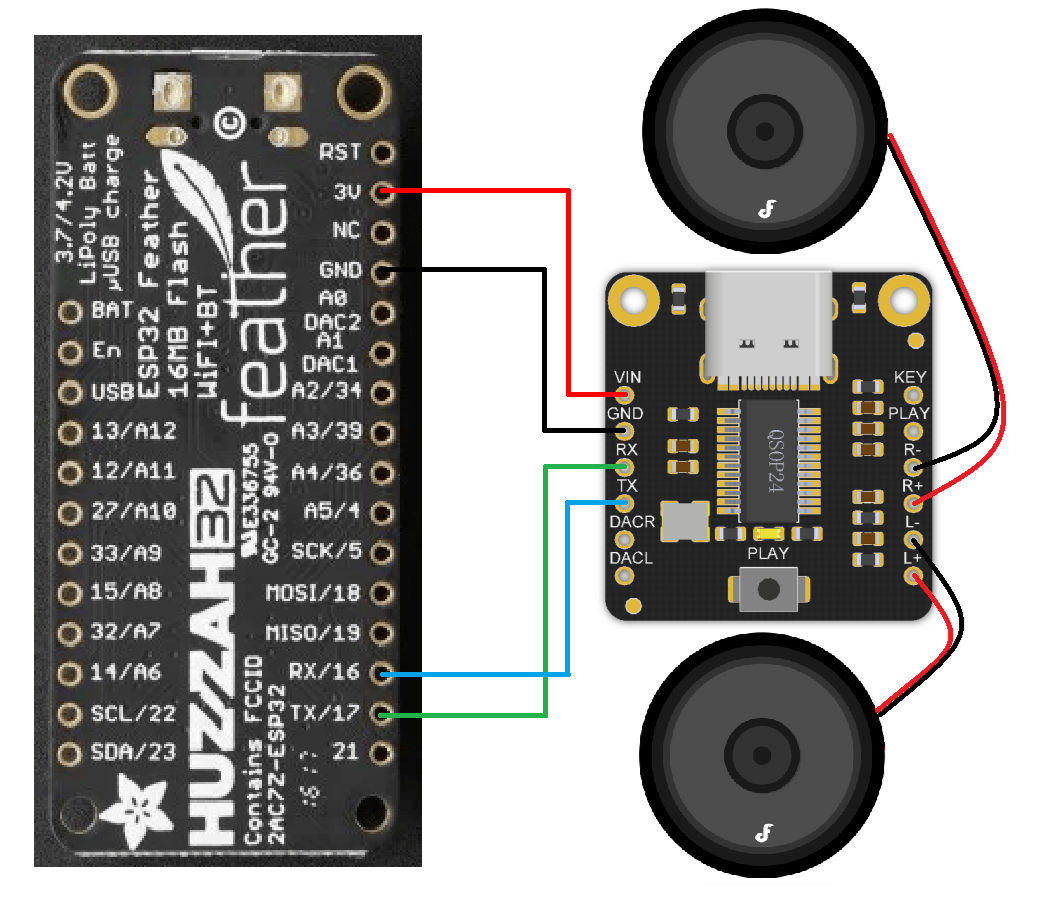
Wiring is straightforward. You got 4 wires going to your ESP32 – 3.3V and ground, plus two wires for UART. Four more wires for your speakers. Finished!
Note: if you don’t have an available UART (serial) port, you can program the ESP32 to use different pins for UART. Read on for more information.
Wiring chart + diagram as follows:
Note: The DFRobot device and speakers use up most available remaining power from the 3.3V regulator. It’s unlikely you can power additional devices using the 3V pin.
| GND | Goes to (-) negative of your battery |
| Rx | Goes to TX pin of ESP32. |
| TX | Goes to RX pin of ESP32. |
| VCC | Goes to 3.3V voltage regulator output from ESP32 board. |
Installing The DFRobot MP3 Library
Now that you got your hardware wired up, let’s get onto the software side of things.
Load up your Arduino IDE, and go to:
Tools => Manage Libraries
and type in DFRobot 1201 into search.
Download and install the library as below:
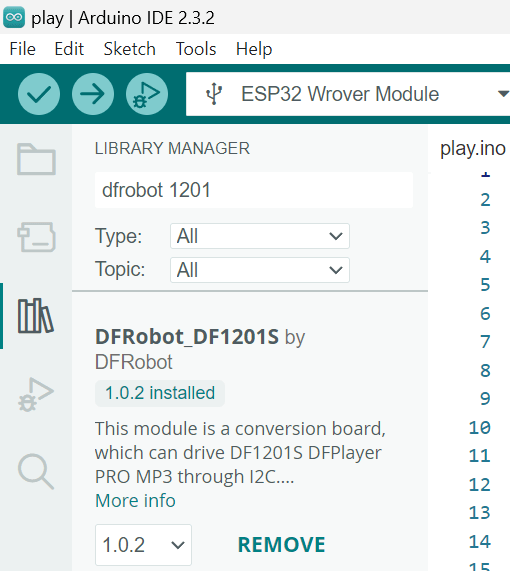
Note: check out the DFRobot_DF1201S library on Github for more info.
Put some MP3s on your Player
Find some MP3s on the internet, or create your own using your favorite sound recording app/software.
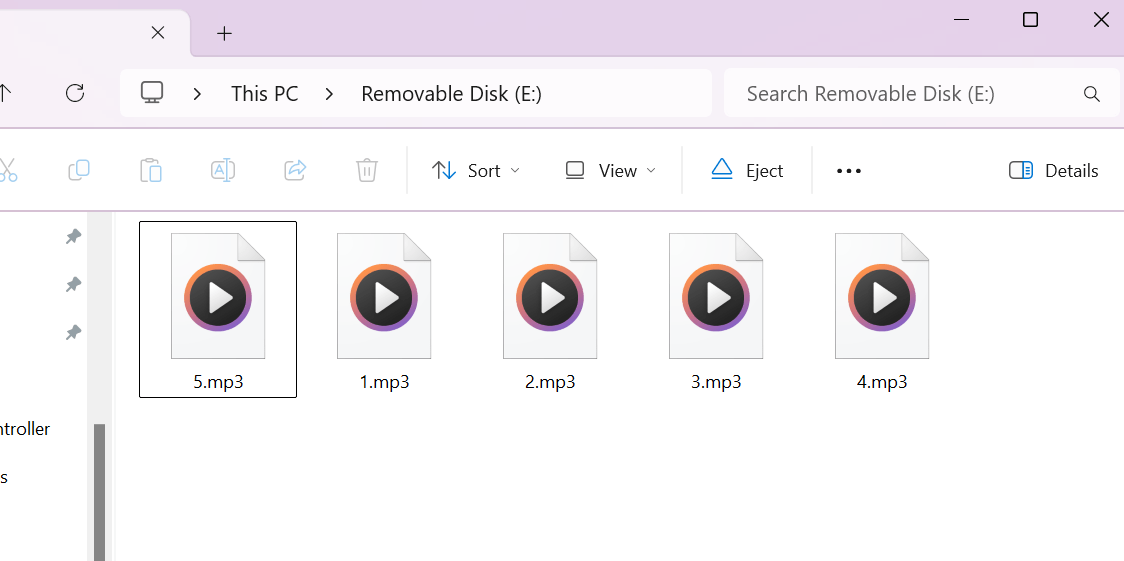
Name the files in numerical order:
01.mp3
02.mp3
03.mp3
Etc.
You can use MP3, WAV, WMA, FLAC, AAC, APE.
IMPORTANT: Before connecting USB, you MUST disconnect 3V from your DFRobot or you risk damaging your ESP32 board regulator.
Connect the DFRobot device to your laptop using USB, open the device folder, then upload the files individually one by one in the same numerical order. You can store up to 128mb.
Note: The average song is 4mb (.mp3) or 25mb (.wav), so you probably won’t run out of memory.
If uploading in numerical order is annoying, The later Demo #3 below demonstrates how to use the DF1201S.playSpecFile() function to instead call files by their filename.
Create your own voice files
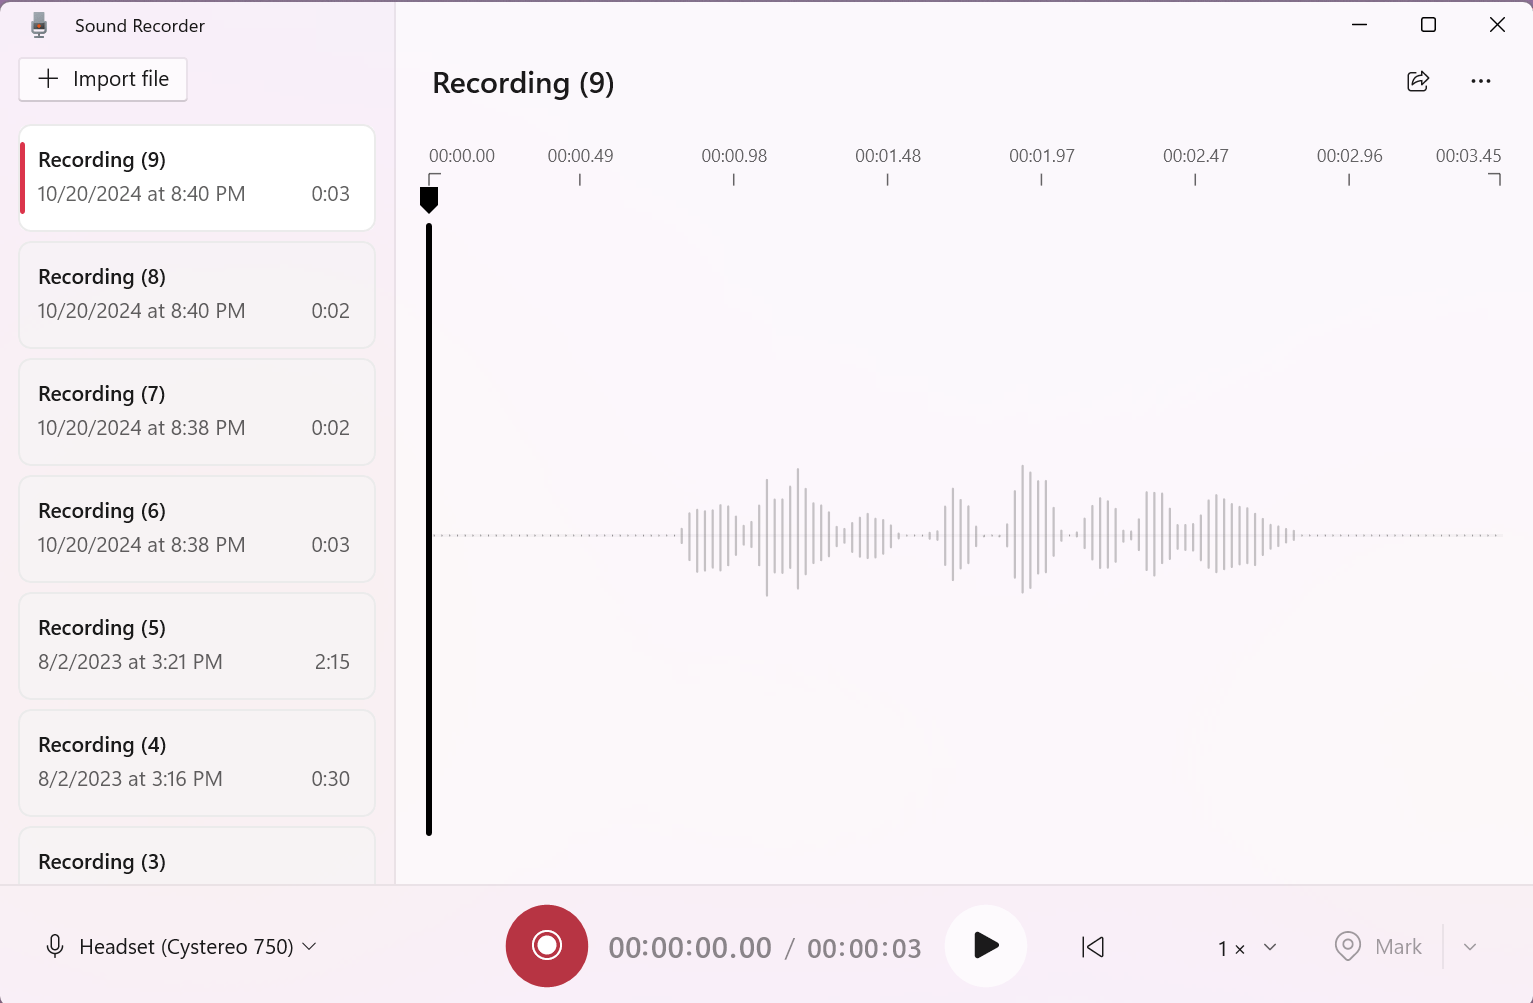
I used a very basic Windows program I found called Sound Recorder that let me speak into my headphones and create voices for this demo. You can also use any online generative AI voice creator that lets you save to a multitude of sound formats.
Some pointers… the .wma format did not work for me on this device. I also found the compression sound quality for .mp3 via Sound Recorder to be absolutely terrible. I got the best results with it by far using the .wav format.
First Example Sound Playback Program, Demo #1
Let’s try out the first built in example program that comes with the library. This will confirm your wiring and let you try it out, and then later we’ll do a more advanced example.
This following example demo program will treat your ESP32 like an MP3 player, jumping through various music tracks.
Go to:
File => Examples => DFRobot_DF1201S => play
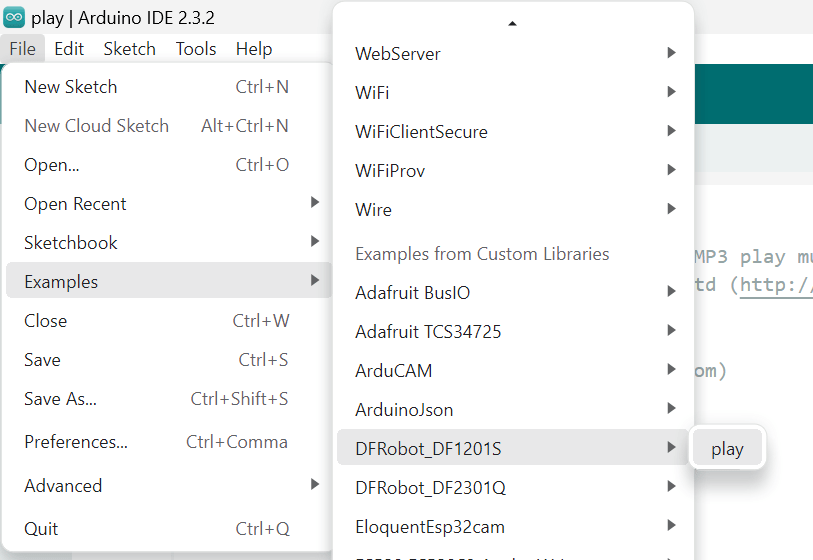
At the very top of setup(), look for this line and change D3 and D2 to match your preferred Rx and Tx pins.
Change this:
DF1201SSerial.begin(115200, SERIAL_8N1, /*rx =*/D3, /*tx =*/D2);
To this:
DF1201SSerial.begin(115200, SERIAL_8N1, /*rx =*/16, /*tx =*/17);
The volume isn’t that loud, either.
Change this:
DF1201S.setVol(/*VOL = */15);
To this:
DF1201S.setVol(/*VOL = */20);
Then, compile and run it on your ESP32. You should be hearing your sound files!
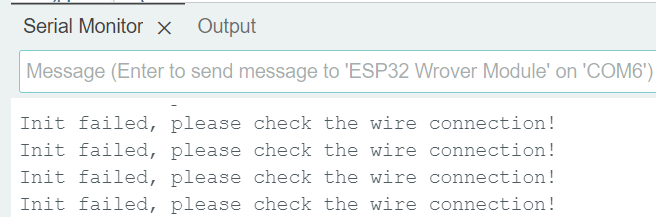
Below is a screenshot of what you should see in Serial in your Arduino IDE when running the demo.
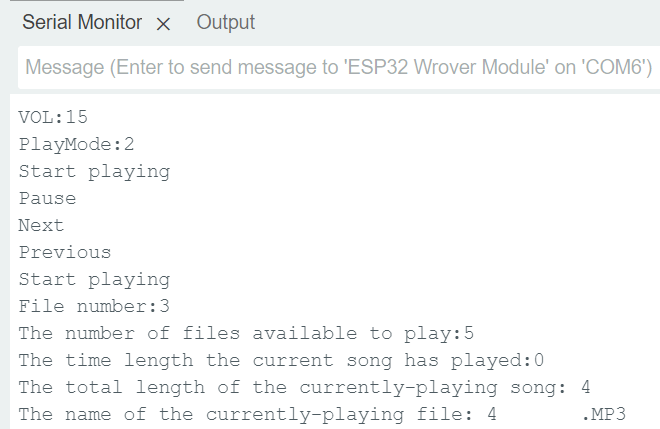
Helpful pointer: If you get the below ‘Init failed’ error, it likely means your Rx and Tx are reversed. Check your wiring.
List of Playback Commands
Quick reference list of commands you can run in code.
See the DFROBOT tutorial for a full list of command words. 140+ commands available!
| command | description |
| DF1201S.setVol(15); | Set volume, 0 to 20. |
| DF1201S.getVol(); | Returns volume as int. |
| DF1201S.switchFunction(DF1201S.MUSIC); | Enter music mode. |
| DF1201S.setPlayMode(DF1201S.ALLCYCLE); | Set playback mode to ‘repeat all’. Other modes are SINGLECYCLE (repeat all songs once), ALLCYCLE (repeat indefinitely), SINGLE (play one song and pause), RANDOM (play randomly), and FOLDER (repeat all in folder). |
| Serial.println(DF1201S.getPlayMode()); | Get playback mode. |
| DF1201S.setBaudRate(115200); | Set baud rate. |
| DF1201S.setLED(true); | Turn on/off power indicator LED. |
| DF1201S.setPrompt(true); | Turn on the prompt tone. |
| DF1201S.enableAMP(); DF1201S.disableAMP(); | Enable / disable amplifier chip. |
| DF1201S.start(); | Start playing. |
| DF1201S.pause(); | Pause. |
| DF1201S.next(); | Play next song. |
| DF1201S.last(); | Play previous song. |
| DF1201S.fastForward(10); DF1201S.fastReverse(10); | Fast forward / reverse 10 seconds. |
| DF1201S.setPlayTime(10); | Start the song from the 10th second. |
| DF1201S.getCurFileNumber(); | Returns file number as int. |
| DF1201S.getTotalFile(); | Returns number of files available to play as int. |
| DF1201S.getCurTime(); | Returns time length the current song has played. |
| DF1201S.getTotalTime(); | Returns total length of the currently playing song as int. |
| DF1201S.getFileName(); | Returns the name of the currently-playing file as string. |
| DF1201S.playFileNum(1); | Play file #1. File number is according to the sequence saved into memory. |
| DF1201S.playSpecFile(“//eadn-wc01-1929780.nxedge.io/test/test.mp3”); | Play file test.mp3 in folder /test. |
| DF1201S.isPlaying(); | Returns bool, 1 if playing, 0 if not. |
| DF1201S.delCurFile(); | Delete current playing file. |
| DF1201SSerial.begin(115200, SERIAL_8N1, /*rx =*/D3, /*tx =*/D2); | Set baud and UART pins. |
| DF1201S.begin(DF1201SSerial); | Returns bool whether communication with the device is successful. |
Example Demo #2 for your ESP32
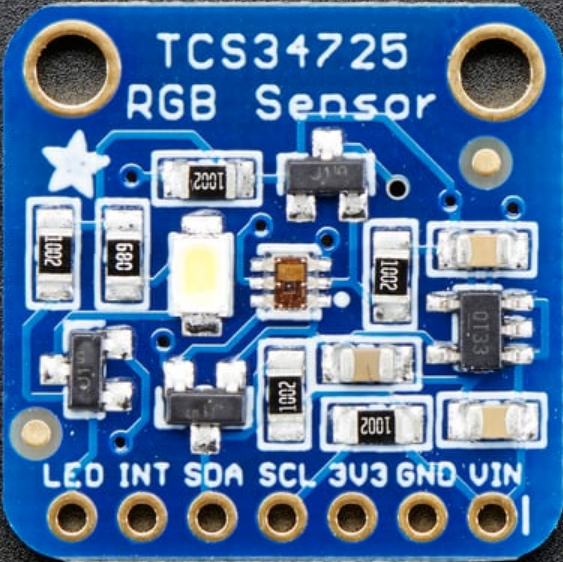
For the following demo I’ve uploaded a few sound clips, and I’m using a TCS34725 RGB color sensor. The purpose of this demo is to give an educational example of how one can use a sensor to trigger different sound files. In this case a color sensor. If you don’t plan to do the demo, skip down to the source code for further study.
If you’d like to learn more about color sensors, check out our other tutorials here.
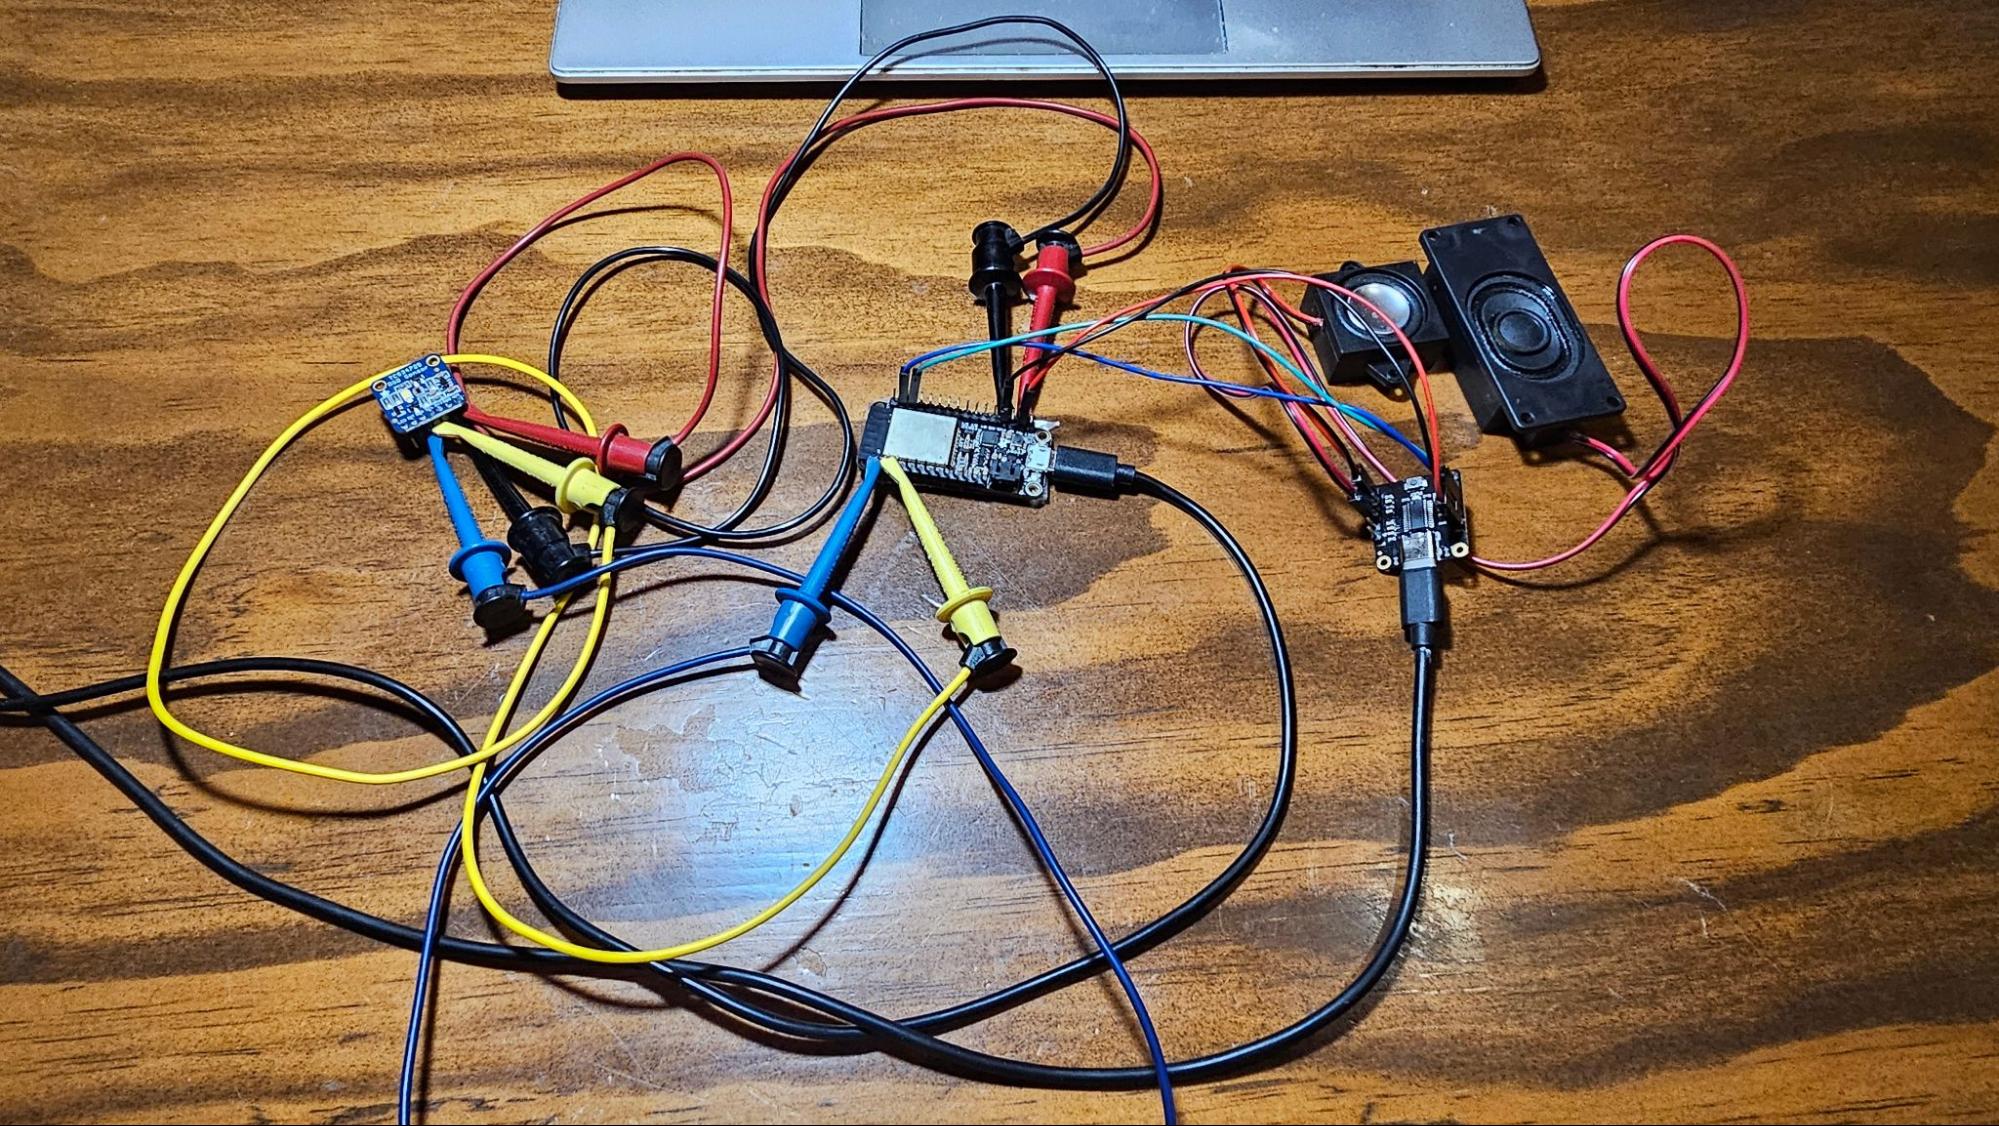
First let’s wire it up.
Connect VIN on the sensor to 3V on your ESP32.
Connect GND on the sensor to GND on your ESP32.
Connect SCL on the sensor to SCL (pin 22) on your ESP32.
Connect SDA on the sensor to SDA (pin 23) on your ESP32.
I used a bunch of jumper cables to quickly put it together. Click the image to zoom in.
Next, let’s get the demo software onto your ESP32.
Load up your Arduino IDE, and go to:
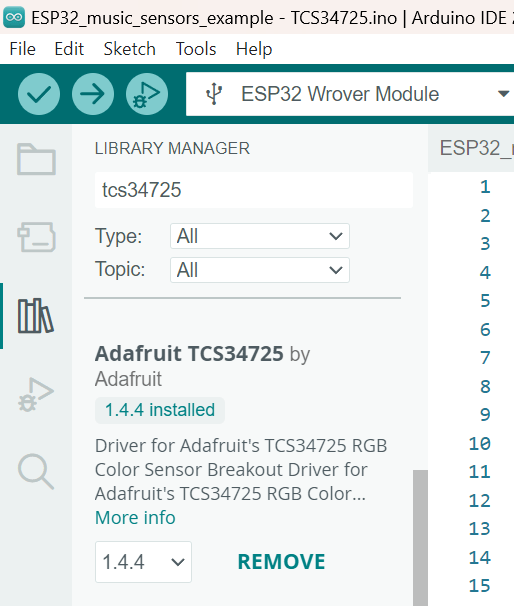
Tools => Manage Libraries
and type in TCS34725 into search.
Download and install the library as below:
Now let’s program your ESP32.
Create a new project in your Arduino IDE called ESP32_music_sensors_example.ino. Then create two header files, TCS34725.h and DF1201S.h.
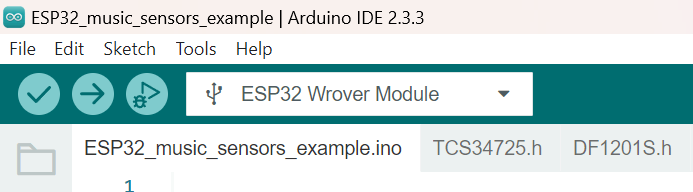
Next, copy/paste the following code into each file.
ESP32_music_sensors_example.ino
#include "TCS34725.h"//color sensor

#include "DF1201S.h"//sound player

void setup(void)

  {

  Serial.begin(115200);

  Wire.begin(23, 22); // SDA, SCL

  sound_setup();

  color_setup();

  }

void loop()

  {

  uint8_t color;

  //read the color

  color = color_loop();

  //select the appropriate sound file

  if(color==RED)

    {

    DF1201S.playFileNum(RED);

    Serial.print(" red");

    }

  else if(color==BLUE)

    {

    DF1201S.playFileNum(BLUE);

    Serial.print(" blue");

    }

  else if(color==GREEN)

    {

    DF1201S.playFileNum(GREEN);

    Serial.print(" green");

    }

  Serial.print("n");

  //delay long enough to play the entire sound file

  delay(2000);

}
TCS34725.h
#include "Adafruit_TCS34725.h"

//colors

#define RED   1

#define BLUE  2

#define GREEN 3

//calibration constants

//these are default values my sensor reads in my specific environment

//in a realistic situation, calibrations should be dynamic and not fixed

#define calibration_red 112

#define calibration_blue 75

#define calibration_green 65

Adafruit_TCS34725 tcs = Adafruit_TCS34725(TCS34725_INTEGRATIONTIME_50MS, TCS34725_GAIN_4X);

//initialize the sensor

void color_setup() {

  delay(1000);

  if (tcs.begin()) {

    Serial.println("Found sensor");

  } else {

    Serial.println("No TCS34725 found ... check your connections");

    while (1); // halt!

  }

}

//read the sensor and output color data

uint8_t color_loop() {

  float red, green, blue;

  uint8_t color;

  tcs.setInterrupt(false);  // turn on LED

  delay(60);  // takes 50ms to read

  tcs.getRGB(&red, &green, &blue);

  tcs.setInterrupt(true);  // turn off LED

  Serial.print("R:t"); Serial.print(int(red));

  Serial.print("tG:t"); Serial.print(int(green));

  Serial.print("tB:t"); Serial.print(int(blue));

//  Serial.print("t");

//  Serial.print((int)red, HEX); Serial.print((int)green, HEX); Serial.print((int)blue, HEX);

//  Serial.print("n");

  //calibrate colors to ambient

  red=red-calibration_red;

  blue=blue-calibration_blue;

  green=green-calibration_green;

  //determine which color is brightest

  if(red > green && red > blue)

    color = RED;

  if(green > red && green > blue)

    color = GREEN;

  if(blue > red && blue > green)

    color = BLUE;

  return color;

}
DF1201S.h
#include <DFRobot_DF1201S.h>

#define DF1201SSerial Serial1

#define sensorPin 32

DFRobot_DF1201S DF1201S;

void sound_setup()

  {

  //setup serial port for sensor

  DF1201SSerial.begin(115200, SERIAL_8N1, /*rx =*/16, /*tx =*/17);

  //wait for boot

  delay(500);

  while (!DF1201S.begin(DF1201SSerial))

    {

    Serial.println("Init DF player failed, please check the wire connection!");

    delay(1000);

    }

  Serial.println("DF player init complete");

  /*Set volume to 20*/

  DF1201S.setVol(/*VOL = */20);

  Serial.print("VOL:");

  /*Get volume*/

  Serial.println(DF1201S.getVol());

  /*Enter music mode*/

  DF1201S.switchFunction(DF1201S.MUSIC);

  /*Wait for the end of the prompt tone */

  delay(2000);

  // Set playback mode to NORMAL (USE THIS INSTEAD OF FOLDER)

  DF1201S.setPlayMode(DF1201S.SINGLE);

  Serial.print("PlayMode:");

  /*Get playback mode*/

  Serial.println(DF1201S.getPlayMode());

  //Enable amplifier chip

  DF1201S.enableAMP();

  //Disable amplifier chip

  //DF1201S.disableAMP();

  }
Compile and upload it to your ESP32. Power cycle your setup. Wait a few seconds for it to initialize. You should then see the following output in Serial Monitor as below:
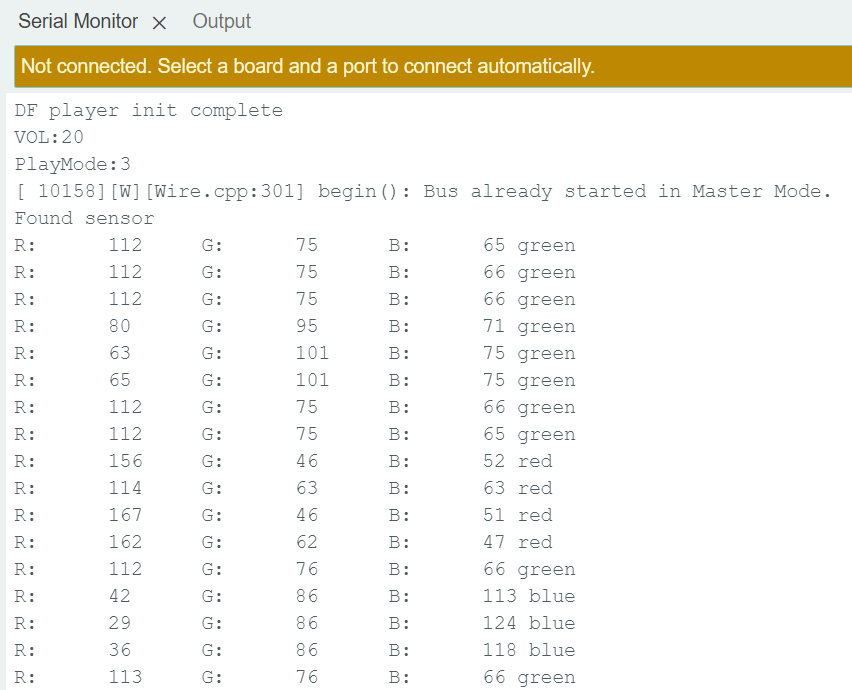
R for Red, G for Green, and B for Blue.
Check out this quickie demo below to hear it identify the color of different books.
Note: The software is simple in that it only declares the brightest color it sees. In this case, the environment is slightly green, so it’ll announce “green” when no book is present. For a real-world application, it could be written more intelligently and even identify other colors like purple or black, but I didn’t want to overcomplicate the demo.
Programming Electronics Academy members, check out the Audio Boards course to learn about more advanced noise making, and even prototype your own mp3 player!
Not a member yet? Sign up here.
Example Demo #3 for your ESP32
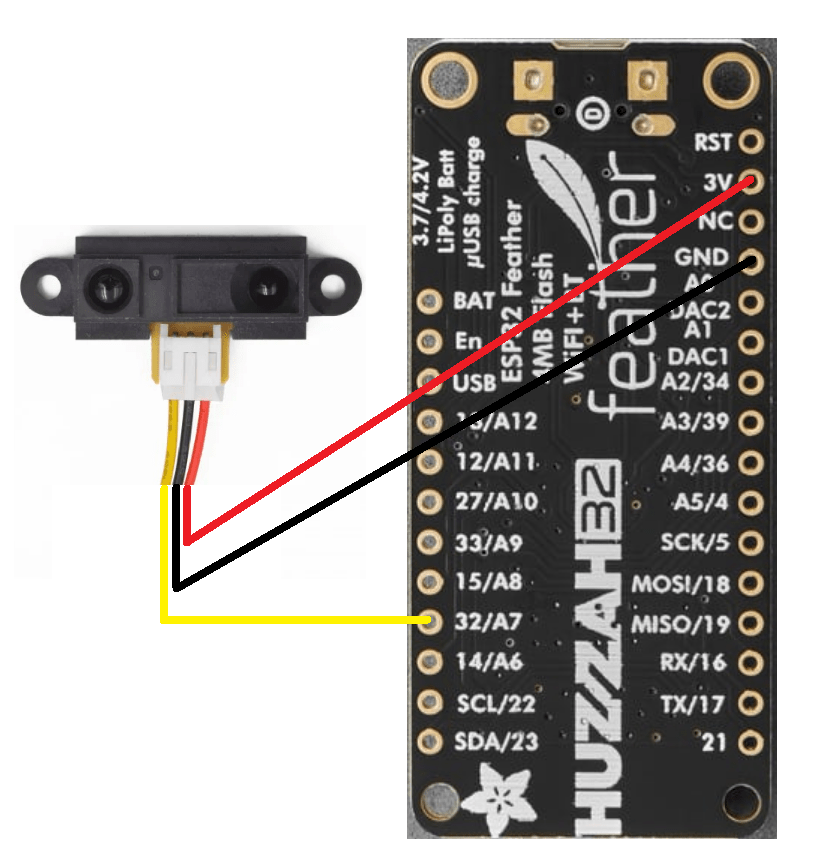
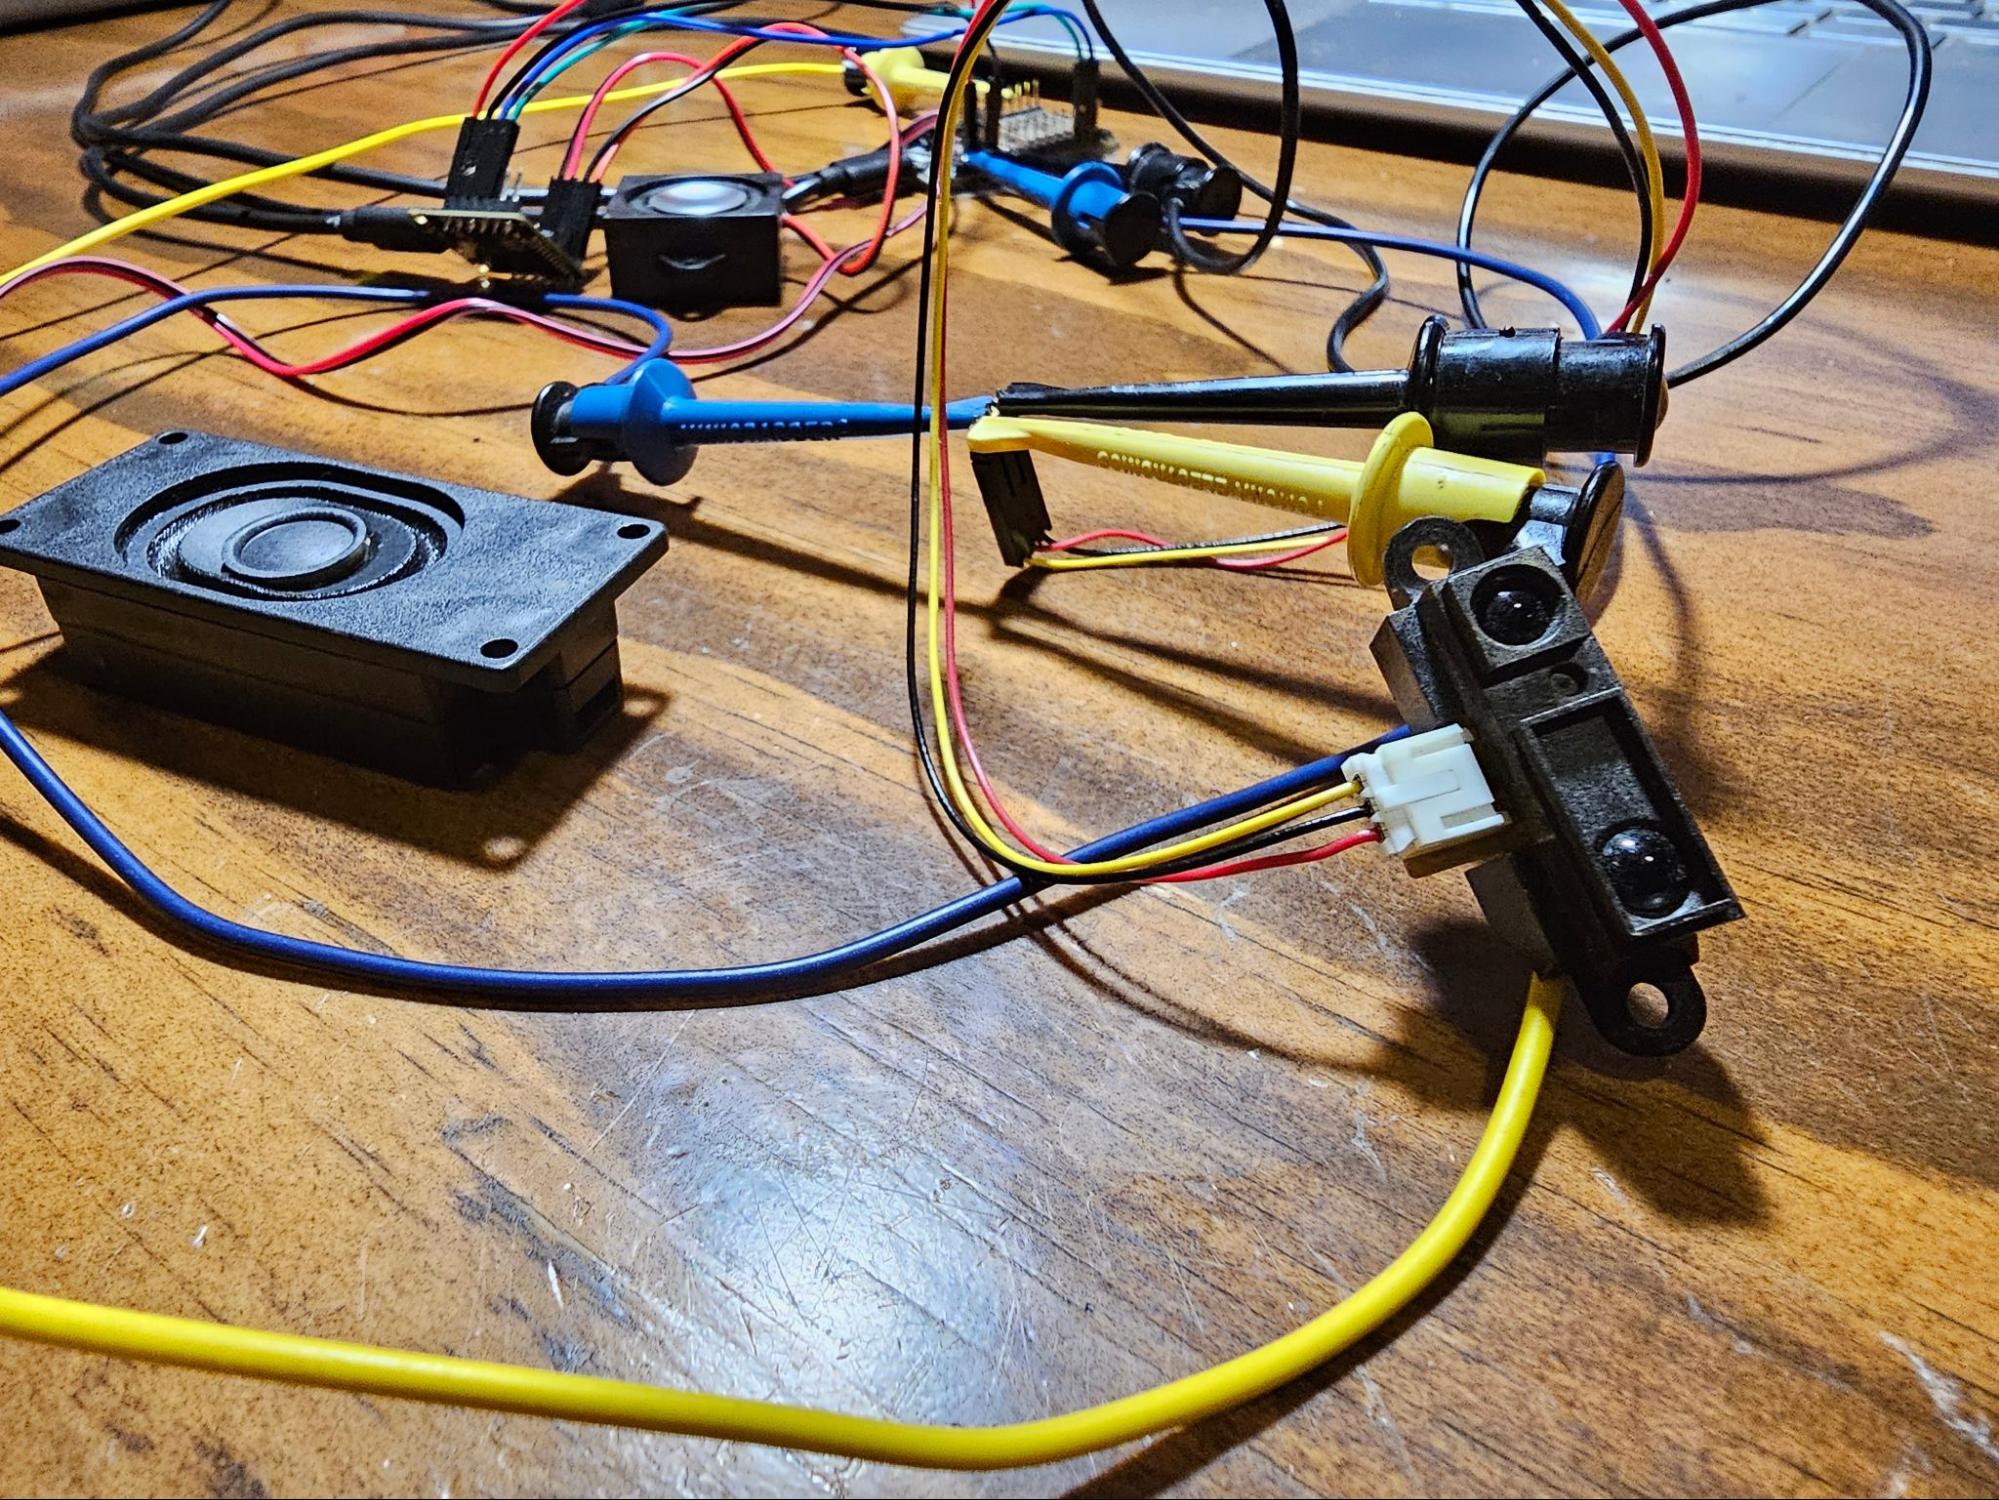
One last demo, using the SharpIR rangefinder. This sensor returns an analog voltage correlating to the distance of the object it detects in front. My software will then say a number, roughly correlating to that analog value.
For wiring, connect yellow to an ADC pin (I used 32). Black to GND, and red to 3V (although, ideally to an independent 3.3V power source). Keep your DFRobot player wired up as before.
Create a new project, and copy/paste the below code. No header files this time – keeping it simple!
sound_demo.ino
#include <DFRobot_DF1201S.h>

#define DF1201SSerial Serial1

#define sensorPin 32

DFRobot_DF1201S DF1201S;

void setup(void)

  {

  Serial.begin(115200);

  // declare the Sharp IR as analog input

  pinMode(sensorPin, INPUT);

  //flush ADC

  analogRead(sensorPin);

  DF1201SSerial.begin(115200, SERIAL_8N1, /*rx =*/16, /*tx =*/17);

  //wait for boot

  delay(500);

  while (!DF1201S.begin(DF1201SSerial))

    {

    Serial.println("Init failed, please check the wire connection!");

    delay(1000);

    }

  Serial.println("Init complete");

  /*Set volume to 20*/

  DF1201S.setVol(/*VOL = */20);

  Serial.print("VOL:");

  /*Get volume*/

  Serial.println(DF1201S.getVol());

  /*Enter music mode*/

  DF1201S.switchFunction(DF1201S.MUSIC);

  /*Wait for the end of the prompt tone */

  delay(2000);

  // Set playback mode to NORMAL (USE THIS INSTEAD OF FOLDER)

  DF1201S.setPlayMode(DF1201S.SINGLE);

  Serial.print("PlayMode:");

  /*Get playback mode*/

  Serial.println(DF1201S.getPlayMode());

  //Enable amplifier chip

  DF1201S.enableAMP();

  //Disable amplifier chip

  //DF1201S.disableAMP();

  }

void loop()

  {

  //read Sharp IR

  uint8_t sensorValue = analogRead(sensorPin);

  Serial.printf("n%u",sensorValue);

  if(sensorValue<30)

    DF1201S.playSpecFile("/10.wav");

  else if(sensorValue<60)

    DF1201S.playSpecFile("/11.wav");

  else if(sensorValue<110)

    DF1201S.playSpecFile("/12.wav");

  else if(sensorValue<170)

    DF1201S.playSpecFile("/13.wav");

  else if(sensorValue<220)

    DF1201S.playSpecFile("/14.wav");

  else

    DF1201S.playSpecFile("/16.wav");

  delay(3000);

}
Compile and upload it to your ESP32.
The gist of this demo is that it reads the distance to the nearest object and then declares that distance using a pre-recorded number.
This demo also demonstrates how to use the DF1201S.playSpecFile(“/filename.wav”) function so that the file upload order does not matter, and you can even use folders.
Note on the demo: The Sharp IR rangefinder is known for high power spikes, even after adding a capacitor between power and ground (which really helps!). My ESP32 board 3.3V out voltage regulator just couldn’t handle that and the speakers and everything else that was running, so the ADC would occasionally give bogus readings. I could have complicated the circuit by adding an additional separate power supply for voltage stabilization. But, I thought that too much for a simple demo that just teaches concepts. The numbers were fickle and not always accurate, but good enough!
Still need help?
If you want to use other sensors to control your DFRobot sound player, write in to us and maybe we’ll expand this tutorial with your suggestion. =)


