Failed uploading: no upload port provided | SOLVED
Want to build a ChatGPT terminal? Check out this project walk-through!
Did you just plug in your new Arduino board and get this error message: Failed uploading: no upload port provided? or maybe…
No device found on <blah-blah-port>
Failed uploading: uploading error: exit status 1
or
dfu-util: No DFU capable USB device available
Failed uploading: uploading error: exit status 74
Errors like these can be pretty frustrating when you’re trying to get up and running!
But don’t fret – this is a super easy error to correct – read on…
Fixing the Failed uploading error in the Arduino IDE
It is very likely the reason you got this error was because you did not specify the correct board and port in the Arduino IDE 2.
The “board” is simply referring to which development board you have connected to your computer – this could be any Arduino IDE compatible board, from an Arduino UNO R3, to a generic ESP32 development board.
The “port” is referring to which serial port your computer has assigned to the board you plugged in. If you are using the Windows operating system, generally the port names will start with COM. If you are using the Apple operating system, the port name will start with “/dev/cu.usbmodem…/”.
Programming Electronics Academy members, learn about the Arduino IDE toolchain in the Familiarization section of the Arduino Course for Absolute Beginners.
Not a member yet? Sign up here.
How to specify the correct board and port
The reason you’re getting the failed uploading error is because the Arduino IDE can’t figure out where to upload code.
To fix this you’ll need to specify the correct board and port in the Arduino IDE.
The example below shows how this is fixed in Arduino IDE 2. For Arduino IDE 1, you’ll use the Tools menu and pick board and port separately.
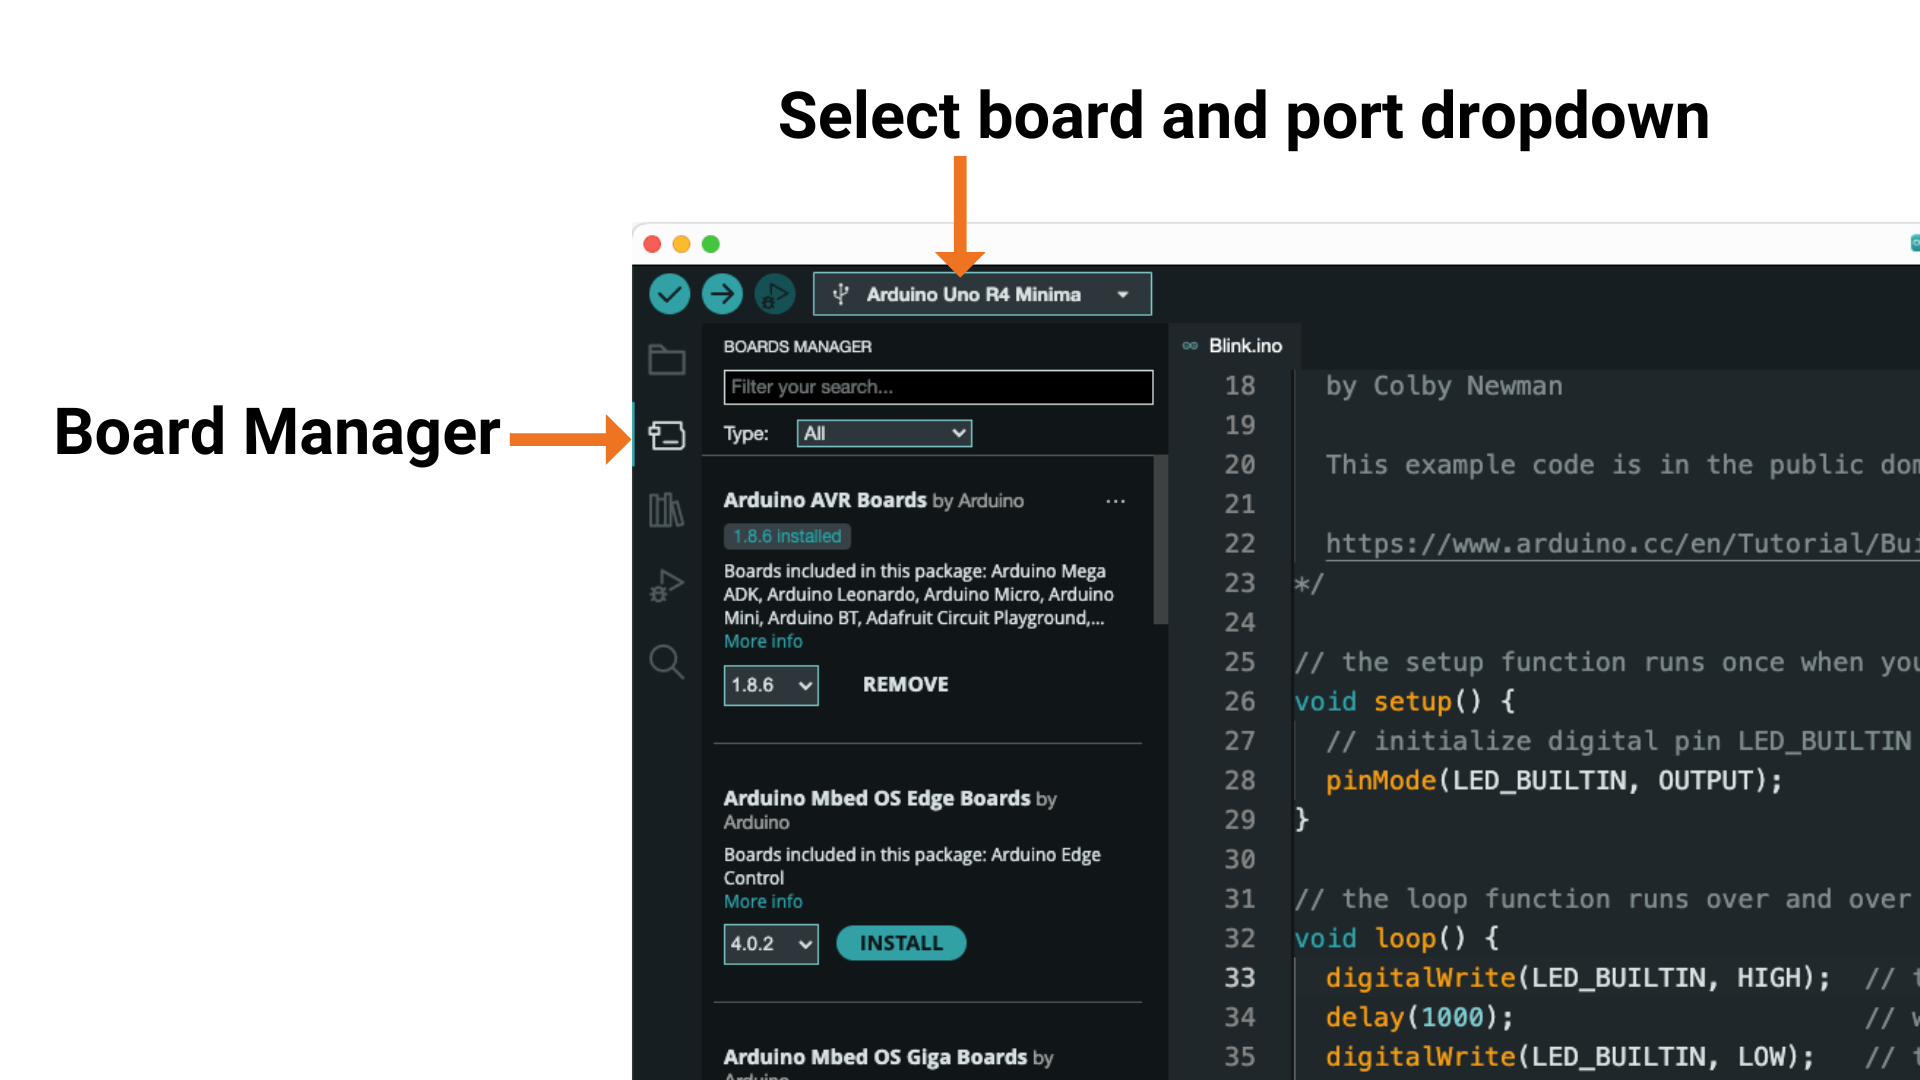
First, click the drop-down menu on the top left of the Arduino IDE 2.

Then click, “Select other board and port…”
A modal window will appear that looks like this:
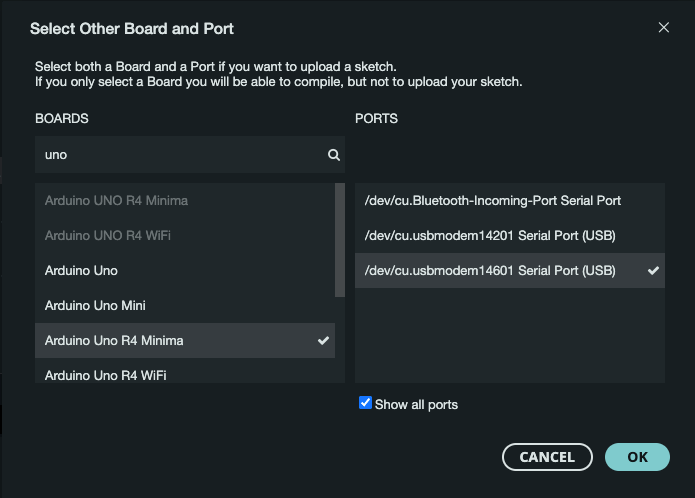
On the left side, under BOARDS, search for the name of the development board you have hooked up to your computer, then select it from the list.
On the right side, under PORTS, select the port that you believe has been assigned to your board.
If you don’t know which one it is, simply disconnect the board, and see which port name disappears, then reattach it, and select the one that showed up.
Finally, click OK.
Now in the bottom right of the Arduino IDE 2 you should see the board and port listed.

We are almost there!
Goodbye Failed uploading error!
Now simply try to upload the code again by clicking the upload button. Fingers crossed everything works!
You should see some text print out in the console window on the bottom, but no more red error message.
Maybe you won’t get the “Failed uploading: no upload port provided” message ever again 😀. But if you do, you’ll know how to fix it!
Of course, maybe you ran into some troubles along the way, hopefully the following can help…
What if I can’t find the board name in the list?
If you have an official Arduino board, finding the name is pretty simple. Usually Arduino IDE 2 will prompt you when you plug in a new board to download the board package. The “board package” is like a configuration file that tells the Arduino IDE about the target development board.
The Arduino IDE 2 has several preinstalled board packages, but you may have to add some if you’re plugging in a new board for the first time. Doing so is super easy…
How to install a board package
To install a board package click the “board” icon on the left hand side of the IDE. Then search for the name of your board.
One board package often includes specifications for a category of boards, so the name you are looking for is somewhat general.
For example, if you have a generic ESP32 development board clone straight off the ship from China, then the board package “esp32 by Espressif Systems” would likely cover configuration for your board.
Once you find the board package, just click install. Now go back to the “Select Board and Port” drop down menu and see if you can find the name of your board…
Programming Electronics Academy members, check out the Arduino Course for Absolute Beginners to jump start your Arduino programming skills.
Not a member yet? Sign up here.
I still can’t find my board name from the list
If you have installed the correct board package, and you still can’t find the name of the development board you have, chances are you simply have a super generic board.
These super generic chinese clones are abundant for all types of development boards. Trying to find the right name to pick can sometimes be difficult. You’ll see things that might look close, but don’t match.
Your best bets are to either pick something that looks closest and just give it a try (you’re not going to break anything).
Or better yet, check where you bought the board, and see if they tell you which board name to select. If you bought the board from Amazon, sometimes you can find a kind soul in the review section who will point out a board name selection that worked for them!
Failed uploading has been conquered, now what?
Congrats! You have vanquished the Failed uploading error – you just went up 2 levels and gained the skill “error tracker downer” 😜
If you want to keep busting through errors and start building your own project, check out our training program to get you programming Arduino in no time!


