millis() Arduino function: 5+ things to consider
Have you heard of the Arduino millis() function?
Did you know that it gives you access to the Arduino internal timer counter hardware which can be used for the timing of different events?
We will discuss this and more in the video tutorial below.
Topics in this lesson
- What is a hardware clock?
- Timer/Counter() modules
- How to “get” the value from millis()
- Storing the value of millis()
- Doing math with unsigned longs (variables that are perfect for storing millis values)
- What the tensile strength of a rubber band is
Check out the entire series on using millis() here:
- delay() Arduino Function: Tight Loops and Blocking Code
- millis vs. delay Part 3 | A mini-series on Timing Events with Arduino Code
- millis() vs delay(): Part 4
- Doing multiple timed things with Arduino: Unleash the millis()!
What is a hardware clock?
What is this millis() function anyway? Before we can explain this, we need some context. Specifically, let’s discuss what a “hardware clock” is and what a “timer counter” is. Hang in there!
A hardware clock is an electrical circuit that creates a signal (like a voltage pulse) at a consistent frequency.
There are a lot of different circuits that can generate voltage signals. Some are precise, some you can make yourself on a breadboard, and some are built into modulus that we can connect to our Arduino.
The integrated circuit that an Arduino uses has a built in hardware clock.
The video above states this, but in reality, most Arduino use a ceramic resonator for time keeping. The crystal oscillator is usually needed for things like serial communication in order to control the baud rate.

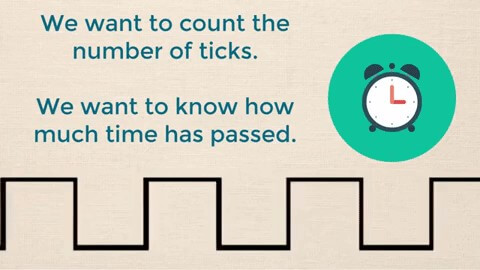
So what does “clock source” mean in this context? It means it’s generating a consistent signal, we can call this single a “tick” as in the “tick-tock” of old school analog clocks.
So if we count how many “ticks” have occurred since the sketch has been running, we know how much time has passed since it was powered up.
Thankfully the Arduino already has a module that counts these “ticks” for us, and it’s called a “timer/counter module” … go figure!
This module can do lots of things, but for our purposes, let’s just examine how it can:
- Count the “clock ticks” from the Crystal Oscillator
- Keep a running tally of the “clock ticks”
So the timer/counter starts counting “clock ticks” as soon as the Arduino powers up. You don’t have to tell it to do this, it automatically starts on its own, and it never stops as long as there’s power applied.
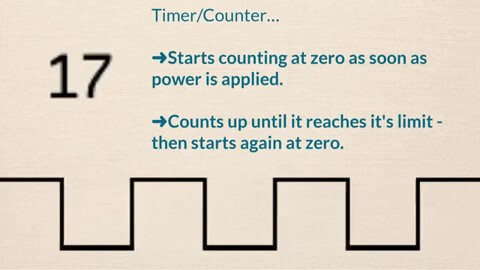
It will count until it reaches its maximum value, and then it starts again at zero.
So for how long can it count? 49 days…
That’s 343 in dog days!
You may hear the jargon for when it reaches this maximum number and starts over as “rolling over”, but a more proper way to say it is the timer “overflows”.
So how do we access this information? Enter the millis function.
The millis() Function!
To put it simply, the millis() function gives us access to the running tally that the timer/counter has been keeping track of. When you call the millis() function, it returns the current value of the timer/counter in milliseconds (hence the millis() function name).
To state it another way, the value that is returned by the function millis() is the amount of time that has passed since the Arduino board was powered up.
Let’s review some basic Arduino function jargon. Let’s talk about two specific words, “call” and “return”. When you type a function out, as in when you use it in your code, you’re said to be “calling” the function, or another way, it’s said to be a “function call”.
When we type out millis() in our sketch, we’re “calling” the millis function. When this function performs a calculation for you, and it gives you some information back, it’s said to “return” a value.
unsigned long previousTime =0;

void setup() {
}

void loop() {

previousTime = millis();

}
So in our case, when we “call” the millis function and it “returns” the current time in milliseconds that the Arduino has been running.
How do we use, or access, this time? We set the value that is returned to a variable. Now let’s create a variable called “previousTime” and let’s set it equal to the output of the millis function. So every time the Arduino goes through its loop, this variable will be updated with the most recent count of time in milliseconds.
We see this when we print this variable to serial monitor. After 1 minute of being powered up, the variable will be equal to 60,000 (60 secs x 1000 ms). If you waited 7 days, the value “returned” would be 604,800,000 (7 days x 24 hours x 60 min x 60 secs x 1000 ms).
Another way to get the value of millis() is to call the function inside of a condition. For example, let’s say we have an “if” statement. Now an “if” statement has a condition and if the condition is true, then we execute the code in the “if” statement, but if the condition is false, then we skip that code.
We can directly use the millis() function inside of a condition. When that condition gets evaluated, the millis() function checks in with the timer/counter and then it returns the current count in milliseconds and it dynamically updates every time this condition is checked.
To keep your mind straight, try to think about the millis function as simply an ever increasing number, instead of “function”.
This is how we call on the millis function. In another lesson we will explore why you would call the millis function, and show how it can be hugely important. This is especially true when you start using the Arduino delay function, which can causes issues very quickly.
Data Types
You may have noticed that the value the millis function returns can end up being VERY large. The largest value it can return is over 4 billion (4,294,967,295 to be exact).
So if we’re going to store that value in a variable, we have to ensure the variable type we select is large enough to hold that enormous number. Let’s do a quick review on what a variable is, and the different types of variables available to us.
Think of a variable as a locker at school. But in our case, instead of storing books and smashed sandwiches, we use them to store data. There are different size lockers at school, and if you had a large item, like a hockey stick, you would need a large locker.
The same thing is true for our data. If we have some BIG data, and the variable (i.e. the locker) is too small, some funky things will happen… Kind of like trying to put a hockey stick in a half-size locker!

The “data type” of a variable is what specifies the kind of data, and the size of the data, the variable will be storing. So with an Arduino Uno you have a bunch of data type options.

We have bytes, which hold data from 0 to 255. Way too small! We have integers, they hold numbers from -32,768 to positive 32,767 but that’s still too small. Millis could fill that up in a matter of seconds, as we saw.
We could use a float, which can hold a lot of data for us, but these a generally used for numbers with decimals. A long can hold 32 bits of data, from -2 billion and some change to positive 2 billion and some change. Now we’re talking!
But we can do even better. Since millis will never return a negative value, we can use an unsigned long. What this variable allows us to do is shift the negative value storage capacity of a long to the positive side, effectively doubling the available data
This is perfect for the millis function. So much so that if we look at the Arduino reference literature, we see the unsigned long is exactly what the millis function is designed to return.

To summarize, when saving values form the millis function, save them into variables of the datatype unsigned long.
2 things to avoid…
If you’re going to be doing math with an unsigned long, then ensure these two things:
First, any other variables that are going to be used to change that variable should also be an unsigned long.
Let’s say you’ve got a variable called previousTime and you’re going to subtract a value from it, and that value is in another variable, say it’s like currentTime. MAKE SURE that other variable, currentTime, is also a unsigned long.
if(currentTime - previousTime > 10000UL ){

  //Do this thing...
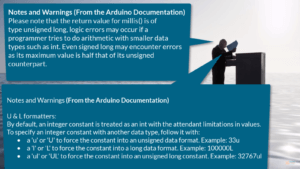
The second thing is if you’re going to be using any raw numbers to do a calculation on an unsigned long variable, make sure that at least one of the numbers in that calculation has a UL formatter at the end of it.
So for example, if you’re dividing previousTime, which is an unsigned long variable, by either 100 or 1000, then make sure that those numbers in the “denominator” are written as 100UL or 1000UL.
Raw numbers like these are called integer constants and if you don’t put that UL formatter on the end, then the calculation can create some really unexpected results.
We won’t get into the details about the strange results that can happen and necessarily why it happens, but basically it has to do with when those numbers roll over after they get to their maximum value.
The UL formatter at the end of that raw number tells the Arduino that it should be treated as an unsigned long.
Review
We covered what a hardware clock is an electrical circuit that generates a signal at a consistent frequency.
We also talked about a timer/counter and we said that the Arduino has built in timer/counter. The timer/counter counts the number of ticks that the clock has made and it keeps a running tally of those ticks.
We talked about how the milli() function can get that running tally for us, and how we store that value in a variable. This segued into “calling” the milli() function and utilizing the “return” inside of a condition.
Finally, we talked about using an unsigned long data type to store the value returned from millis(), and the precautions to use when doing math with an unsigned long variable data type.
That’s it! We hope you’ve enjoyed this tutorial. Check out our “delay() Arduino Function: Tight Loops and Blocking Code” tutorial which explores the millis function even more.
Want to see a great example where one of our students uses the millis function in their own project? Check out the “Homebrewing with Arduino” post which is fantastic.


[…] is part 2 of our millis() function mini-series. Part 1 helps us understand what the millis() function does, part 2 discusses tight loops and blocking […]
[…] is part 4 of our millis() function mini-series. Part 1 helps us understand what the millis() function does, and part 2 discusses tight loops and […]
[…] is part 3 of our millis() function mini-series. Part 1 helps us understand what the millis() function does, and part 2 discusses tight loops and blocking […]
[…] watched the previous lessons, we’ve described the basics of millis function in general (part 1), we’ve talked about tight loops and blocking code (part 2), and we’ve discussed some […]
[…] you go back and check them out either now or after this lesson. Here’s a quick rundown: In part 1 we described the basics of the millis function in general, in part 2 we talked about tight loops […]
[…] Take me to this lesson. […]
In the example above, surely its the wrong way ’round? Since previous time will be smaller than current time it’ll produce a negative result if you use the example above if(previousTime – currentTime > 10000UL ) so shouldn’t it be if(currentTime-previousTime > 10000UL ) ?
Thanks for pointing that Clive – you are absolutely correct! Those variables got switched – but are now corrected in the post.
I want a n led1 turn on for one minute and in the process I want to turn on led2 for next 30secs.keeping led1 still on.can anyone help ……….please….
I really can’t thank you enough for the free, awesome tutorials. You are the best tutor I’ve seen. Thank you so much for the massive effort <3
Sorry, everyone is talking about millis() with the same example.For example, using only millis() will light the led 10 times with 200 ms intervals and the loop will end…???
Great question! the loop function will never end – so if you want something to only happen 10 times, you need to have some condition that will block that code from happening after the 10 times. So like…
int currentCount = 0
…..
if(currentCount < 10 ) { do something... currentCount = currentCount + 1 }