Hyperduino for teachers, integrating Arduino into the classroom
Are you a school teacher looking for new STEM activities to add to your curriculum? Are you considering integrating Arduino into your classroom? Keep watching to learn more about how you can use HyperDuino to introduce Arduino to your students!
HyperDuino
HyperDuino is an Arduino shield system that helps introduce second grade through high school students into the fun world of programming and electronics, but it does it in interesting ways, right next to their normal curriculum.
What it does is simplify some of the more difficult features of working with Arduino while still allowing your students the excitement of making something interactive.
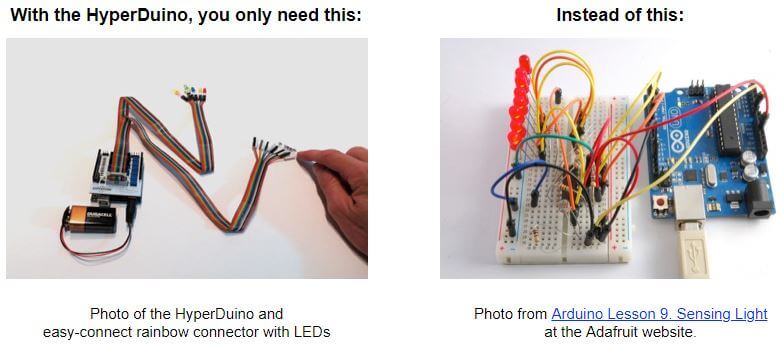
The HyperDuino system negates the need for breadboards to make connections. It has special connectors for all of the different components. These ribbon cable connections make it really easy to connect lots of different things.
You also don’t need to program it in the Arduino IDE with Arduino code. Instead, you can use premade code examples that get loaded onto the Arduino behind the scenes, or if you want, you can use graphical coding tools like mBlock and iForge.
The Creator
Before we jump into the details of using the HyperDuino system, let’s quickly talk about the designer of this board. It’s a guy named Roger Wagner. He’s a former physics, chemistry, biology, and math teacher.
He’s got some patents under his belt, which is pretty cool. He was also named by Technology and Learning Magazine “… one of the five most important educational technology gurus of the past two decades” along with people like Bill Gates, Steve Wozniak, and Steve Jobs. Those are some pretty cool credentials!

The reason we bring this up isn’t to do a bunch of name dropping. We just want to make the point that a lot of thought has gone into HyperDuino as a tool, not only to help students learn how to program and get interested in electronics, but also as a tool for teachers to facilitate learning.
One recurring theme you’ll see on the HyperDuino website is the “low walls and high ceilings” idea. That is, making the barrier to entry for electronics and programming as low as possible, but also giving the ability for students to do lots of interesting things with the same platform.
The HyperDuino Trifecta
Okay, so what exactly is HyperDuino? Well, there’s three sides to HyperDuino. There’s the hardware side, which is essentially an Arduino shield.
Second, there’s a bunch of pre-made code examples for the HyperDuino. Finally, there’s a Chrome web application that can be used to interact with different things, as we’ll see.
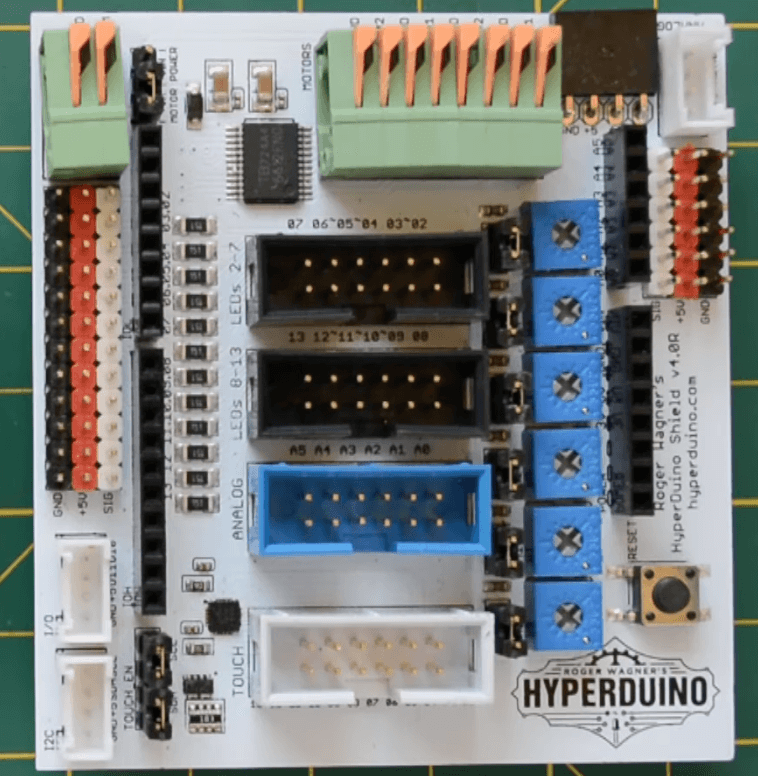
Let’s first talk about the HyperDuino Arduino shield. There’s two versions of the shield: the HyperDuino and the HyperDuino+R (where the R stands for robotics).
The major feature of the regular HyperDuino shield are four large connection ports that go right down the middle of the board. These connect to ribbon cables that come with the HyperDuino kit.
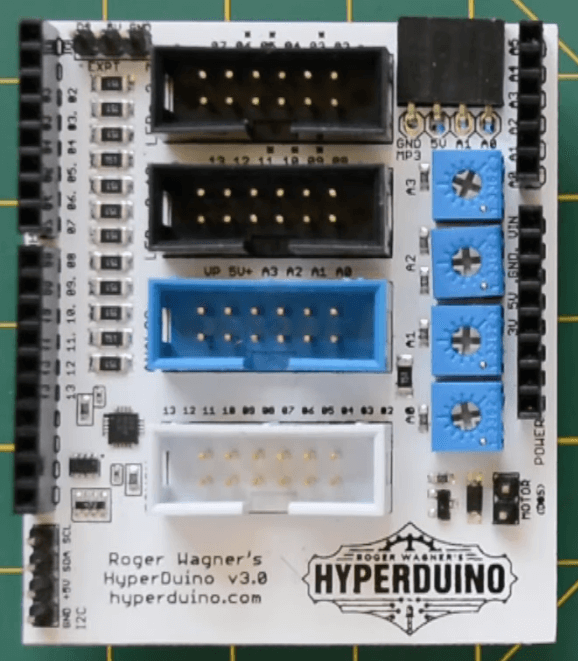
The two sets of the ribbon cables have LEDs pre-attached to the ends. Another ribbon cable is included which connects to touch sensors.
There’s a final ribbon cable that pairs two wires together. They’re meant for connecting analog sensors. For example, a light-dependent resistor, which is also included in the HyperDuino starter kit.
There’s also all the standard Arduino headers around the board, so you can connect another shield on top of the HyperDuino if you wanted to.
There’s four trimmer potentiometers connected to the analog pins, and these can be adjusted with a small screwdriver. There’s also a place to connect a DC motor, and they’ve got this place with 3 pins that’s called “For Experimenting” where they’ve got 5 volts, ground, and a connection to digital pin 9, which makes it ideal for playing around with servos.
There’s also a set of pin headers for connecting a MP3 player module, which comes in a separate audio narration kit.
The HyperDuino+R has a similar layout.
It’s a bigger board, and that’s because it’s got additional connection points for connecting things like stepper motors and DC motors, an additional power port for input for those motors, more trimmer pots, and then, for each pin on the Arduino board, it breaks out the pin, 5 volts, and ground, all right next to each other.
It also has 2 connectors on the side that are designed to accept the popular Grove system of modules.
You can buy additional components from the HyperDuino store including a robotics kit, which comes with wheel motors, servos, ultrasonic distance sensors, an IR remote, Bluetooth receiver modules, infrared line following modules, and stuff like that, and all of those modules are made to easily connect to the HyperDuino board or the HyperDuino+R board.
The App
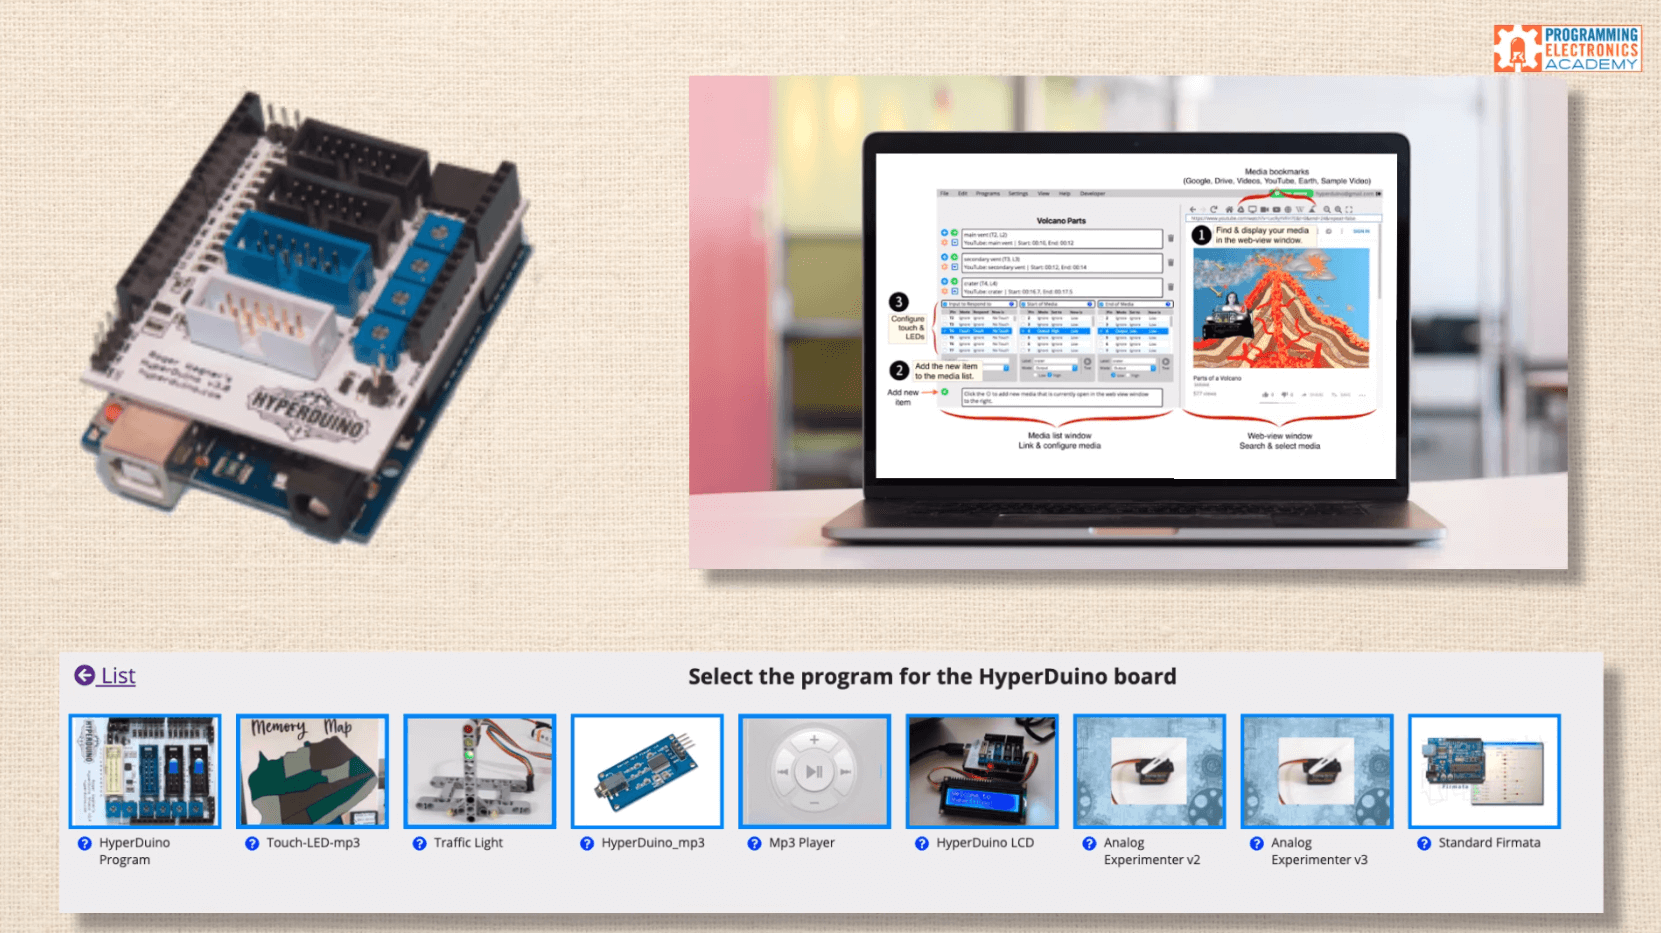
HyperDuino is more than just the shield and the hardware. They also have a really interesting Google Chrome web app.
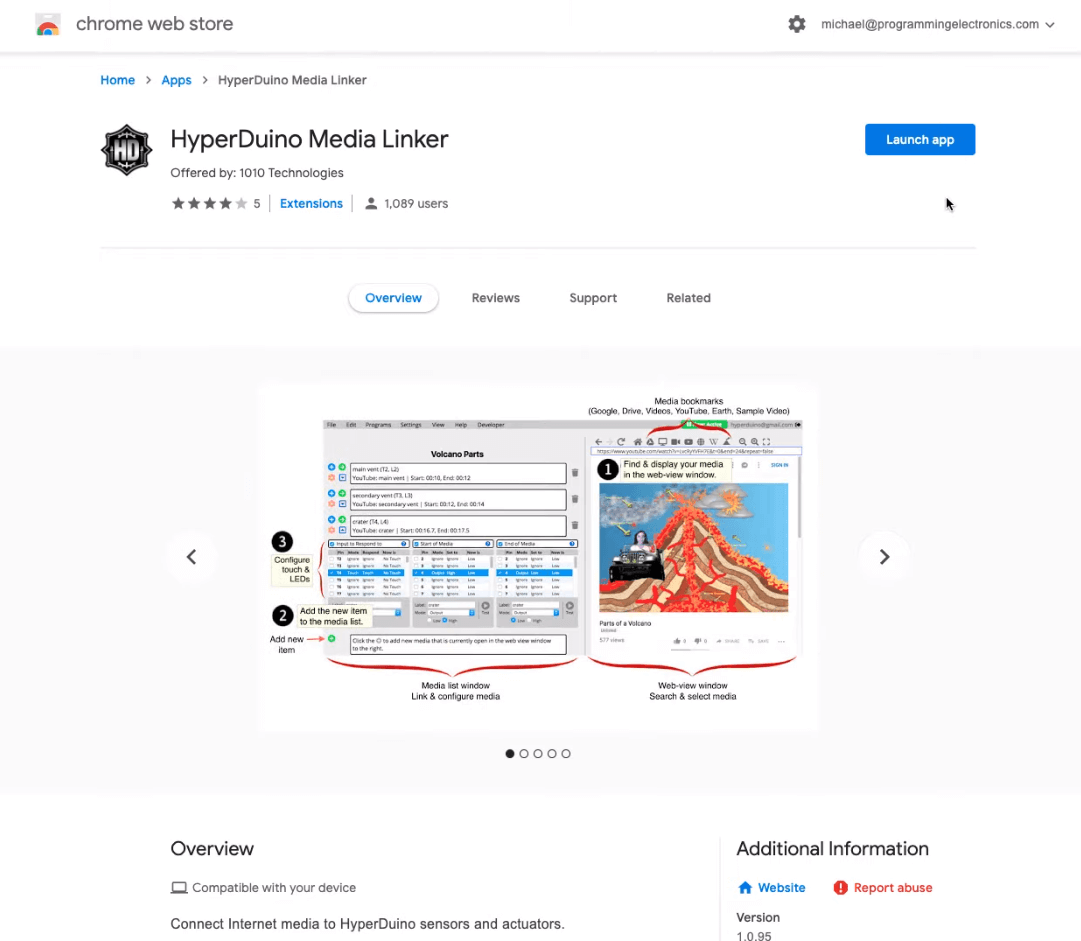
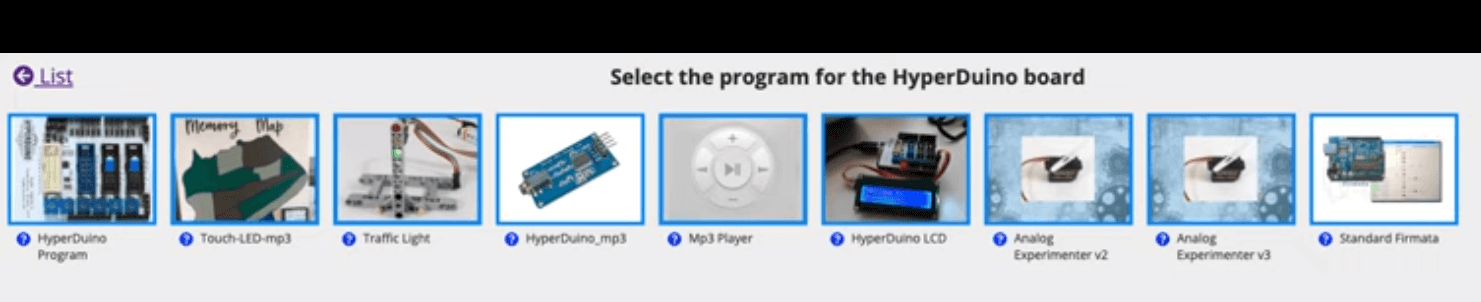
The app allows you to do a couple things: First, it enables you to load code directly onto your Arduino board without using the Arduino IDE.
They’ve got some pre-completed programs for you already, so you don’t even have to look at the code, you can just click on the icon and it will load the code for you.
Each program that you load has a little link where you can go and learn about different activities you can do with the code that gets loaded.
Poster Board Project
The HyperDuino comes with some examples that you can use right out of the box, and the most prevalent one on the HyperDuino website is being able to turn a poster board project into an interactive project by adding touch sensors, LEDs, and even multimedia to the project.
The starter kit comes with everything you need to build a project like this, with touch buttons that light up various LEDs. It’s made in a very accessible way that young people could do this.
If you want to take it to the next level, you’re able to use the HyperDuino Chrome app to link multimedia to different button presses.
For example, maybe you want a portion of a video to play when you press a certain button. Well, you can link it with the app, and it’s really straightforward.

You can see where having a tool like this in the classroom could make it much easier for young kids to comprehend instead of having a bunch of little components sitting around and trying to explain to them how the rows on the breadboard line up, etc.
This is just the beginning project, however. HyperDuino has built modules that work with various programs so you can play around with the robotics kit, make motors move, make line-following robots, and all types of neat stuff like that.
As the students get more advanced, they can also jump right into the Arduino IDE and use the HyperDuino shield just like any other Arduino shield.
In summary
The HyperDuino essentially breaks out all the pins for you and makes it pretty simple to use the different components – there’s really no limit! So to recap, the HyperDuino is the shield. There’s also the code examples that they provide for you and different ideas that go along with those code examples that you could use in the classroom.
Finally, there’s the HyperDuino Chrome app that you can use to load code onto the Arduino, to load those code examples, and also, to link all different types of media to different projects you might have.
If you’re a school teacher and you’re looking for a way to introduce some STEM projects into your classroom, we hope this video has been instructive and has shown you some of the stuff the HyperDuino can do so you can evaluate it and get an idea if it’s going to be a good fit for your classroom.


Is this for teachers only? I would like one of those kits.
Hi Davie, anybody can get them and use them, not just for teachers.